ACM200 USER MANUAL
18 www.blustream.co.uk / www.blustream.com.au
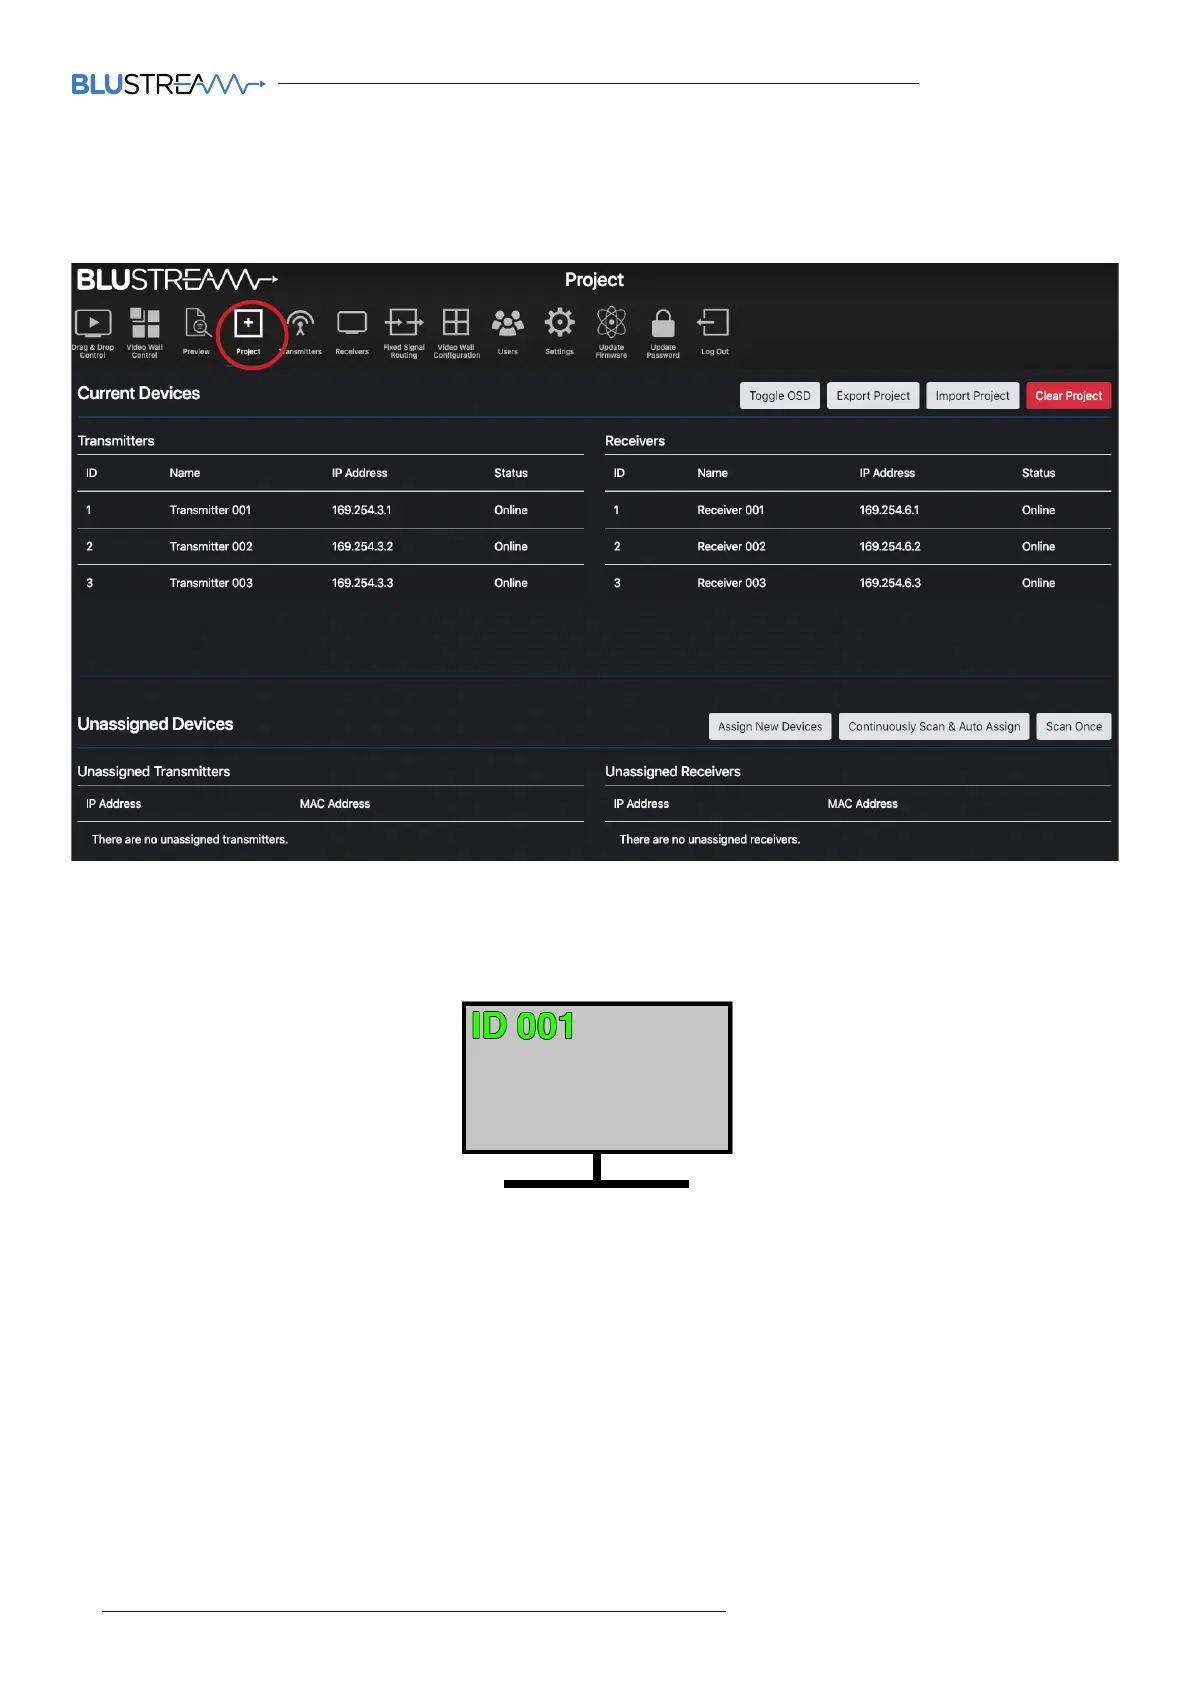
Web-GUI - Project Summary
Outlines the units that are currently set-up in the Multicast system as an overview, or for scanning the network for
new devices to assign to the project:
Options on this page:
1. Toggle OSD: turn On / O the OSD (On Screen Display). Toggling the OSD On shows the ID number (i.e. ID
001) of the Multicast Receiver on each display as an overlay to the media being distributed. Toggling OSD O
removes the OSD. See page 24 for more information on the use of OSD.
2. Export Project: create a save file (.json) for the configuration of the system.
3. Import Project: import an already configured project into the current system. This is particularly helpful when
setting up a secondary system or expansion to a current system o-site where the two systems can be merged
into one.
4. Clear Project: resets the ACM200 removing all Transmitters, Receivers and Video Wall Configurations from the
project, reverting the ACM back to the initial wizard configuration. Please note: when 'Clear Project' is applied
only the ACM200 network settings will remain.
5. Continuously Scan & Auto Assign: continuously scan the network and auto assign new Multicast devices to
the next available ID and IP address as connected. If only connecting one new Multicast device, use the 'Scan
Once' option. The ACM200 will continue to scan the network for new Multicast devices until found, or select this
button again to stop the scan.
6. Scan Once: scan the network once for any new Multicast device connected. Once discovered you will be
presented with the option to: 1. manually assign a new device, or: 2. auto assign a new unit to the next available
ID and IP address as connected.