ACM200 USER MANUAL
09contact support@blustream.co.uk / support@blustream.com.au
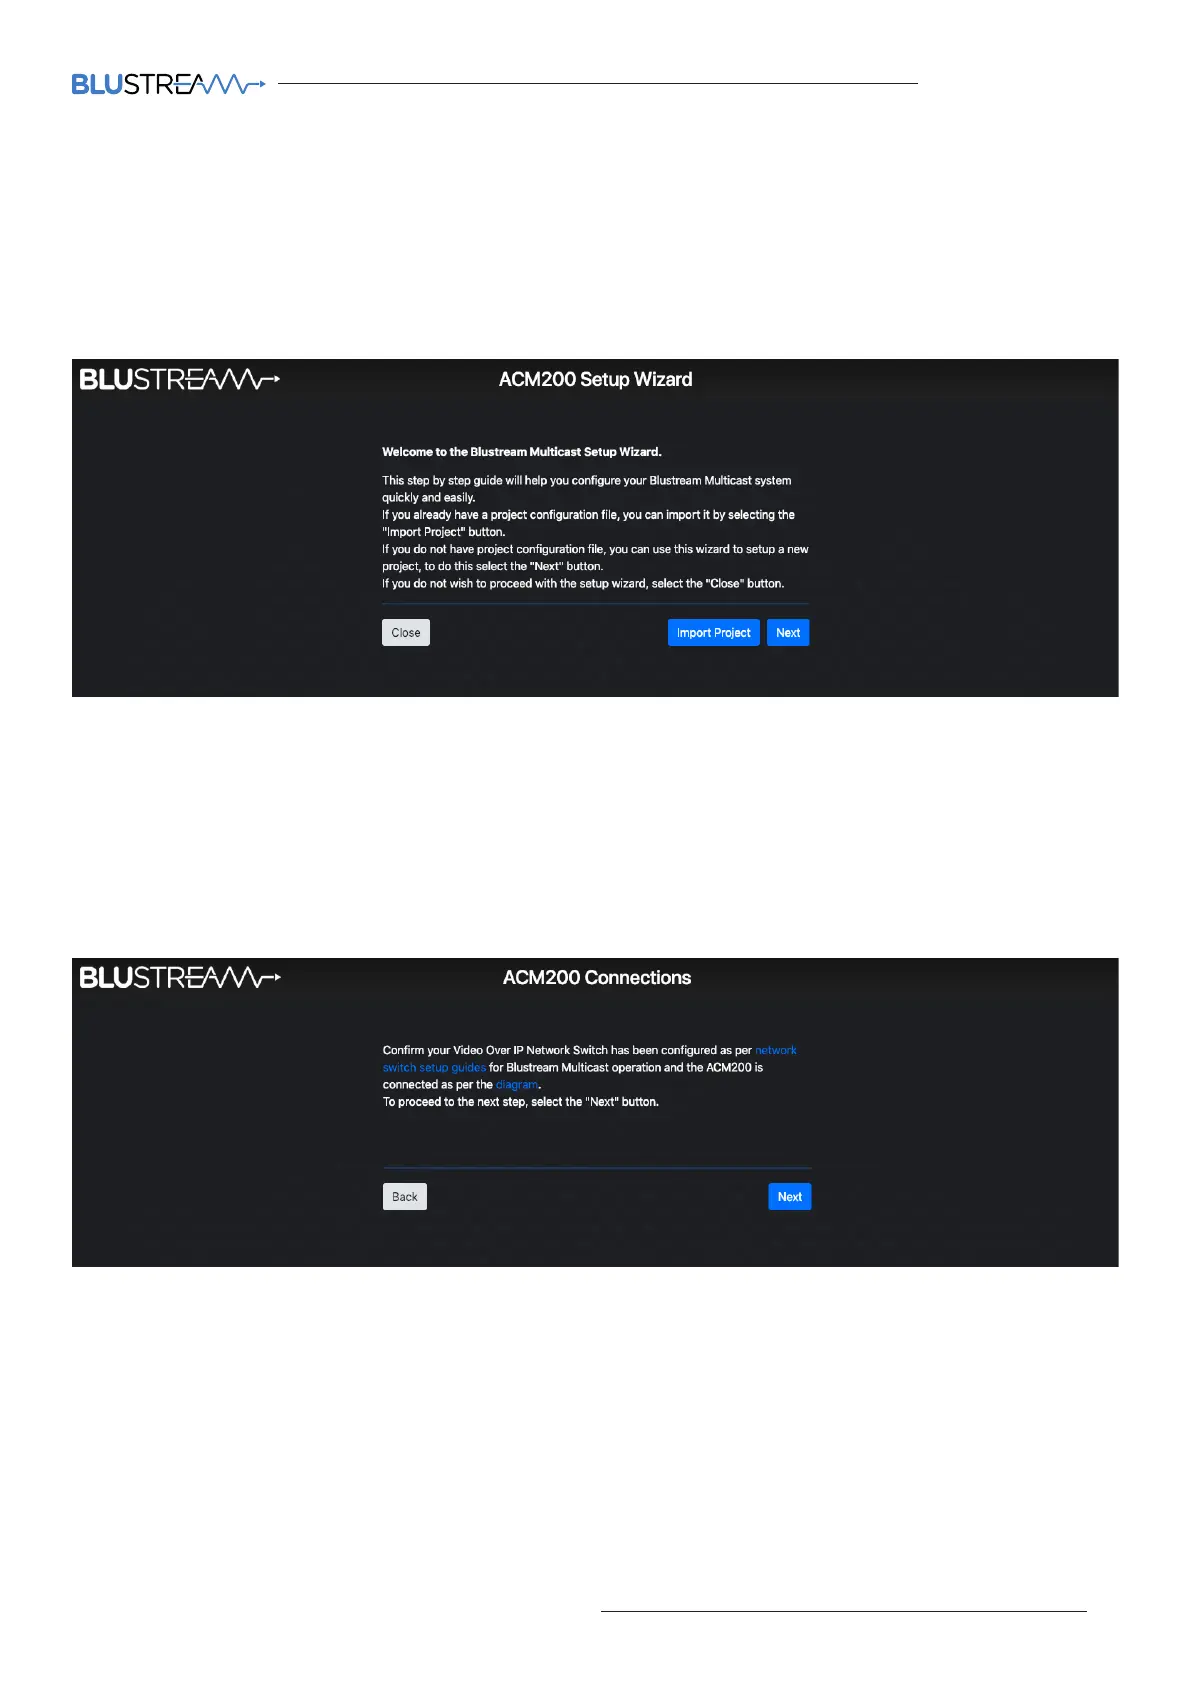
On first log in of the ACM200, a Set-up Wizard for configuring all components of the Multicast system will be
presented. This has been designed to speed up new system configuration as all default / new Multicast Transmitters
& Receivers can be connected to the network switch at the same time, whilst not resulting in an IP conflict during
the system configuration. This results in a system in which all components are automatically and sequentially
assigned a name and IP address ready for basic system use.
Web-GUI - New Project Set-up Wizard
The ACM200 Set-up Wizard can be cancelled by clicking 'Close'. Please be aware that the system will not be
configured at this point, but can be continued by visiting the 'Project' menu (see page 18). If a project file is already
available (i.e. replacing an ACM200 on an existing site), this can be imported by using the .json file by clicking
'Import Project'.
Click 'Next' to continue set-up:
If at this point the Network Switch is not configured for use with the Blustream Multicast system, click on the
hyperlink 'network switch setup guides' to navigate to a centralised webpage containing common Network Switch
Guides.
An example schematic diagram for the connections of the ACM200 can be accessed by clicking the hyperlink
marked 'diagram'. This will ensure the ACM200 is connected correctly to the wider Multicast system before the
Set-up Wizard begins. Once the connections of the ACM200 are confirmed click 'Next'. The connections diagram is
included on page 07 of this guide.