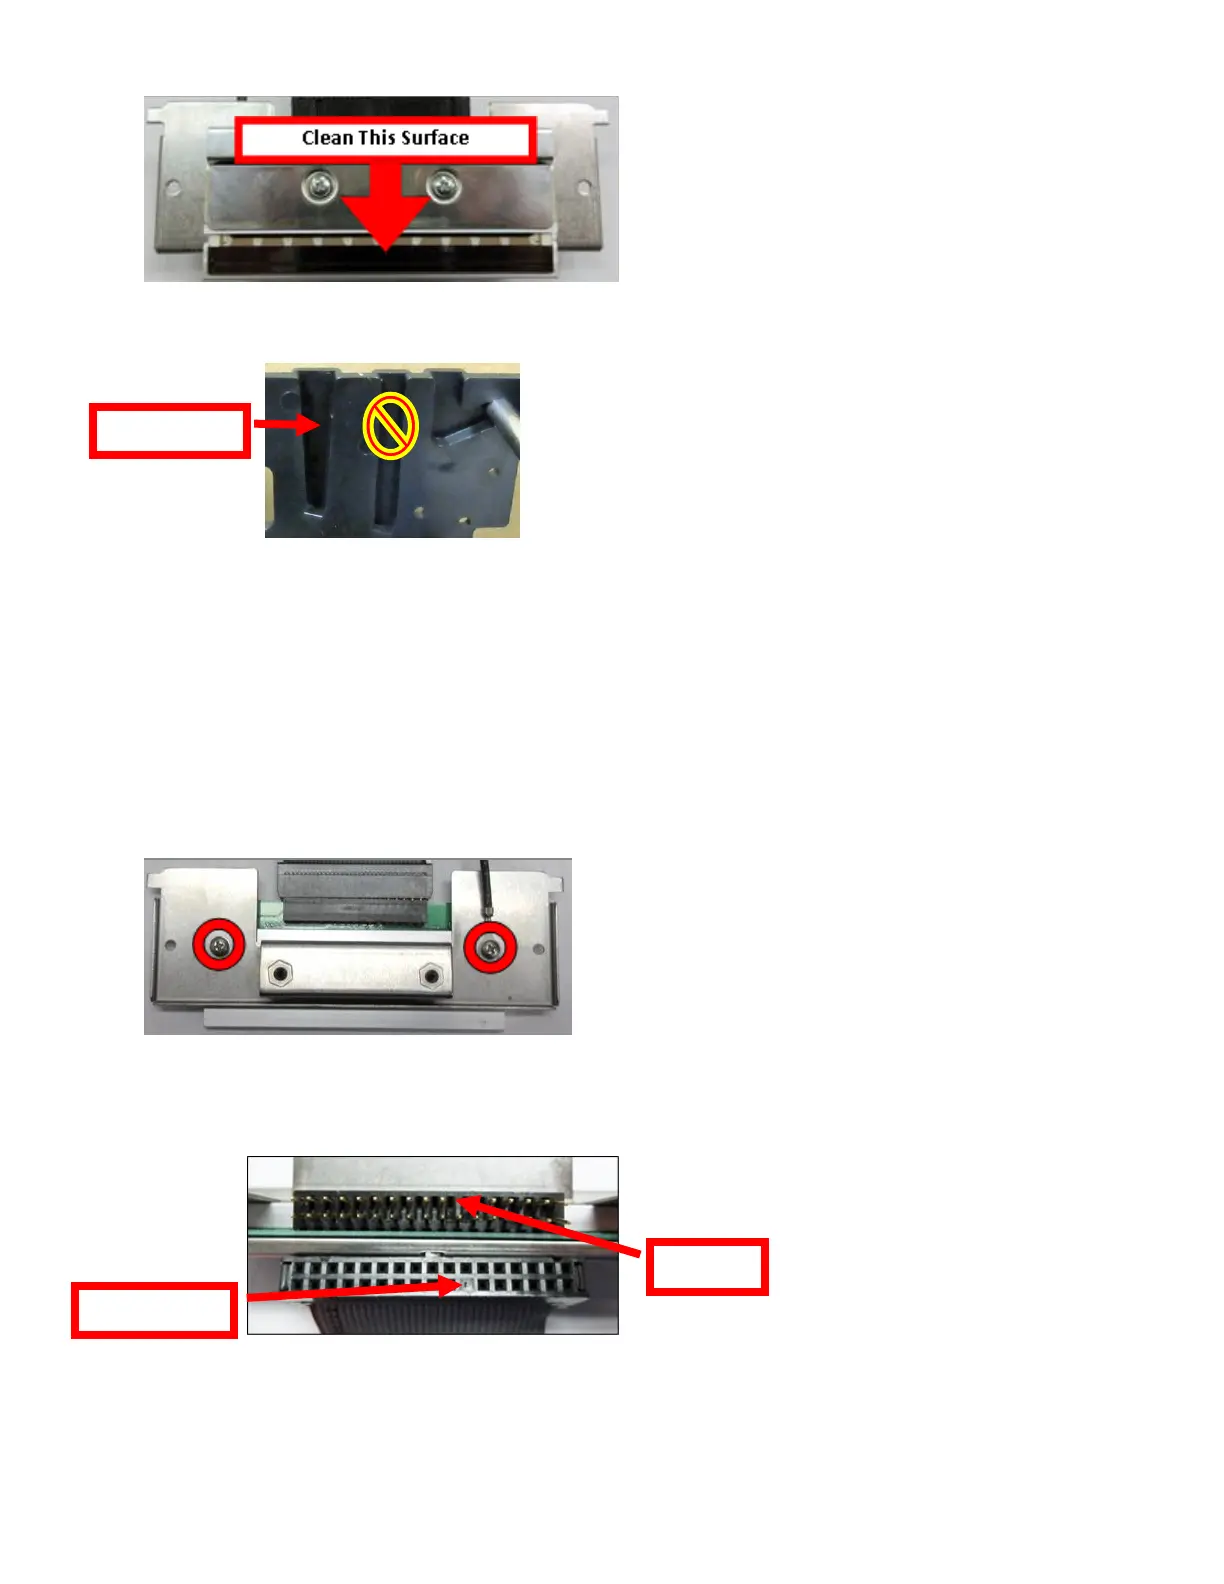
6. Clean the thermal print head surface (the side that makes contact with the paper) with isopropyl alcohol
& paper towel.
7. Install the head mounting plate by reversing the above procedures. Make sure the print head mounting
plate tabs are in the back slot of the print cage slots.
8. Restore pressure to the head by pushing down on the cam lock assembly. The printer is ready for
operation.
TO REPLACE PRINT HEAD:
Once the print head mounting plate/thermal head is removed from the printer the printer head may be replaced
in the following manner if needed.
1. Loosen the two Philips head screws until the thermal print head disengages from thehead plate. Take
care to not lose the lock washer and flat washers.
2. Gently unplug the cable from the old print head and plug it into the new print head. The cables are
keyed (see examples below). The keyed position must be lined up while plugging the cable into the
print head. You should not have to use excessive force to do this.
3. Install the print head back onto the print head mounting plate.
4. Install the head mounting plate/ thermal head back into the printer.