5.0 Installation and Flight Strip Loading
The Lemur-FDIO printer is designed to be mounted either on a desktop or shelf. Prior to site
preparation, installation and loading of flight strips, the printer should be powered up and run in the
following self-test mode:
• Place the printer on a counter top.
• Attach the AC cord and interface cable into the proper connectors.
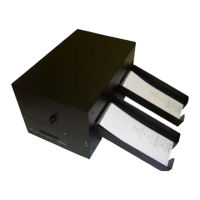
• Install output hopper to catch the flight strips.
• Turn power on via the switch located on the rear of the unit (see Fig. 4). The LCD will display
PAPER OUT and the red PAPER OUT LED will be illuminated.
The Lemur- FDIO has been designed to accept the following FAA flight strip types:
1. Domestic Strip ...............1.0 x 8.0 inches...................NSN 7530-01-453-5094
2. Domestic 1/2 Strip...............1.0 x 8.0 inches...................NSN 7530- 01-468-4668
3. Oceanic Strip............1.317 x 8.0 inches...............NSN 7530-01-435-187
Please note that the Lemur- FDIO has been factory configured for the Domestic strip (1) shown
above. Please consult section 6.0 for instructions on re-configuring the unit to a different flight strip
format via STRIP SELECTION menu option.
Loading instructions:
Load flight strips into the input hopper and locate the hopper at a distance behind the printer to allow
for the smooth feed of strips to the entrance guide on the Lemur-FDIO. Ensure that the stack of strips
is loaded into the hopper so that the arrow (on the bottom of the strip), which indicates feed direction,
is loaded into the printer accordingly.
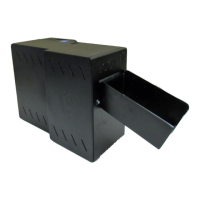
Cover Removal / Installation:
The cover may be removed by turning the knob on top to the unlocked position and then lift up on the
cover.