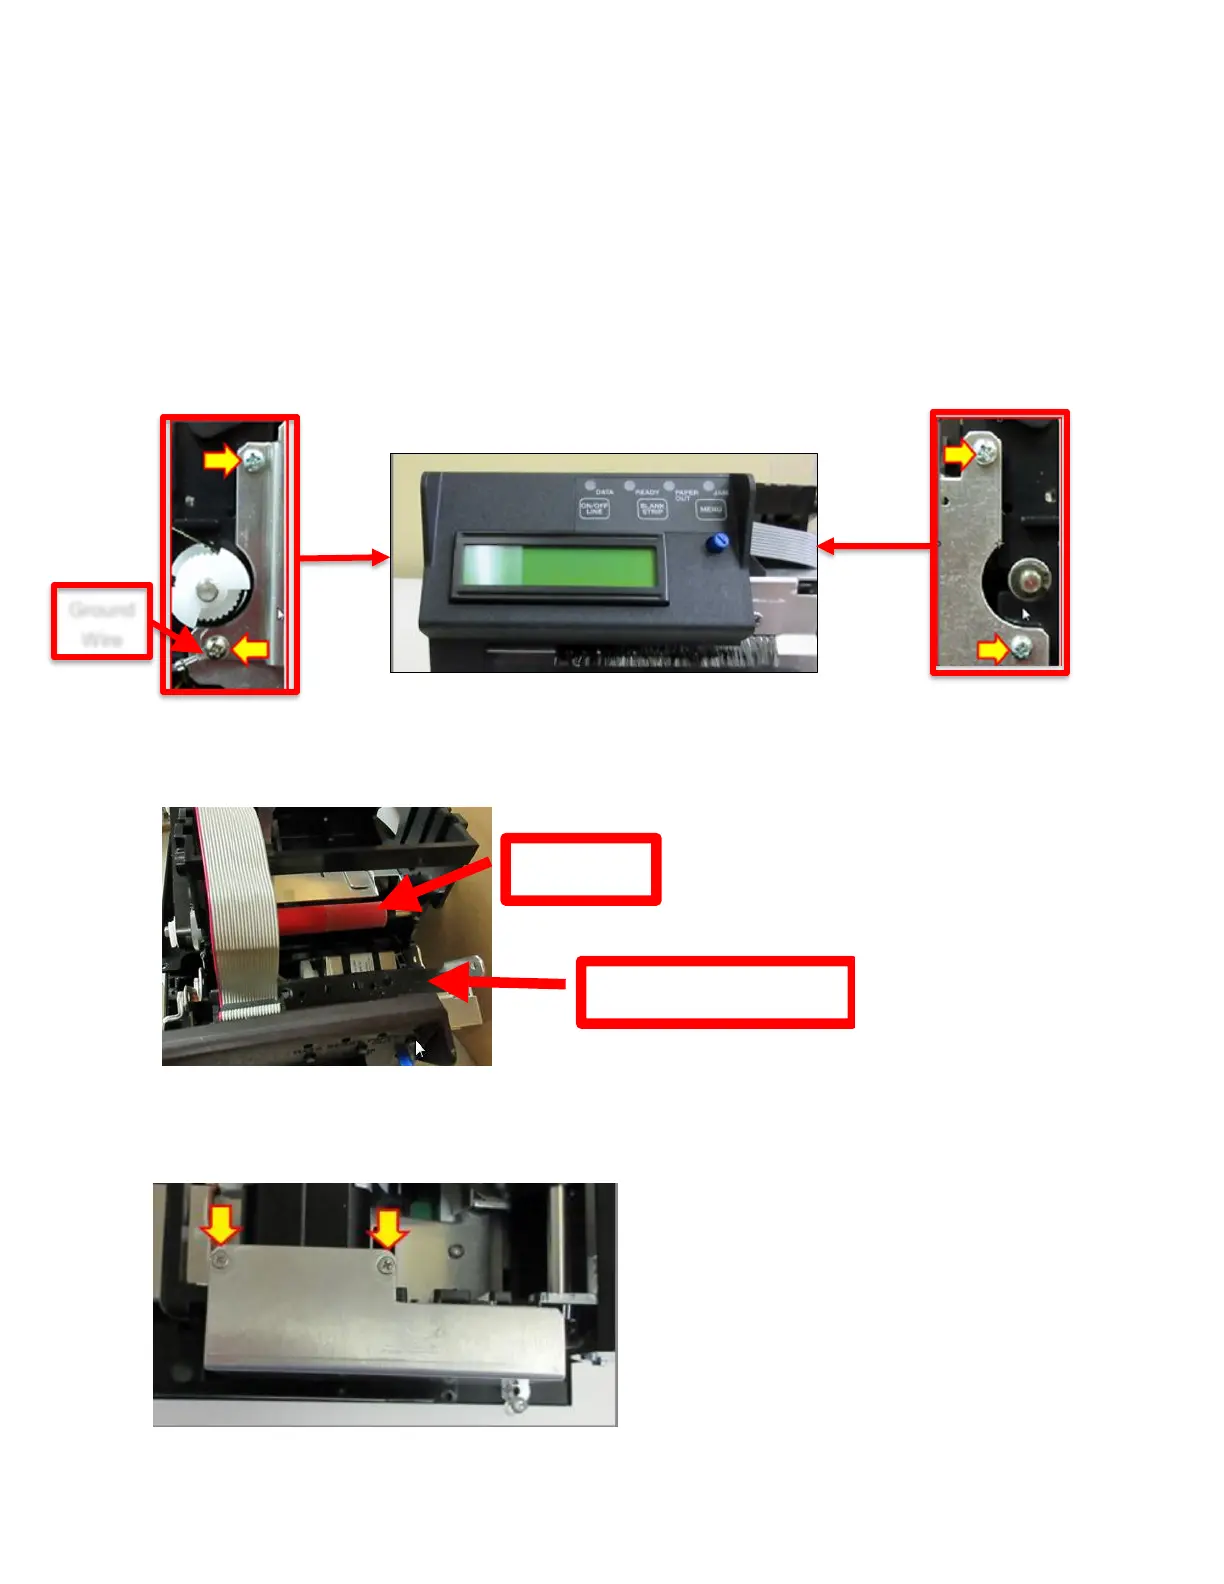
8.6 Platen Removal/Replacement
Please make sure the printer is powered off and unplugged from the AC source.
1. Remove the cover from the printer.
2. Remove the printer head mounting plate/ print head from the printer. See section 7.1.1.
3. Loosen the electronics cover by removing the screws that hold it in place. See section 8.1.
4. Remove the four Phillips head screws that hold the cutter assembly in place.
5. The electronics cover may be gently lifted up a little to enable the cutter assembly to separate
from the print cage. This will enable you to get access to the platen.
6. Remove the two Philip head screws that hold the drive belt shield in place and remove the
shield.