8.3 Load SQ Opto Removal/Replacement
Please make sure the printer is powered off and unplugged from the AC source.
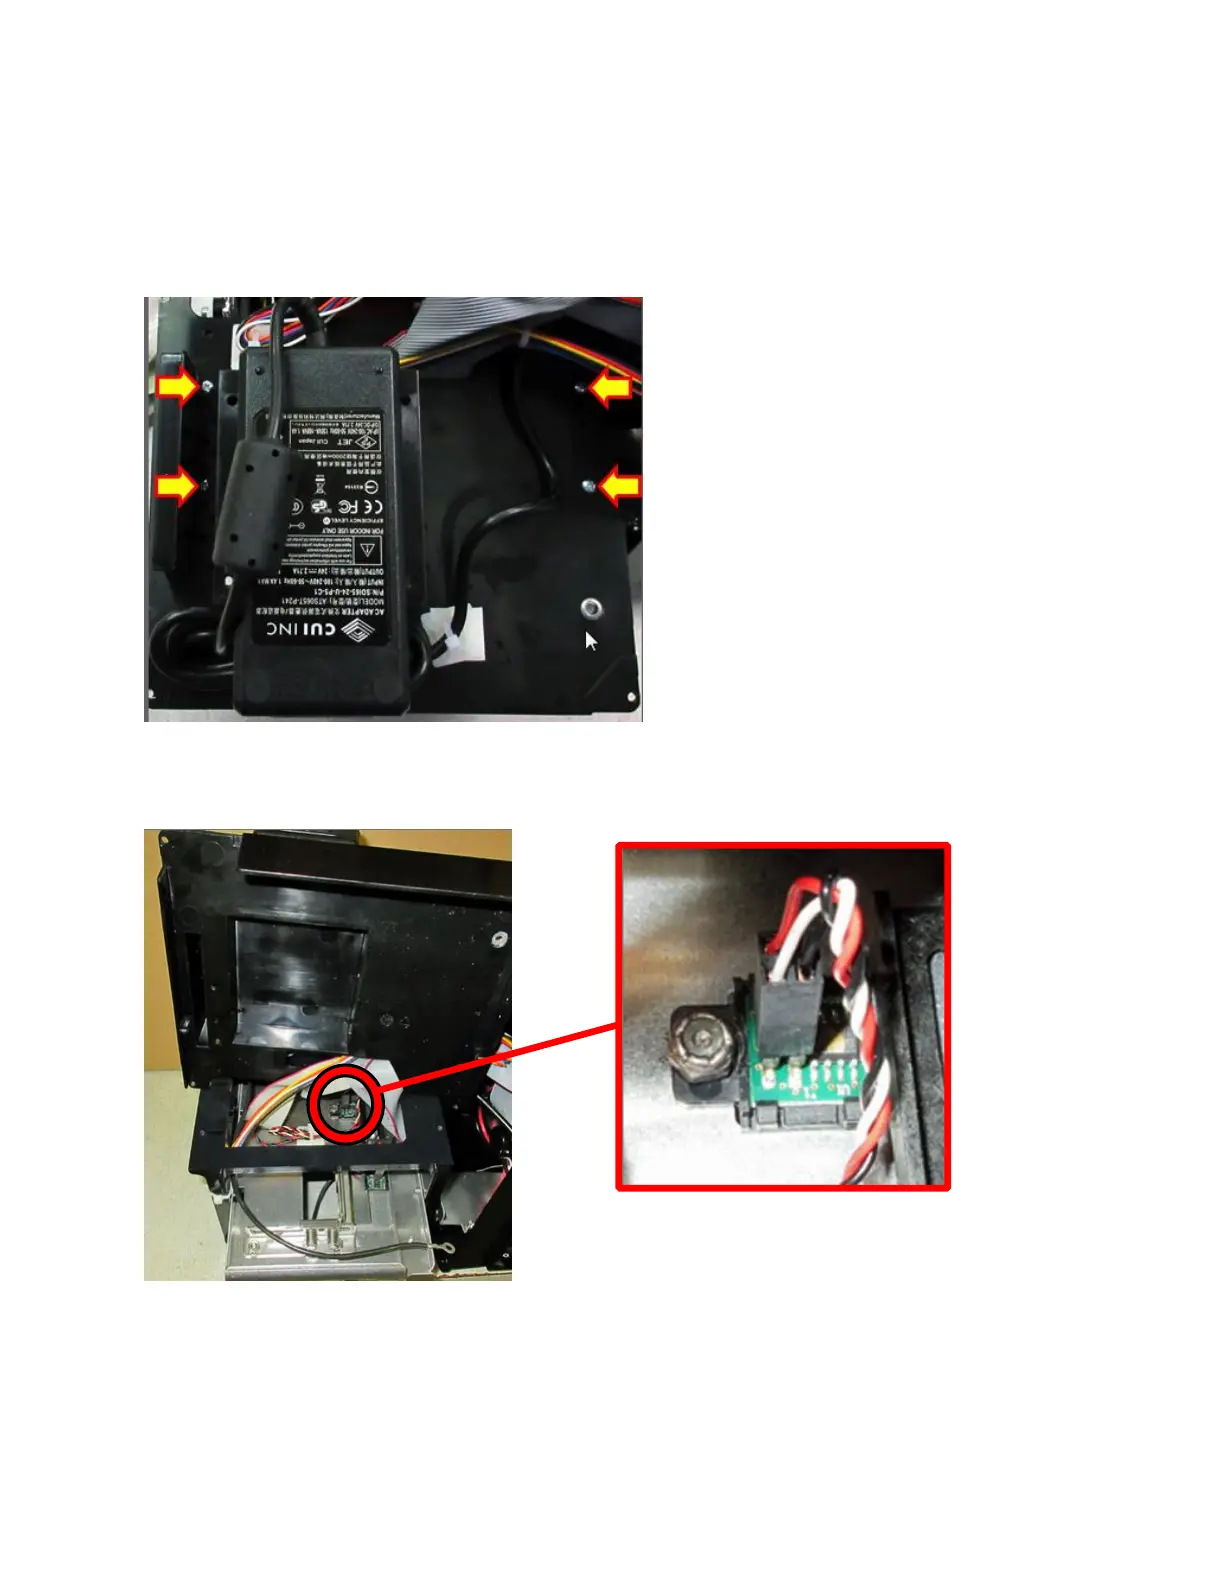
1. Remove the electronics cover from the printer. See section 8.1.
2. Remove the four Phillips head screws that hold the print cage onto the electrical cover.
3. Once the screws have been removed the electrical cover may be gently tilted away from the
print cage to gain access to the Load SQ Opto.
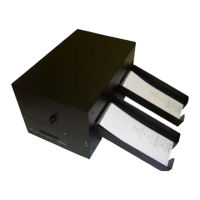
4. Remove the 1⁄4” nut with either a nut driver or socket.
5. Once the nut and flat washer are removed the black Load SQ Opto mounting bracket may be
pulled up so the connector may be unplugged and a new Load SQ Opto (Gold dot on IC)
installed.