6.0 Control Panel Options
The Lemur-FDIO allows the user to adjust various printer options through the front control panel.
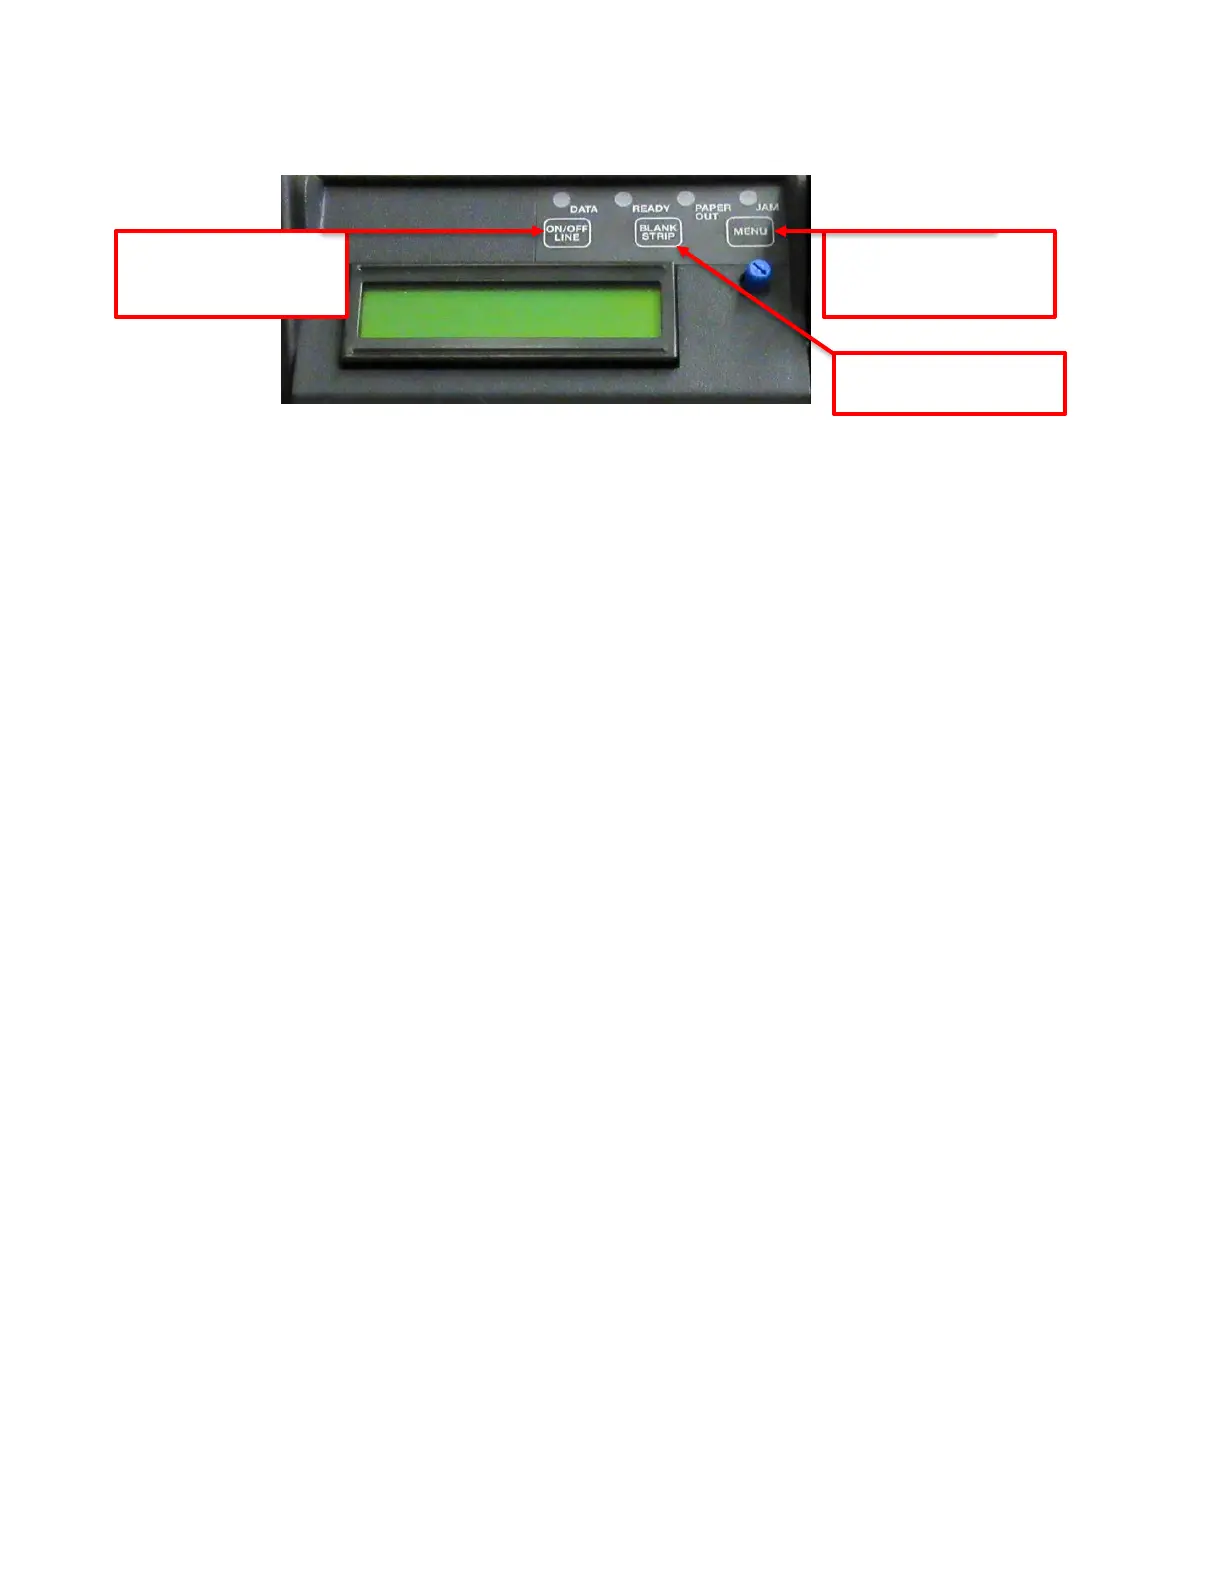
The printer has four LED lights on the control panel. All LEDs will illuminate briefly after power up.
• DATA flashes green when the printer is receiving data
• READY green when the printer is ready
• CHECK PAPER red when the printer is out of paper
• PAPER JAM red when there is a paper jam
Single Key Press
• Press the “ON/OFF” LINE button - the printer will toggle between online and offline modes.
The current on/off line state is displayed on the LCD display and the “READY” light is
illuminated when the printer is online and ready to receive data.
• Press the “BLANK STRIP” button - the currently selected blank flight strip will print.
Multi-Key Press
• Enter factory menu - press and hold the “MENU” button first, and while continuing to keep the
“MENU” button depressed, press and hold the “ON/OFF LINE” button for approximately two
seconds. Once the printer enters the menu system the LCD will display “FACTORY MENU”.
• Print a diagnostic ticket - press and hold “ON/OFF LINE” button first, and while continuing to
keep the “ON/OFF LINE” button depressed, press the “BLANK STRIP” button. A printer
diagnostic strip will print which displays a few lines of text using the special flight strip printer
fonts. The current printer’s firmware revision is shown at the bottom of the diagnostic strip.
• Print a configuration ticket - press and hold “ON/OFF LINE” button first, and while continuing to
keep the “ON/OFF LINE” button depressed, press the “MENU” button. A configuration ticket
will print containing the printer’s current configuration settings.
FACTORY MENU Under normal operating conditions an operator can explore all of the menu
settings, but any changes to the printer’s parameters will be ignored. Modifying the printer’s
configuration settings by issuing the appropriate FGL command is not affected by the state of the
menu.