8.4 Control Panel Removal/Replacement
Please make sure the printer is powered off and unplugged from the AC source.
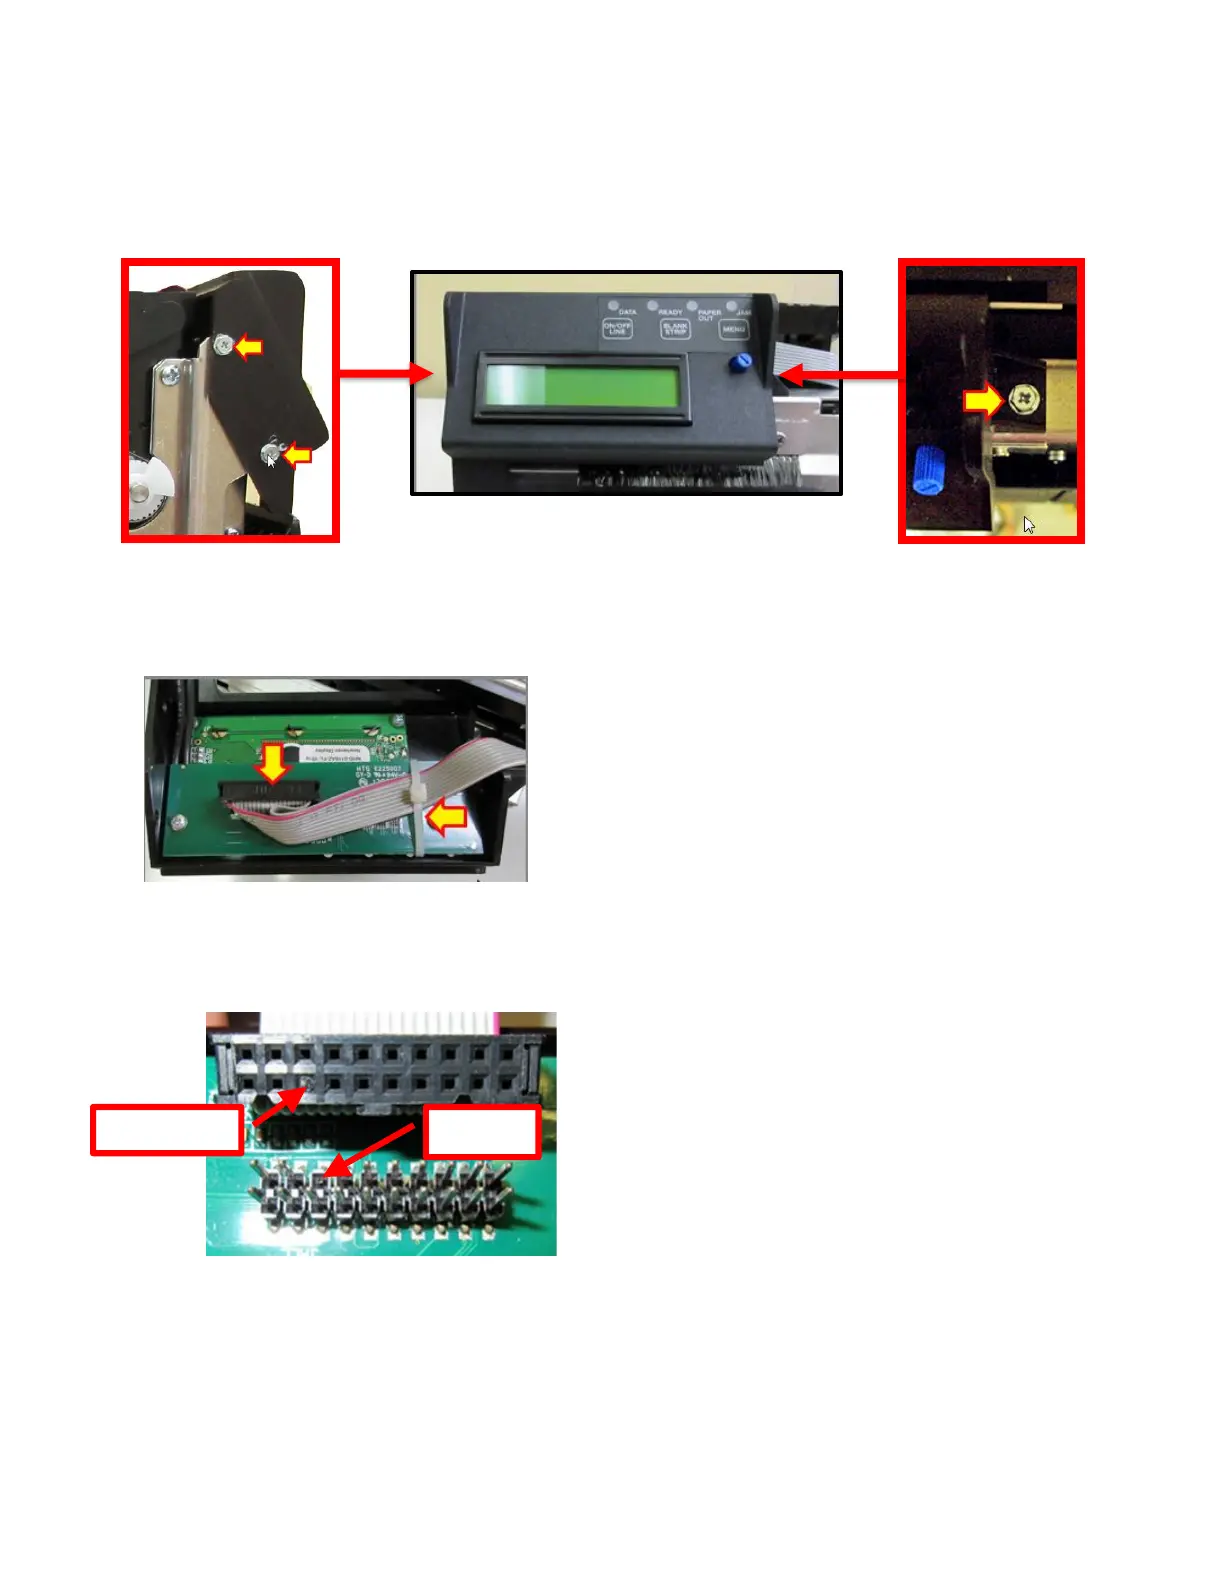
1. Remove the three 3/16” hex head screws that hold the control panel in place.
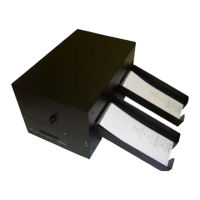
2. Cut the zip tie holding the cable in place and gently unplug the keyed grey ribbon from the
control panel.
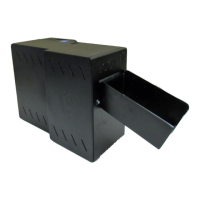
3. Plug the grey ribbon cable into the replacement control panel. Take care to make sure the
keyed areas of the cable and connector line up.
4. Install the control panel back in place by reversing the above steps.