11.1 Lemur-FDIO Flight Strip Printer Setup
The following information is provided for reference only. It is used only by Boca technicians for the configuration and
testing of our printers.
1. Set USB DEVICE TYPE to HID.
2. Connect the printer via the USB interface port.
3. Use OCEANIC ticket stock for initial testing of the printer.
4. Download font file FAA46A3L.fnt to the printer.
5. Downloaded latest FAA firmware (FAA46##.bin) to the printer. The latest version is shown in the FAA-FDIO Test
Firmware Release log.
6. Connect to the technical program to the printer via USB-HID and clear the parameter block.
a. Click on the FAA under Status list.
b. Click on the FAA to FGL Mode button.
c. Click on Clear Param Block button.
7. Unplug the USB connector.
8. Connect the printer up to the RS232/RS-485 (RS422) converter. In the technician program Serial Auto Negotiate
must be sent to NO and set the baud rate to 2400,N,8,1.
9. Send <bce><hse><lve2><bcd> command to the printer:
a. Click on the FAA to FGL Mode button.
b. Type above command string in the Enter Text box and click the Send button.
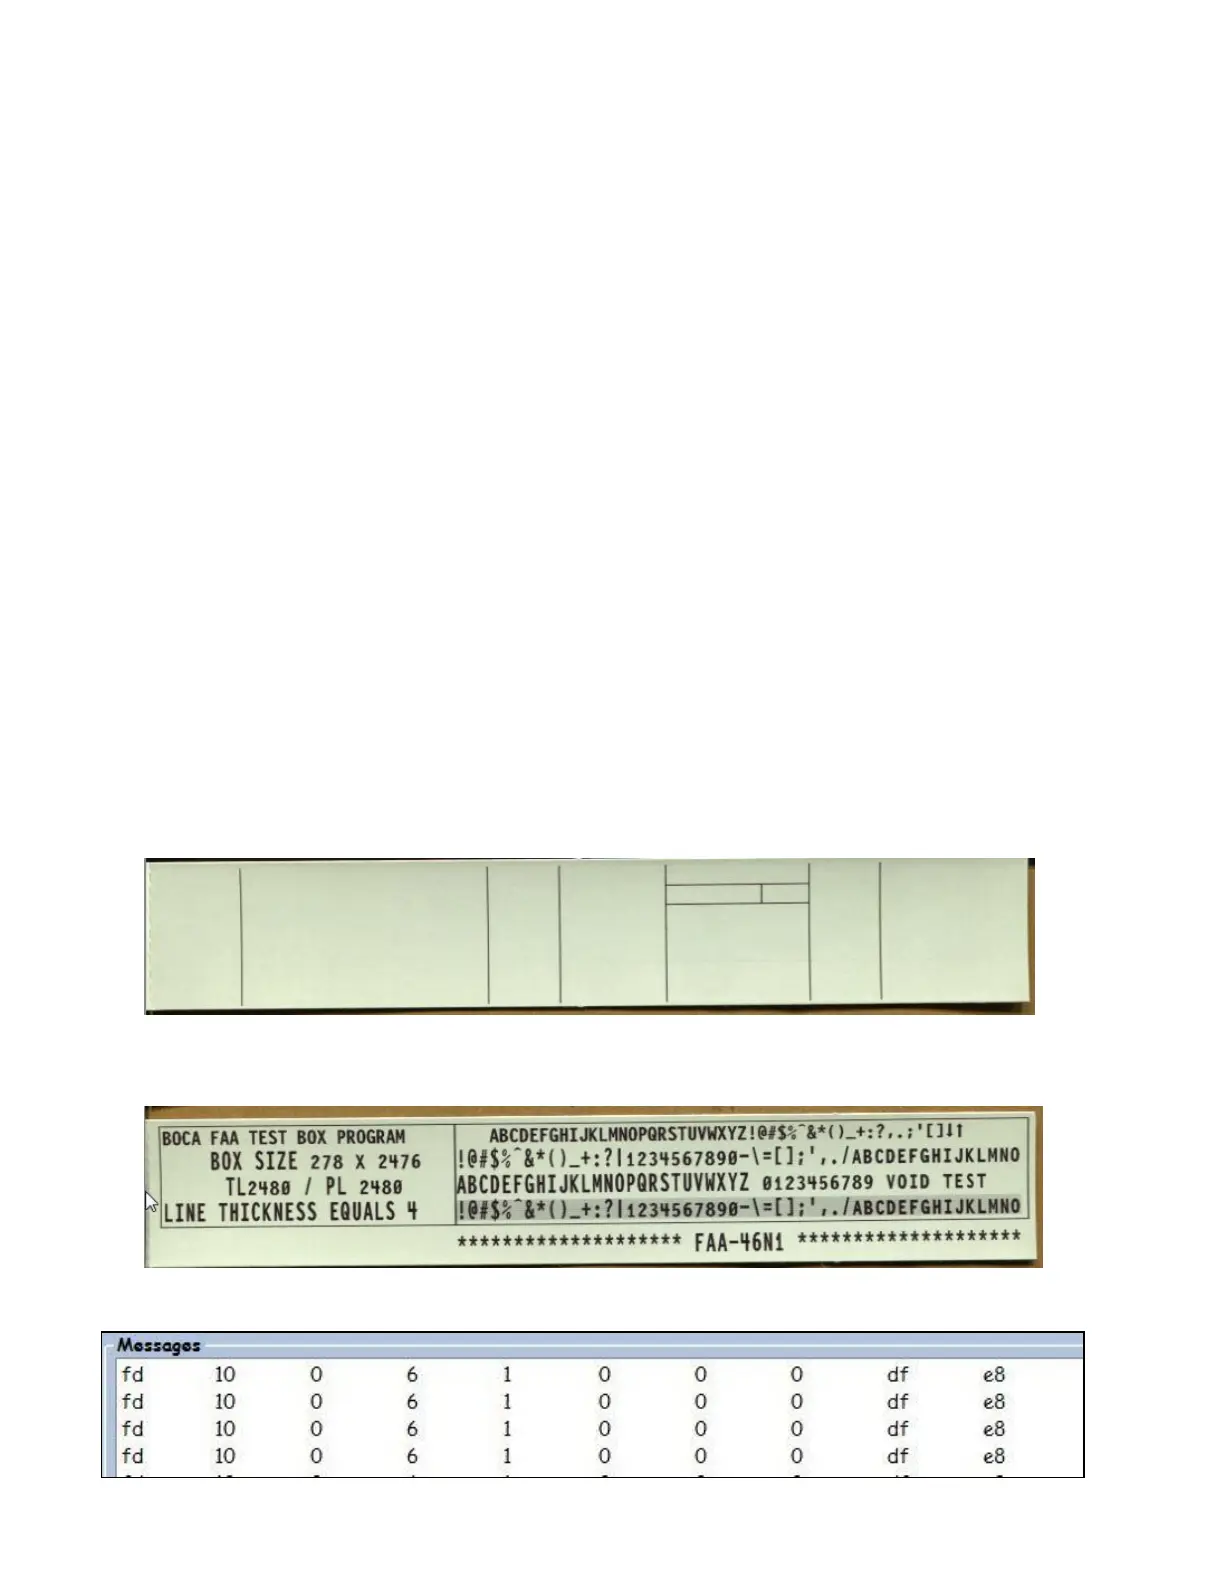
10. With the printer powered off holding down the MENU and ON/OFF LINE buttons. Power up the printer and hold
buttons until printer shows FACTORY MENU. Change STRIP SELECTION to OCEANIC. Use the OCEANIC
ticket stock. Pressing the BLANK STRIP button only will cause the below printout. Attach sample to test sheet.
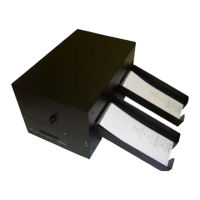
11. Click on the FAA Test Tickets button and go to the FAA2016 folder found in the firmware directory. Send the
FAA_Tower20.txt file to the printer. Twenty tickets will printout. The cut position and text alignment should be
similar on all tickets. Attach one ticket to the check sheet.