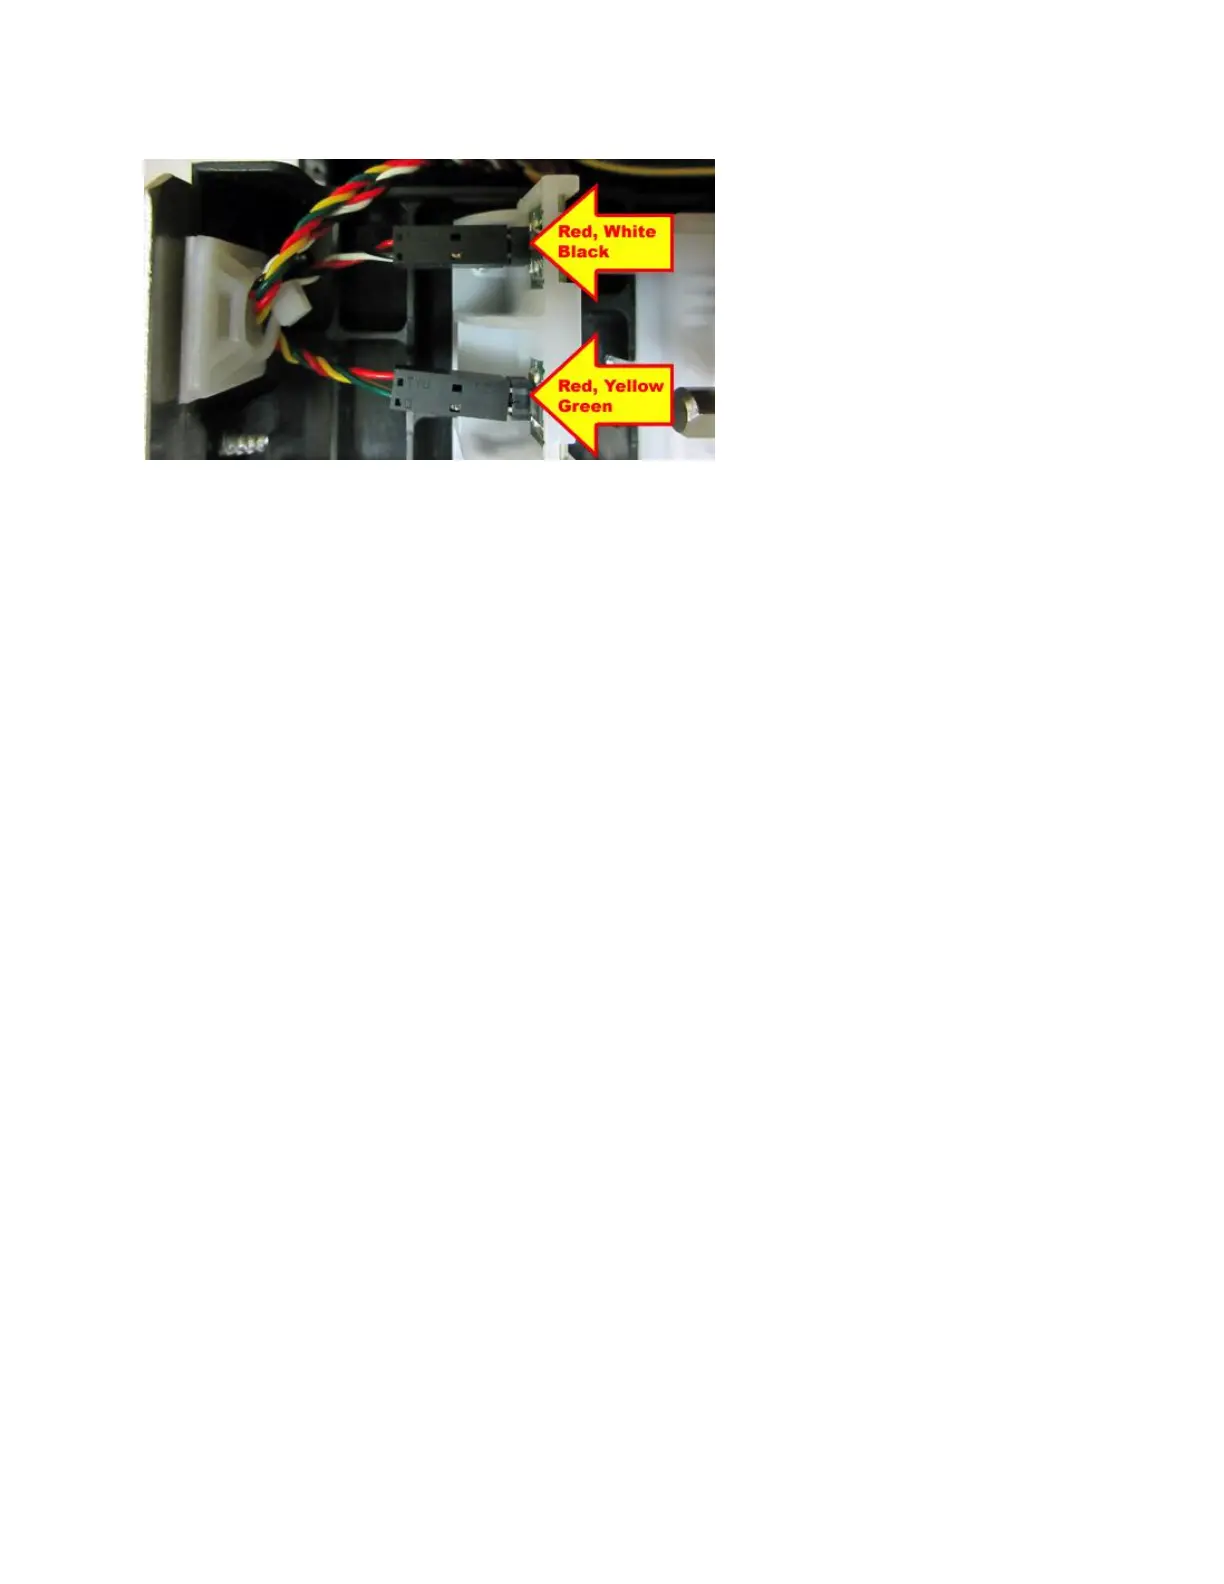
6. Connect the wires to the replacement cutter assembly and zip tie in place. Take care to make
sure the wires are properly connected to their respective sensors. See photo below.
7. Secure the control panel back onto the cutter assembly.
8. Install the cutter assembly back onto the print cage and make sure the ground wire is
attached back on as shown in step #4.
9. Install the electronics cover back in place.
10. The printer may now be put back into service.