APPENDIX F – INTERFACE TESTING A LEMUR
Boca Systems, Inc. has developed a Windows based program that allows customers to communicate from a host
computer to the printer over any interface (parallel, serial, USB, Ethernet) and print drivers too. The below program link is
found on our website under the “TECH SUPPORT/ REPAIRS“ section. For Apple/ Mac based systems see page 35.
WINDOWS BASED SYSTEM
www.bocasystems.com/documents/configure_boca.exe
To use this program you will need to download the executable file to your Windows based host computer and run it. If your
system doesn’t already have Microsoft .NET Framework 4 installed then allow it to be installed when prompted. Follow the
instructions on the pop up windows to install the program.
The following steps will guide you through using this program once it has been installed on your host computer.
1. Hook the BOCA printer to the host computer that you have the Configure program loaded onto. Make sure that
the printer has stock loaded and it ready to go. A printer is ready to print when it is able to print out a self test
ticket by depressing the TEST button. If you are not able to get a self test ticket then see section Installation to
make sure you have the printer properly setup.
2. On your Window’s desktop click on the START icon and then click on PROGRAMS to see all your computer’s
programs.
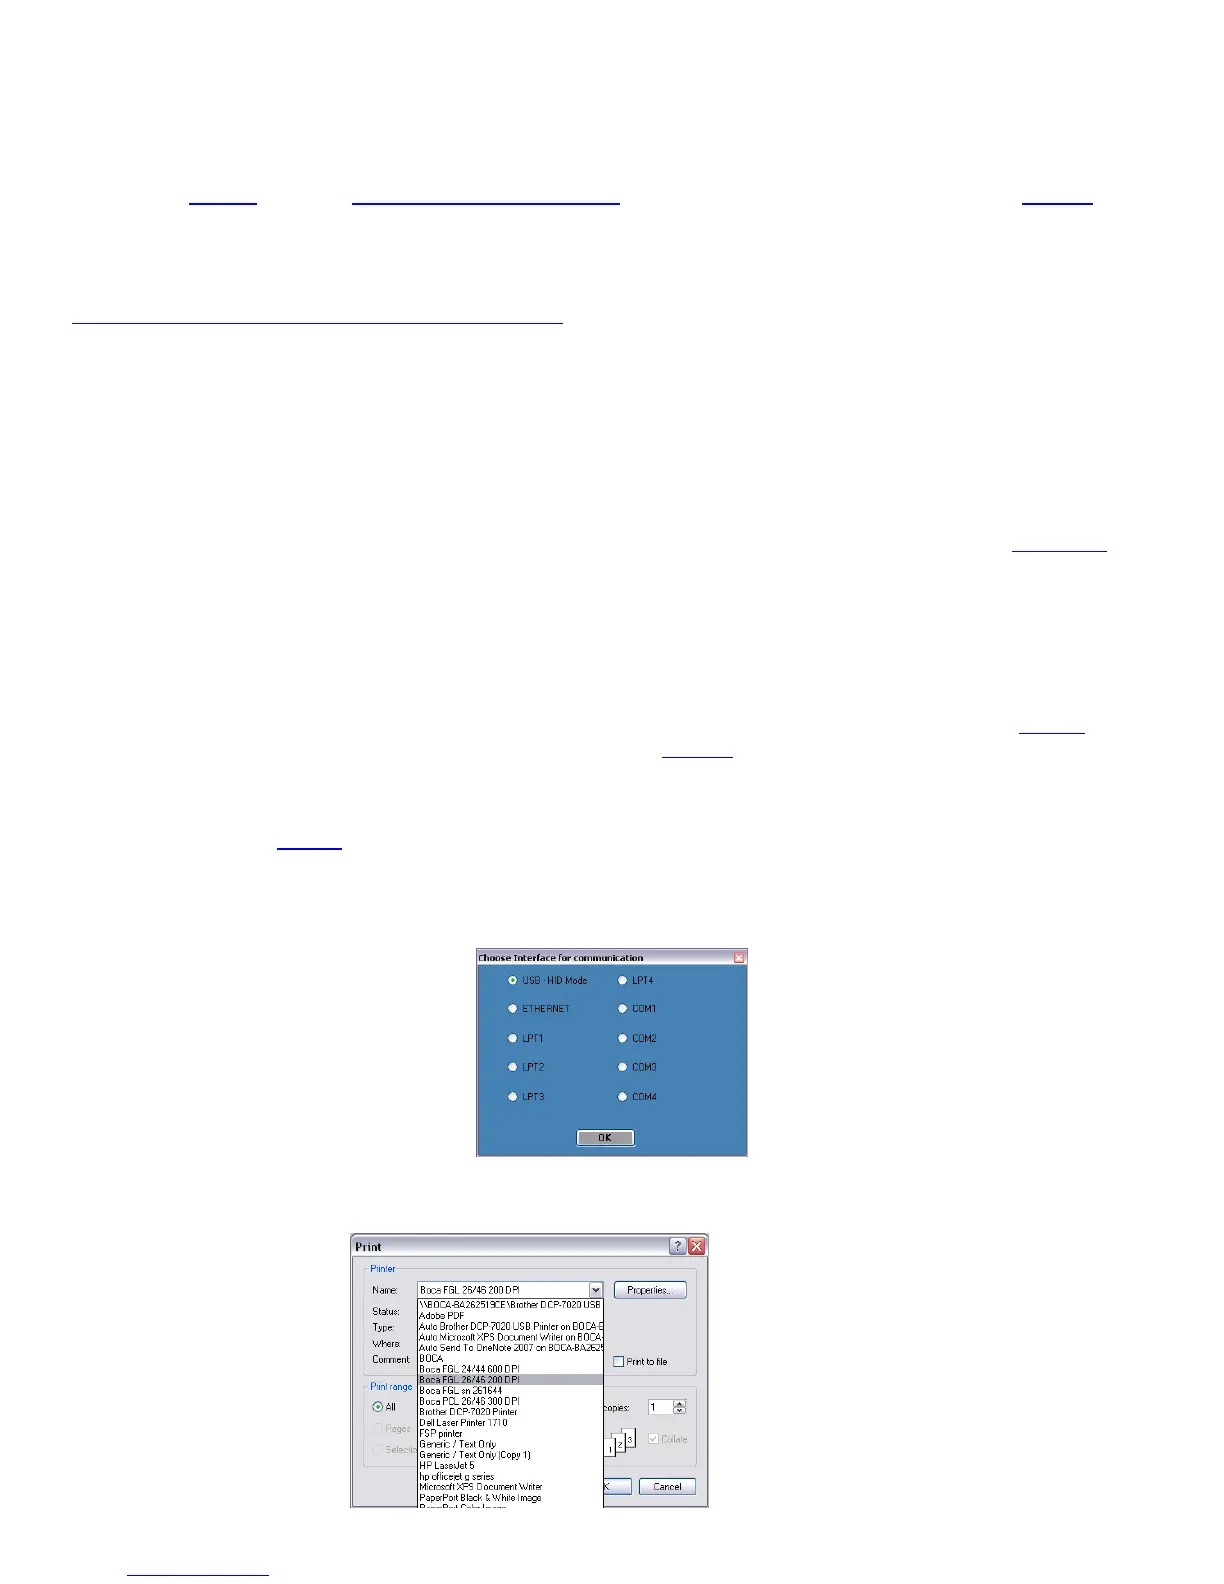
3. Find “Boca Systems” and click on Boca Configure and Test. Once the program is running, click on the “Select A
Printer” drop-down arrow and you have to choices.
Printer Interface - if your connecting through a Parallel, Serial, Ethernet or USB-HID mode (go to step# 4)
Print Driver - if you’re connecting via a print driver (go to step # 5).
4. Once the program is running, click on the “Select A Printer” drop-down arrow and choose “Printer Interface”. You
will want to choose the interface connection that you have the BOCA printer hooked up to then click the OK
button. Go to step #6.
If you are connecting via the Ethernet port then in the IP Address box type in the printer’s current IP address.
The printer’s current IP address is printed on the self-test ticket (when the test button is pressed). When tying in
the address don’t include the leading zeros (If IP=189.010.000.002 then type in 189.10.0.2). Click on the Connect
button.
5. Once the program is running, click on the “Select A Printer” drop-down arrow and choose
Printer Driver. You will want to choose the driver you are using for the BOCA printer. Once the driver is chosen
click the OK button.
Your selection of drivers will vary from what is shown in above image