Maintenance and Replacement
8–7
1070 073 822-104 (02.06) GB
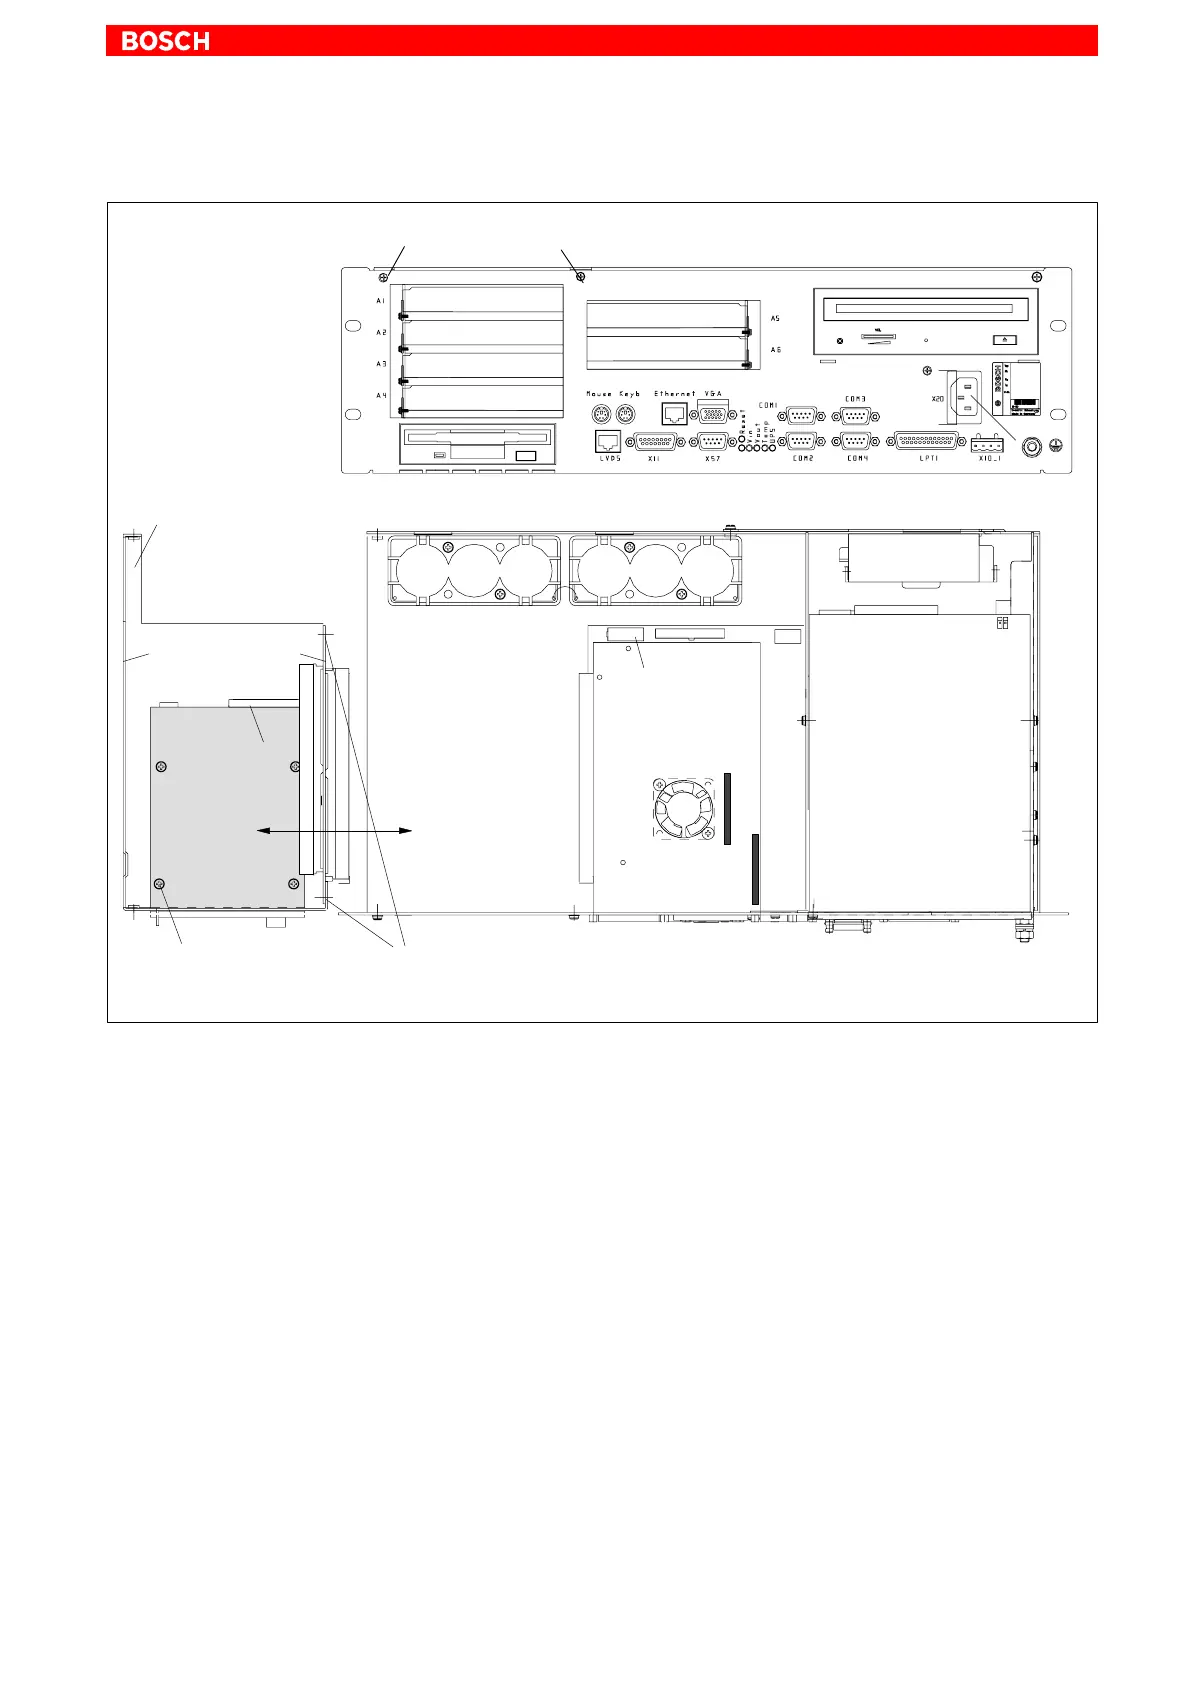
8.2.2 Replacing the 3.5” floppy disk
Backplane/Floppy
Mounting screws
Power connection:
– CD-ROM
– Floppy disk
Floppy disk
deinstalled support
plate with floppy disk,
side panel and
backplane
Backplane
Side panel
Motherboard
Floppy disk
Mounting screws
(from below)
Floppy
Data
connection
Floppy
Power
connection
Backplane/Floppy
Mounting screws
1. Switch off the supply voltage to the unit. If required, unplug all connectors.
2. Wait until the UPS has switched off the power supply (the UPS LED on
the front illuminates red until the UPS switches off the IPC power supply).
3. Open the housing.
4. If applicable, remove all expansion cards and all cables connected to
these cards.
5. Unplug the female connector together with the controller ribbon cable
and the female connector for the power supply from the floppy disk. Only
a defective cable must be disconnected from the motherboard.
6. Loosen the two mounting screws on the front panel. Loosen the 4
mounting screws on the backplane and remove the floppy disk together
with the side panel, backplane and holder from the side of the housing (as
the motherboard is plugged into one of the backplane slots, the
backplane must be moved carefully in order to loosen this connection).
7. Loosen the 4 mounting screws on the underside of the floppy disk holder
and insert a new drive.
8. Installation is in reverse sequence to that described above.