IndraControl L40 List of Figures 11-1
DOK-CONTRL-IC*L40*****-PR02-EN-P
11 List of Figures
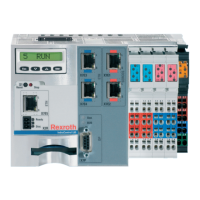
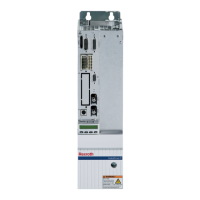
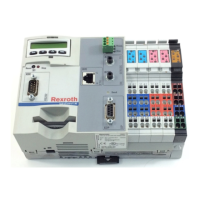
Fig. 1-1: View of a typical IndraControl L40 unit, with further optional
interfaces arranged in the central section. 1-1
Fig. 1-2: Further documentation 1-2
Fig. 3-1: Hazard classification (according to ANSI Z535) 3-1
Fig. 4-1: Operating voltage according to DIN EN 61131-2 4-1
Fig. 4-2: Current consumption 4-1
Fig. 4-3: Ambient conditions 4-2
Fig. 4-4: Used standards 4-3
Fig. 5-1: Bottom view 5-1
Fig. 5-2: Front view 5-1
Fig. 5-3: Lateral view from the left (the cutout for the top-hat rail is
arranged centrally) 5-2
Fig. 6-1: Display with four operator keys 6-1
Fig. 6-2: Reset button and Stop LED 6-2
Fig. 7-1: IndraControl L40 connections 7-1
Fig. 7-2: Supply voltage connections 7-2
Fig. 7-3: Pin assignment of the voltage module 7-3
Fig. 7-4: Diagnostic LED of the power terminal 7-3
Fig. 7-5: Diagnostic LED of segment terminal 7-3
Fig. 7-6: Diagnostic LED of supply voltage 7-3
Fig. 7-7: "FS" and "FN" LEDs 7-3
Fig. 7-8: Main circuit 7-4
Fig. 7-9: Segment circuit 7-5
Fig. 7-10: Inline supply and analog circuit 7-7
Fig. 7-11: Address assignment of inputs and outputs 7-7
Fig. 7-12: Digital inputs 7-8
Fig. 7-13: Data of digital inputs 7-9
Fig. 7-14: Light-emitting diode D 7-9
Fig. 7-15: Digital outputs 7-9
Fig. 7-16: Data of digital outputs 7-10
Fig. 7-17: Light-emitting diode D 7-11
Fig. 7-18: RS232 interface 7-11
Fig. 7-19: Ethernet interface 7-12
Fig. 7-20: PROFIBUS DP interface 7-13
Fig. 7-21: Parameters for PROFIBUS DP line 7-13
Fig. 7-22: Maximum segment length in relation to the transmission rate
7-13
Fig. 7-23: "Send" light-emitting diode 7-14
Fig. 7-24: Distortion indicator 7-14
Fig. 7-25: Characteristic data of Ready contact 7-14
Fig. 7-26: Ready LED 7-15
Fig. 8-1: Before dismounting the IndraControl L40, the first Rexroth Inline
module must be removed. 8-2
IAS COMPONENTS www.ias-components.com info@ias-components.com
 Loading...