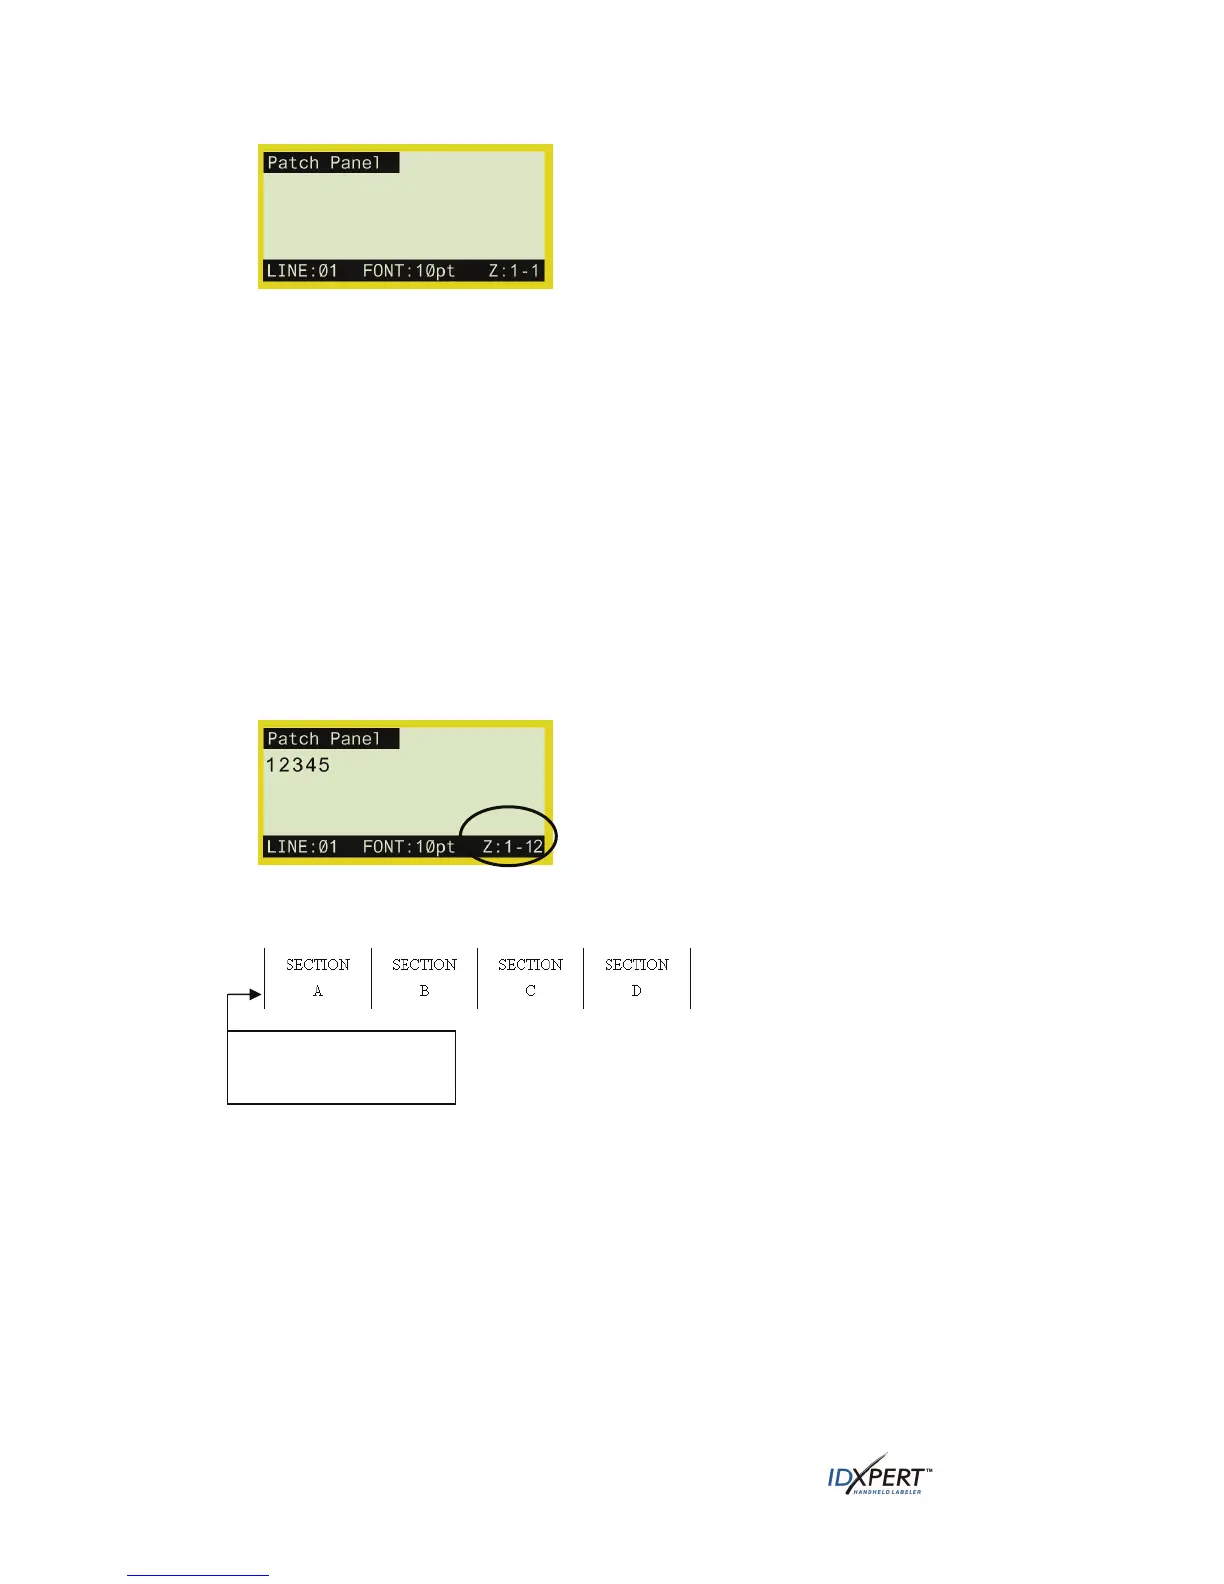
Patch Panel Display Screen
Step 6.
Step 7.
Enter the desired label data and do one of the following:
• Press the
ENTER key to begin a second line, or
• Press
FUNCTION + CREATE ZONE to move to a new zone (port).
Use the
PREV ZONE and NEXT ZONE keys to scroll through the zones created for the label.
Patch panels can be viewed the same as if they were one large label.
Note also the following:
• You can create up to 12 zones per label.
• Font sizes can differ on a line-by-line and zone-by-zone basis. Rotation can also be
changed on a zone-by-zone basis.
• One zone (or port) is viewed at a time (creation of a maximum of 12 zones is possible;
when the label is recalled from memory, the first zone created appears).
• The example below shows a Patch Panel label that utilizes 12 zones with the first of
the 12 zones shown:
Step 8. Press
PRINT. The label will feed to the cut position.
Lines print so that both the start and end lines show. See example:
After printing, the display screen returns to displaying the label text in the DataComm
& T-Block Menu.
1/16
" unprintable space
at beginning of label
24 User Manual