Do you have a question about the Brady GlobalMark 2 and is the answer not in the manual?
Legal statement regarding usage and reproduction rights of the manual.
Statement limiting liability for inaccuracies or misuse of the guide.
Terms and conditions governing the use of licensed software.
Details the warranty coverage and limitations for Brady products.
Regulatory compliance information for US, Canada, and Europe.
Technical details including physical, environmental, and electrical characteristics.
Information on power cords for international use, including country-specific specifications.
Provides an overview of the manual's content and structure.
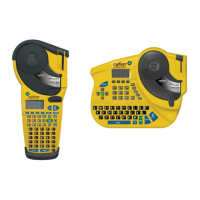
Lists key features and capabilities of the label printing system.
Describes the Monocolor, Multicolor, and Color & Cut printing systems.
Details specialized label applications like Custom, QuickText, Pipe Marker, and more.
Provides contact information for regional technical support services.
Guides on connecting keyboards, mice, and power cords to the system.
Instructions for installing ribbon and tape cartridges into the printer.
Steps for inserting and using a compact flash memory card for storage.
Procedures for maintaining the printer, including cleaning the print head.
Describes the initial power-on sequence and the system's splash screen.
Overview of the primary user interface screen with application choices.
Explains the function of various keys on the system's keyboard.
Details how to use an optional mouse for system navigation and selection.
How to view information about tape/ribbon levels and system version.
Methods for accessing the system's built-in help features.
Overview of the label creation and editing interface.
Explains how to navigate and input data in various system screens.
How to enter the system's configuration settings.
Configuration of print-related settings like supply saver and overprint.
Setting system language, keyboard layout, and units of measure.
Adjusting hardware-specific settings like speaker volume and cutter calibration.
Configuring grid preferences and line width settings.
How to enable and use the on-screen grid for precise object placement.
Setting default font, type size, and justification for text objects.
Configuring PC connection type (USB or Serial).
Steps for designing and creating unique labels from scratch.
Procedure for quickly creating simple text-only labels.
How to use pre-designed layouts to create standardized labels.
Guidance on creating and managing groups of labels for batch printing.
Methods for modifying label size, orientation, and properties.
Customizing settings specific to certain label applications.
Defines the term 'object' and lists types of objects that can be added to labels.
Describes the process of adding text, graphics, and other elements to labels.
How to select objects in the editor window for manipulation.
Procedures for repositioning objects on a label.
Methods for changing the dimensions of objects on a label.
How to duplicate and relocate objects within a label design.
Overview of editing objects and their properties.
Explains how system and supplies determine color choices for labels.
Guides on how to select and apply colors to label elements.
Information on how color is applied during the printing process.
Explains how to save and organize labels as files and file groups.
Step-by-step instructions for saving created labels as files.
Operations for opening, editing, and deleting saved label files.
How to print individual files or entire file groups.
Guidance on transferring files between a PC and the label printing system.
Accessing and using downloaded or custom templates.
Defines terms related to cutting operations like Cut, Cut out, Shear, and Weeding.
How to create objects that are cut out from the label material.
Procedures for applying cut bounding boxes around print objects.
How to cut labels along applied frame boundaries.
Steps to adjust the plotter cutter for accurate cutting.
Basic process for printing created labels.
How the system verifies installed supplies for print jobs.
Verifying label dimensions against the printable area.
System checks label length against ribbon capabilities.
How ribbon and tape colors affect label output.
Configuring print settings like Supply Saver and Overprint.
Steps to stop an active printing process.
Explains the benefits and requirements for connecting the system to a PC.
Guides on installing the printer as a new hardware device on a PC.
Steps to configure connection settings for PC communication.
How to use the PC and MarkWare application to print labels.
Using the utility for file transfers and management between PC and printer.
Instructions for updating the printer's system software.
Lists special characters and their corresponding codes for use in label creation.
Describes the components and function of the plotter cutter.
Step-by-step guide to removing the stylus holder for maintenance.
How to adjust the depth of the cutting blade for optimal results.
Instructions for replacing the cutting blade in the stylus holder.
Procedure for cleaning the cutting stylus using alcohol and swabs.
Lists common error codes, their causes, and required user actions.
| Print Technology | Thermal Transfer |
|---|---|
| Print Resolution | 300 dpi |
| Cutter | Automatic |
| Label Materials | Polyester, Vinyl |
| Connectivity | USB |
| Display | Color |