7-24 Adding Objects
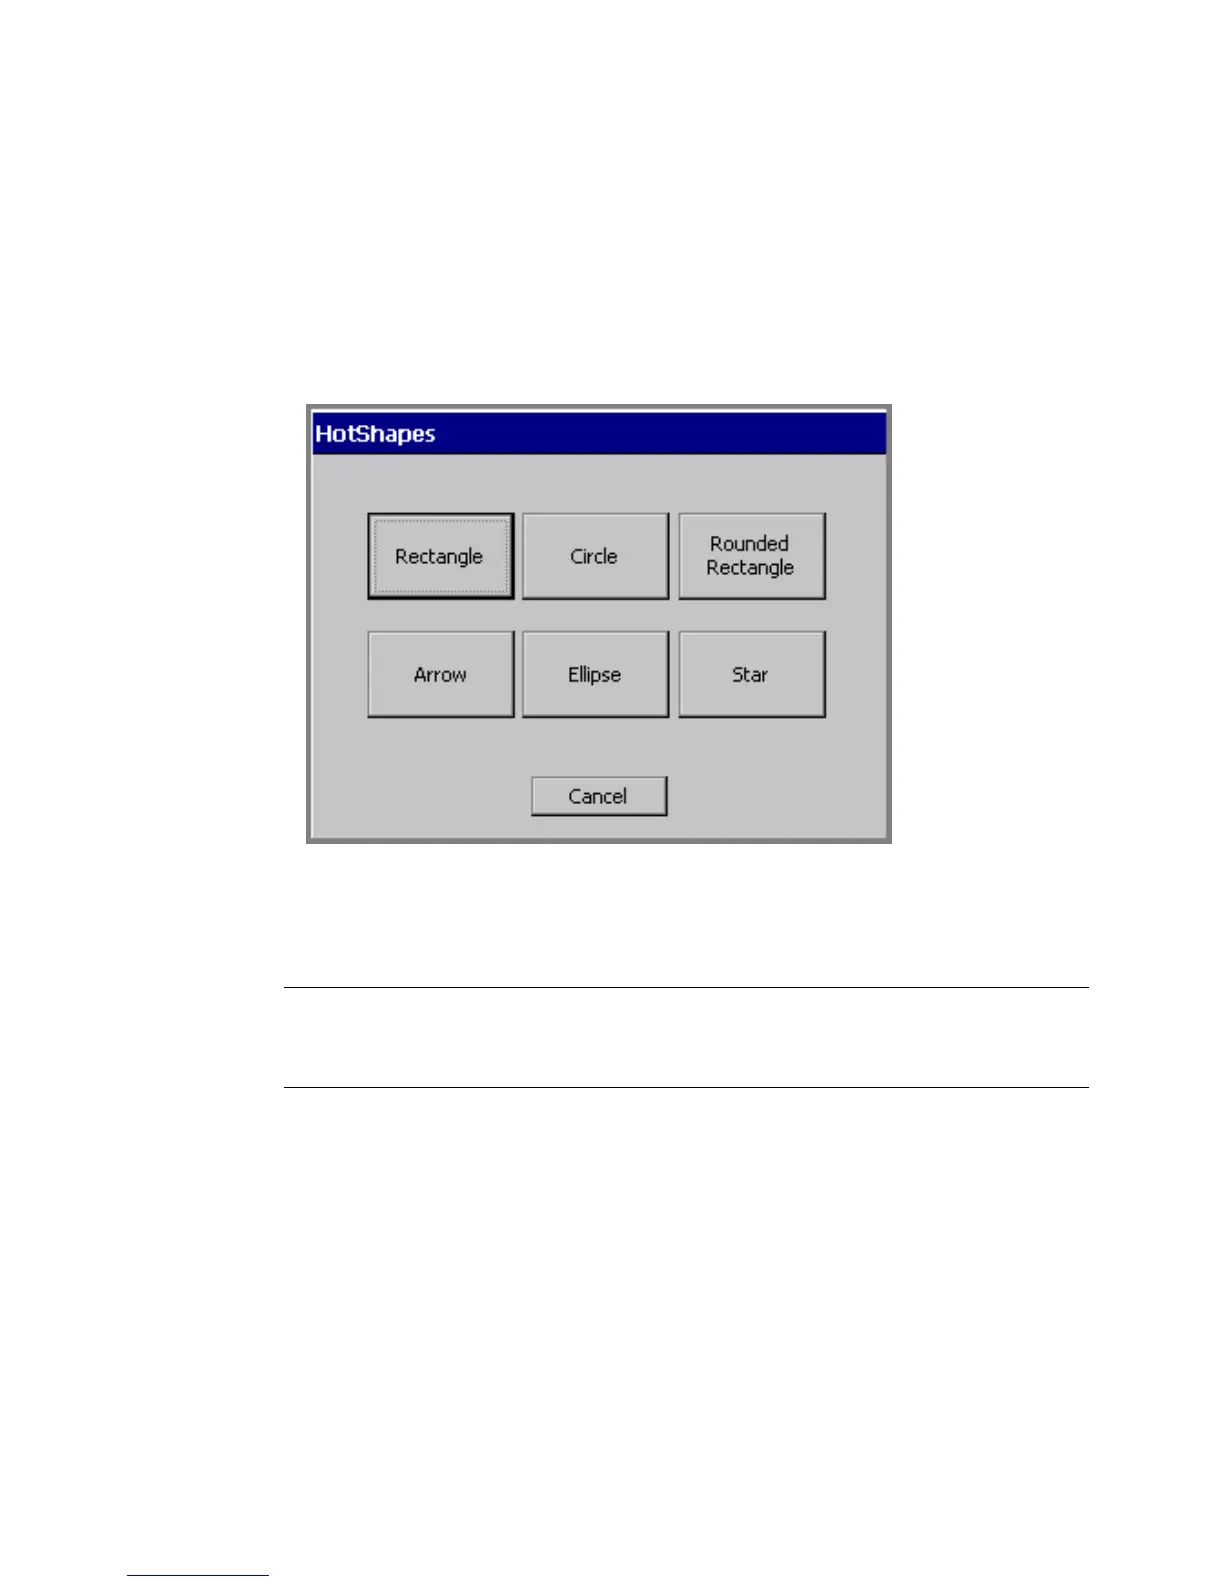
Adding HotShapes
HotShapes are pre-defined designs you can print on your label. If you have the
Color & Cut system, your printer can automatically cut out these shapes. See
CHAPTER 10: Working with Cut-outs, for more information.
To add HotShape objects to your label, select the HotShape option on the Insert
Object screen (Figure 7-2 on page 7-4). The HotShape screen displays.
Figure 7-16. The Hot Shapes screen.
Choose a HotShape by selecting one of the HotShape buttons. The HotShape
object is automatically added to your label on the Editor window.
Hint! You can change the size, color, rotation, and location of a HotShape object
just like any other type of object, but you may not open and edit a
HotShape.
To cancel adding a HotShape and return to the Editor window, choose Cancel.