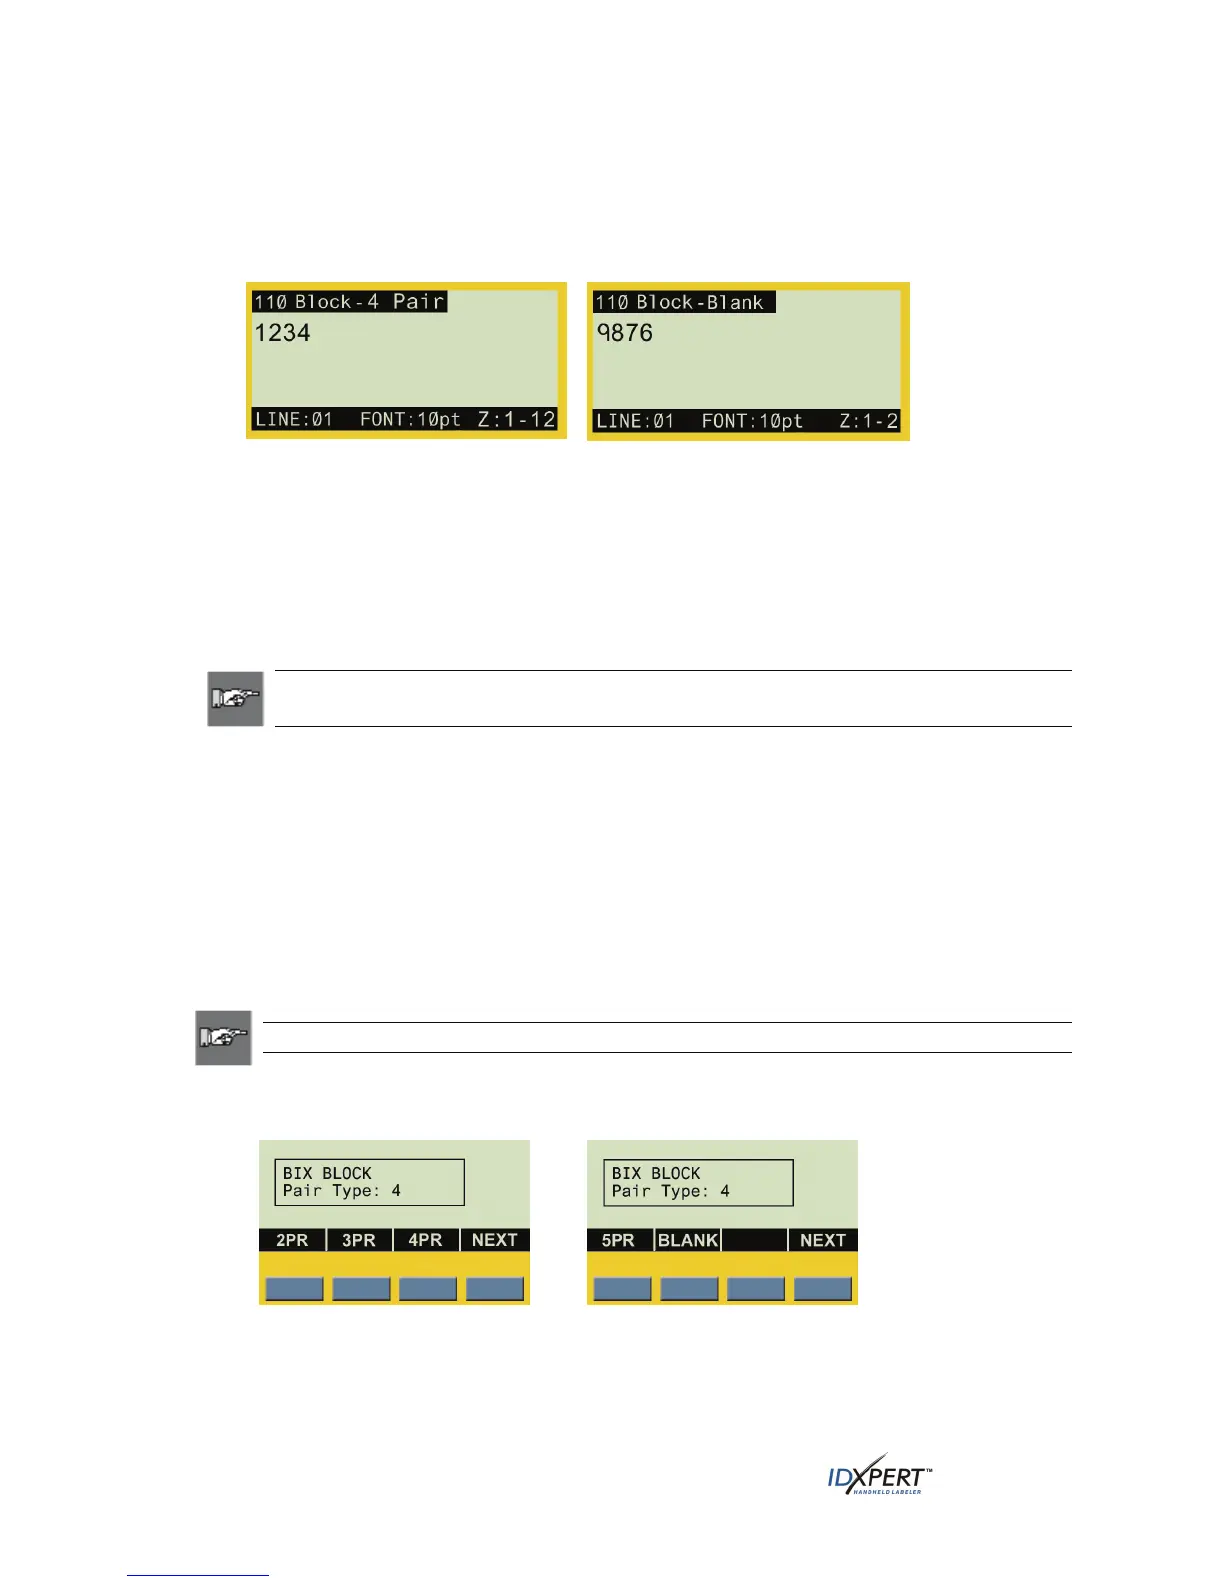
If you make a 2PR, 3PR, 4PR, or 5PR selection (4PR appears by default), the 110-Block editor
display screen appears with the label type title in the upper left corner. One zone is viewed and
editable at a time. The zone availability is pre-defined and based on the pair configuration, thus fixed
accordingly. For example, 2PR has 24 zones, 3PR has 16 zones, 4PR has 12 zones, 5PR has 10 zones,
and BLANK has two zones (see examples):
Display screen showing Zone 1 of
a 4PR, 12-zone label
Display screen showing Zone 1 of a
BLANK label type with two zones available
Step 4. Enter the label data into the desired zones, navigating between zones by pressing
FUNCTION + PREV ZONE and/or FUNCTION + NEXT ZONE when entering data or when
viewing or editing previously entered data.
BIX-Block Labels
Note: See
DataComm & T-Block Menu Selections for a list of the high-level DataComm
& T-Block Menu selections, their default values, and the corresponding softkeys.
This example outlines the functionality required to create a BIX-Block label using the DataComm
& T-Block menu. BIX-Block labels print based on user-selected pair configuration.
This example assumes use of a dedicated BIX-Block part (width = .625").
To create a BIX-Block label:
Step 1. Insert a dedicated part (.625" x continuous in B412 and B422). The printer reads the
smart-cell settings and automatically displays the screen allowing you to choose between
the General ID Menu and DataComm & T-Block Menu. Upon selecting the DataComm
& T-Block Menu, the following datacomm menu options appear above the softkeys:
P-PNL, T-BLK, DESI, 110BLK, 66BLK, BIX.
Note: To escape to the General ID Menu screen press
FUNCTION + CLEAR/ESC.
Step 2. Press NEXT, then the BIX softkey. The default BIX-Block information automatically
appears on the display screen as shown below (pressing
NEXT advances menu options):
28 User Manual