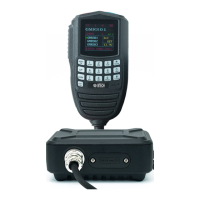
BTech DMR-6X2 CodePlug Programming Guide
V-1.00/1.00
Page 6 of 30
© 2017/8 Trygve Svärd KD0PNQ
To operate on the DMR network, you must register for a
DMR identification number. This can be done at
https://www.radioid.net/ Select Register ID at the top of the
page, then select User Registration at the bottom.
You should receive your new DMR ID within 24 hours.
Your DMR ID can now be entered into the CPS.
- Select Digital / Radio ID List on the left
- Enter your DMR ID and Name
NOTE: If you download a CodePlug from the Internet for your radio, you must enter
your DMR ID as per above before you load this CodePlug into the radio.
STEP 4 - SCAN LIST
A Scan List is a group of channels that can be monitored when Scan is selected
using one of the programmable side keys. The DMR-6X2 has the capability of storing
multiple Scan Lists per channel.
- Select Scan List from the left column
- Double click on the first open line
- Enter a name for the new Scan List
- Highlight the channel name you want to appear in the list and press >>
Up to 50 channels can be loaded into an individual list. You also have the ability to
sort or rearrange the channels in this list. The Scan List will later be assigned to a
channel of your choice during Step 7 below.
Please note – If you want to change the scan list using the Menu on the radio
- Go to Scan List > Scan List > select the TG list you want
- Go to bottom of the list and “Select Current List” to make the one you selected
become the new scan list.
- Then go back to Scan List and select “Scan On/Off” and turn the scan on.