35
7-3 Seat bracket maintenance :
※Hex wrench 17 x 2pcs ※Cross tool x 1pcs
1.Refer to 3-1 Powering off the battery to power off the scooter.
2.Remove the upper set of fixing screws (M8 x35L x 1pcs).
3.Remove the upper set of fixing screws (M10 x20L x 4pcs).
4.The entire set of the seat holder can now be removed.
※Please follow the above steps in reverse for reassembly and
replacement.
7-4 Main controller maintenance :
※Allen wrench 4 x 1pcs
1.Refer to 3-1 Powering off the battery to power off the scooter.
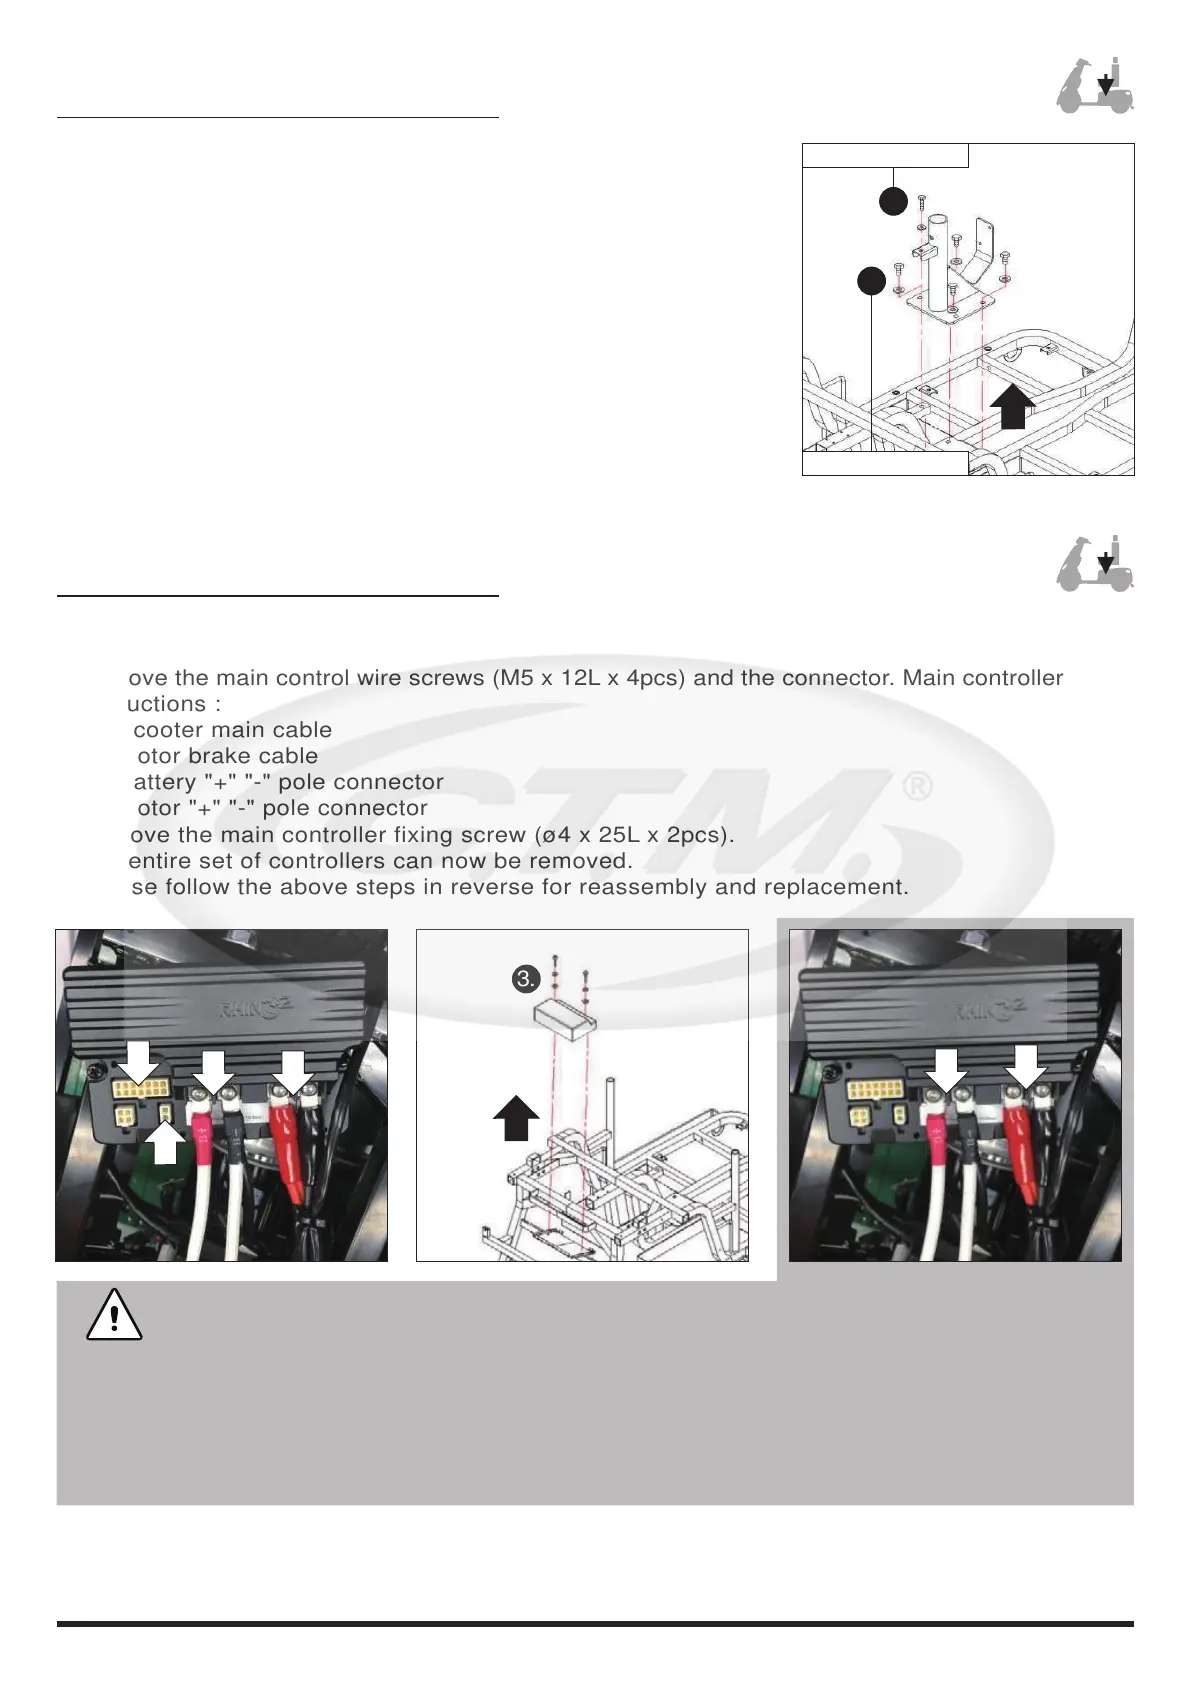
2.Remove the main control wire screws (M5 x 12L x 4pcs) and the connector. Main controller wiring
instructions :
(1).Scooter main cable
(2).Motor brake cable
(3).Battery "+" "-" pole connector
(4).Motor "+" "-" pole connector
3.Remove the main controller fixing screw (ø4 x 25L x 2pcs).
4.The entire set of controllers can now be removed.
※Please follow the above steps in reverse for reassembly and replacement.
1.
3. 4.
3.
4.
2.
150+-15kgf-cm
400+-40kgf-cm
3.
3.
2.
4.
4.
※If the function of the electrical equipment of the scooter is abnormal or invalid, the
controller connector may have loosened. First check whether the controller connector
is loose. If it is normal, the controller may be damaged. Please replace with a new one.
※Connector 3, 4 motor / battery "+" / "-" pole connector, please do not connect the wrong
position and note that if the connection is wrong, the controller may be burnt out.
※After reassembling or replacing the controller, please make sure to properly connect the
connector and the connector screw to prevent falling off, causing the scooter to operate
abnormally.

 Loading...