Chapter 3: Configuration Guide
Configuring Link Aggregation (LAG)
phn-3963_004v000
Page 3-22
Configuring a LAG Group
Creating a LAG Group
To create a LAG group:
1. Select Ethernet > Interfaces > Groups > LAG. The LAG page opens.
2. Click Create LAG underneath the Link Aggregation table. The Create LAG Group page opens.
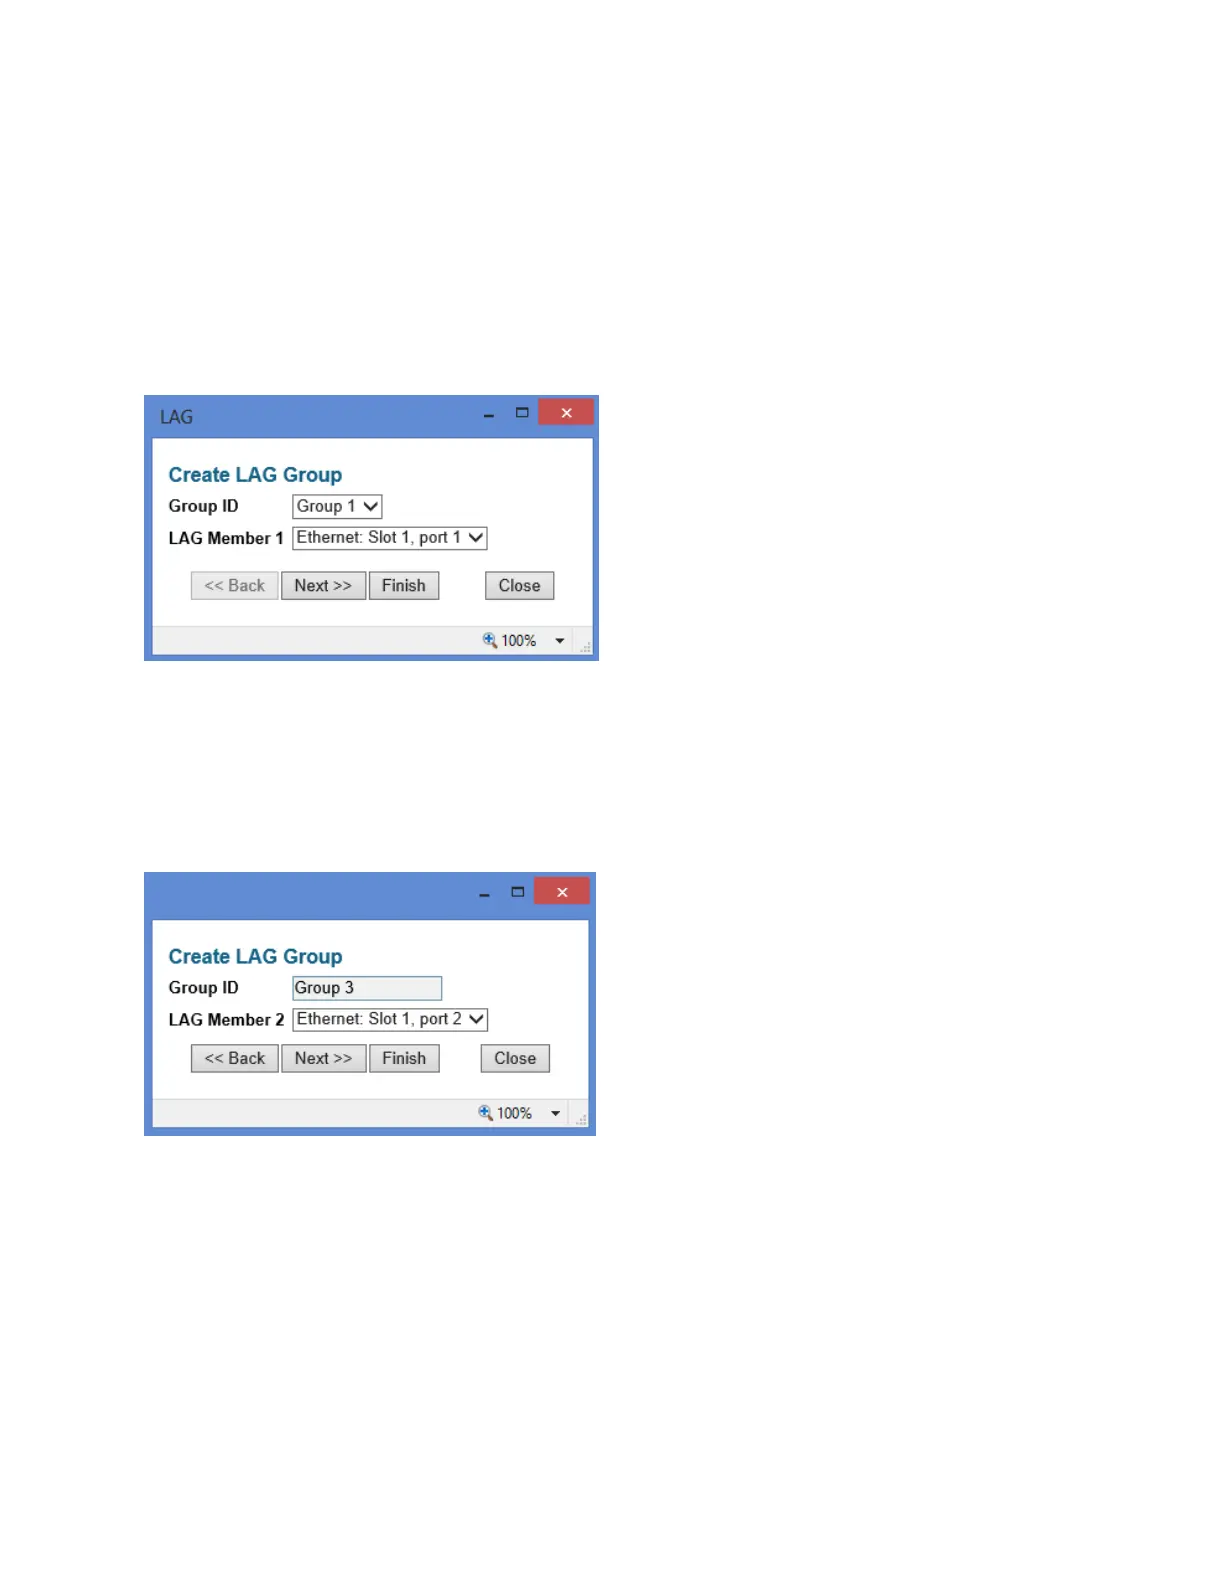
Figure 50 Create LAG Group – Page 1
3. In the Group ID field, select a LAG Group ID. Only LAG IDs that are not already assigned to a
LAG group appear in the dropdown list.
4. In the LAG Member 1 field, select an interface to assign to the LAG group. Only interfaces not
already assigned to a LAG group appear in the dropdown list.
5. Click Next. A new Create LAG Group page opens.
Figure 51 Create LAG Group – Page 2
6. In the LAG Member 2 field, select an additional interface to assign to the LAG Group.
7. To add additional interfaces to the LAG group, repeat steps 5 and 6.
8. When you have finished adding interfaces to the LAG group, click Finish. A new Create LAG
Group page opens displaying all the interfaces you have selected to include in the LAG group.
 Loading...