3-3. Adjustment / Settings
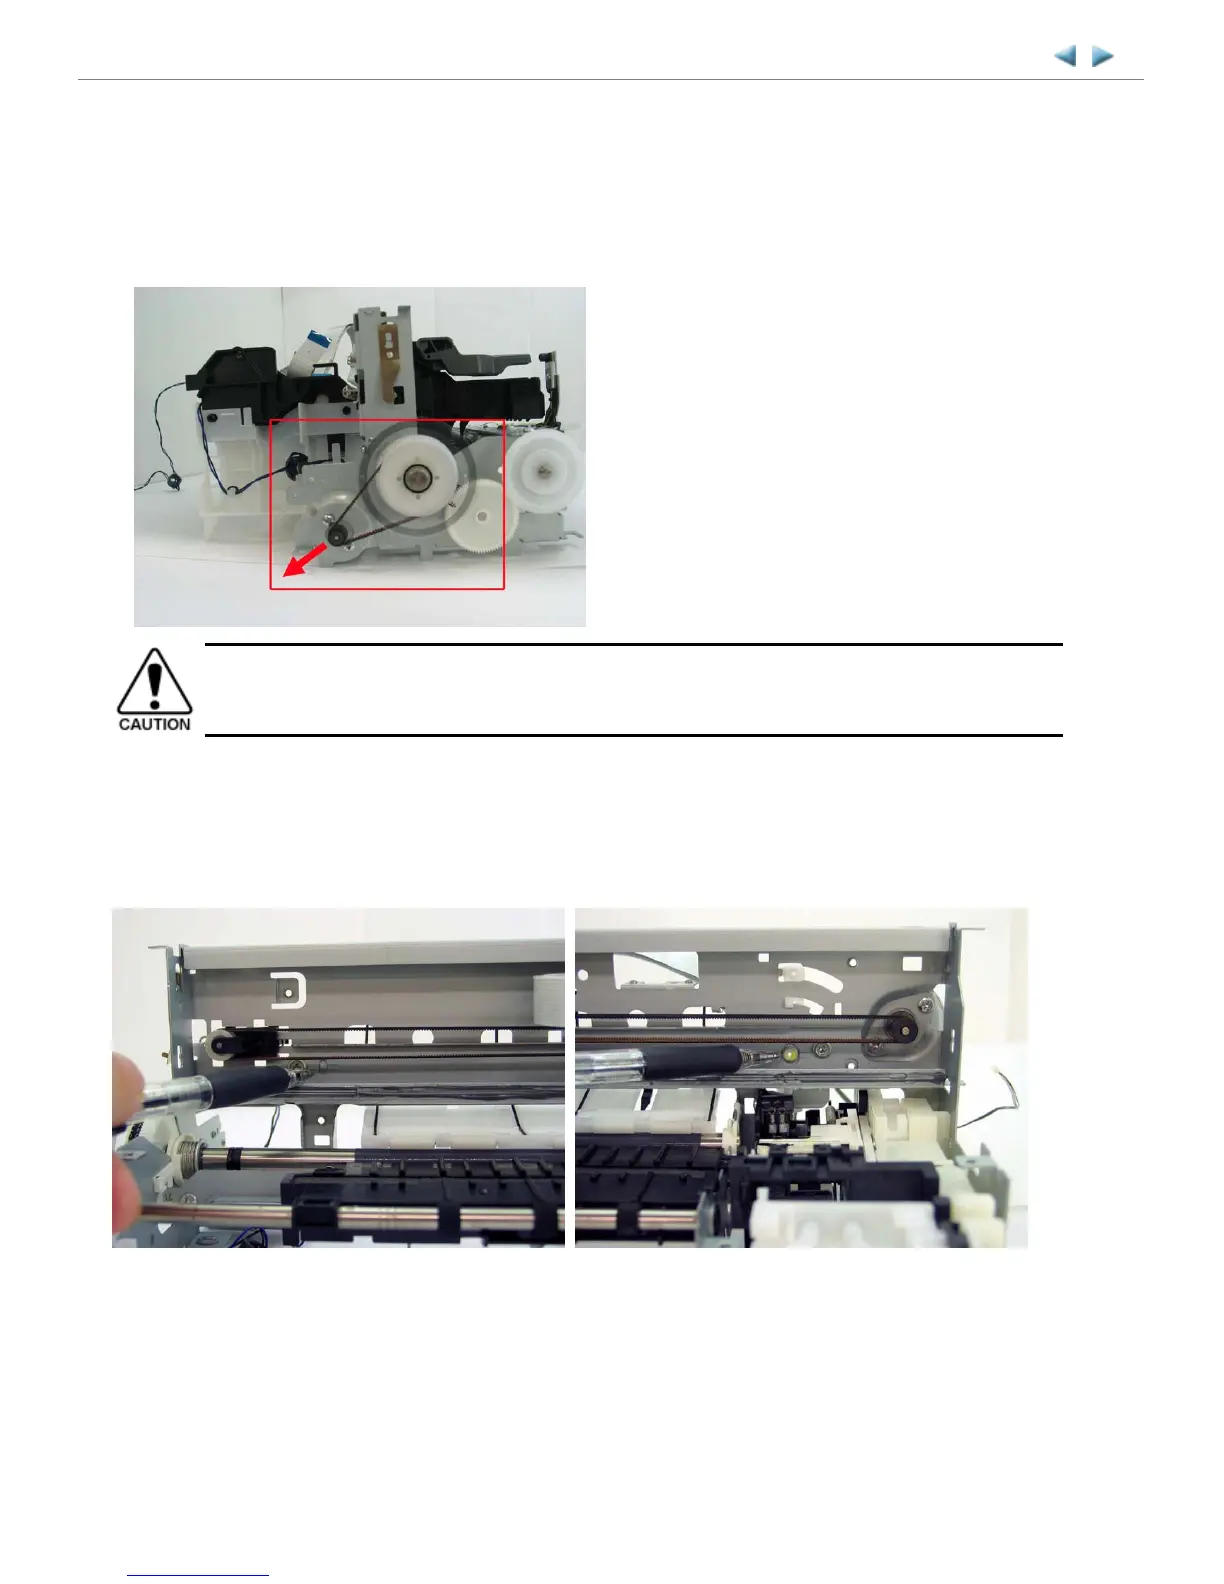
(1) Paper feed motor adjustment
1) When attaching the motor, fasten the screws so that the belt is properly stretched (in the direction indicated by the blue arrow in
the photo below).
2) After replacement, be sure to perform the service test print, and confirm that no strange noise or faulty print operation (due to
dislocation of the belt or gear, or out-of-phase motor, etc.) occurs.
(2) Carriage rail adjustment
Perform the following adjustments when attaching the carriage rail:
1) Before loosening the screws, mark the following positions on the rail:
2) In attaching the carriage rail, make sure that the left boss and right hole fit to the marks made in step 1) respectively, then fasten
the screws.
3) Be sure to perform the confirmation test detailed below; confirm that the print quality is proper and the print head is not contacting
the paper.
MX700 TABLE OF CONTENTS
The screws securing the paper feed motor may be loosened only at replacement of the paper feed motor unit.
DO NOT loosen them in other cases.
Left side: Mark the boss position. Right side: Mark the hole position.