151
Establishing a Wireless LAN Connection
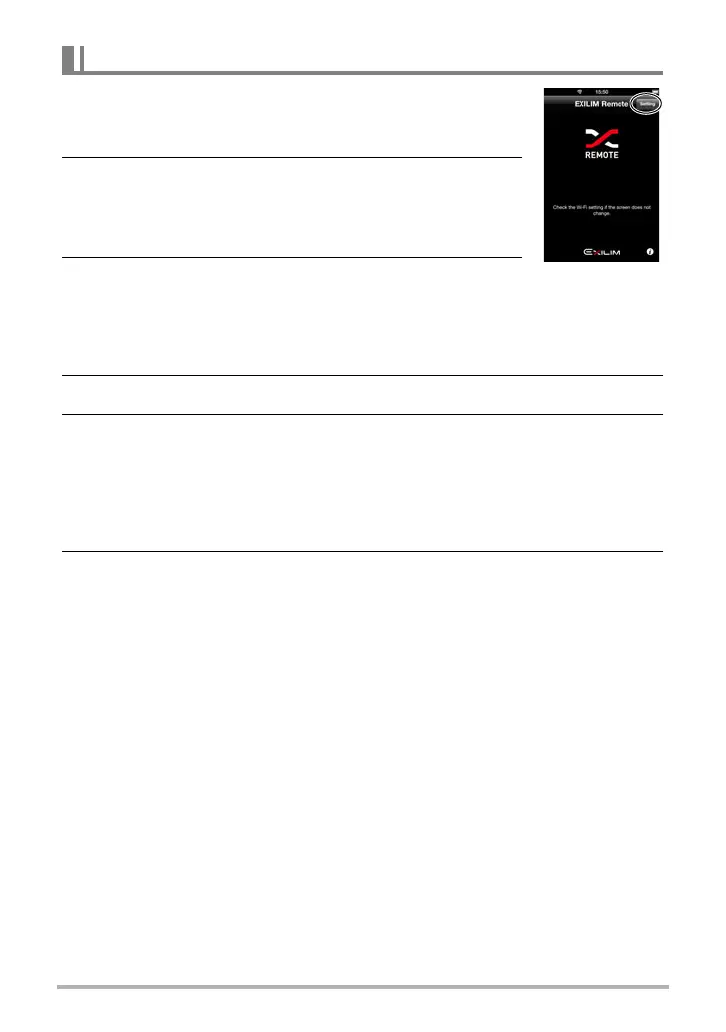
1. On the smartphone, start up EXILIM Remote. In the
upper right corner of the screen that appears, tap
“Setting”.
2. If you plan to upload the image to a social
networking service after sending it to the
smartphone, turn “Send to SNS” on. Otherwise,
turn it off.
3. [8] and [2] to scroll through camera images until
the one you want to send to the smartphone is displayed.
• To send one image from a CS or interval shot group, press [SET] to start
playback of the group images. When the image you want to send is displayed,
press [SET] again to pause playback.
4. Press [Õ] (Continuous Shutter).
5. On your smartphone, start up the EXILIM Remote app.
This will establish a connection between your camera and the smartphone, and
send the files to the smartphone.
• If the message “Connect your phone to the access point below.” remains on
the camera’s monitor screen, change the smartphone’s Wi-Fi settings so your
camera is selected for connection (page 147).
6. After image send is complete, perform either of the operations
described below.
If you turn “Send to SNS” on in step 2 of this procedure:
A screen for uploading the image to a social networking service will appear on
the smartphone screen after image send from the camera is complete. The
wireless LAN between the camera and smartphone will be disconnected at this
time. On the social networking service upload screen, select the service you
want to upload to.
If you turn “Send to SNS” off in step 2 of this procedure:
The camera and smartphone will remain connected by wireless LAN after the
image send operation is complete, so you can repeat steps 3 and 4 of this
procedure to send another image. To break the connection, exit EXILIM
Remote or turn off the camera.
To send the displayed image to a smartphone

 Loading...