Chapter 4. Setting Up Your Show
To set up a new show in 3 steps:
• Start a New Show File.
• Patch the Fixtures.
• Create the Layout.
Start a New Show File
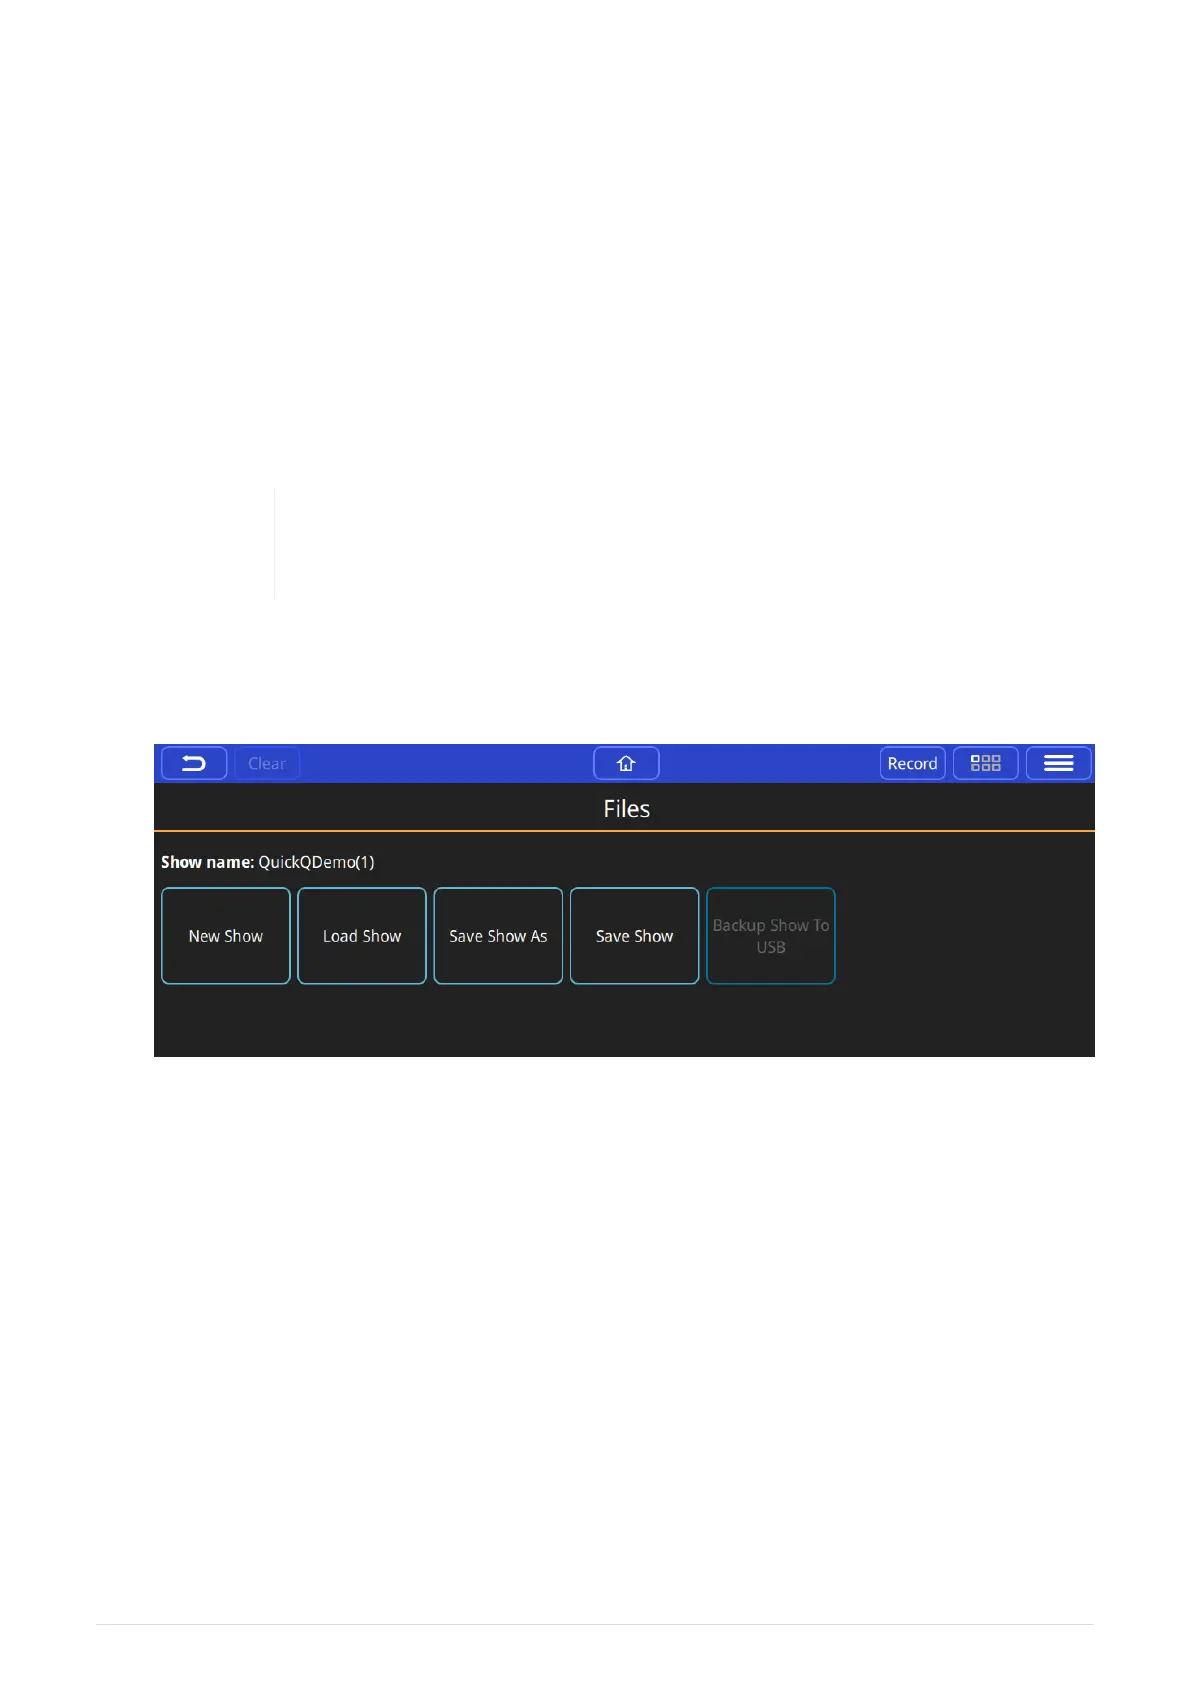
Open the Files Window › Files.
Save your old show first! Use the [ Save Show ] or, to save to a different
name use [ Save Show As ]. We also recommend backing up to a USB Drive.
Insert a USB drive and use [ Backup Show to USB ].
In the Files Window, Press [ New Show ]. This clears the current show file from active
memory – saved shows still remain stored on the console storage drive if you have saved
them and can be reloaded using [ Load Show ]. Confirm by selecting [ Yes ].
Once a new show has been started the console will automatically open the Patch Window.
Patch the Fixtures
"Patching" is the process to tell QuickQ consoles what fixtures you want connected to which
faders and to tell the console to use a particular file ("fixture file") to translate our commands
on the console into levels understood by the fixture. We also have to tell the console which
DMX channels the fixture expects communication on.
We do this by assigning a DMX start address on the physical fixture, picking a fixture
operating mode, and matching this during patching. This is typically done when we first set
the fixtures up, by using their onboard menu systems described in the fixture’s manual. We
also need to know which "Universe" of DMX the fixture is plugged into so we can match this
with the DMX universe ports on the console.
12
QuickQ v6
2021-03-12