Edge/Edge Blanket Repair
7-29
Discharge Conveyor Doffer Roll
Cover Replacement
It is recommended that, on older units with
two doffer rolls, both covers be replaced at the
same time.
Required Tools
7/16” wrench, utility knife, scraper/
sandpaper/steel brush, clean cloths,
contact adhesive, putty knife or paint
brush(s), filament tape, paint thinner,
plug, compressed air
Perform only when the unit is OFF
with power disconnected.
Make sure that the replacement canvas and
foam are the correct size.
Make sure that power is turned OFF at the
main disconnect switch.
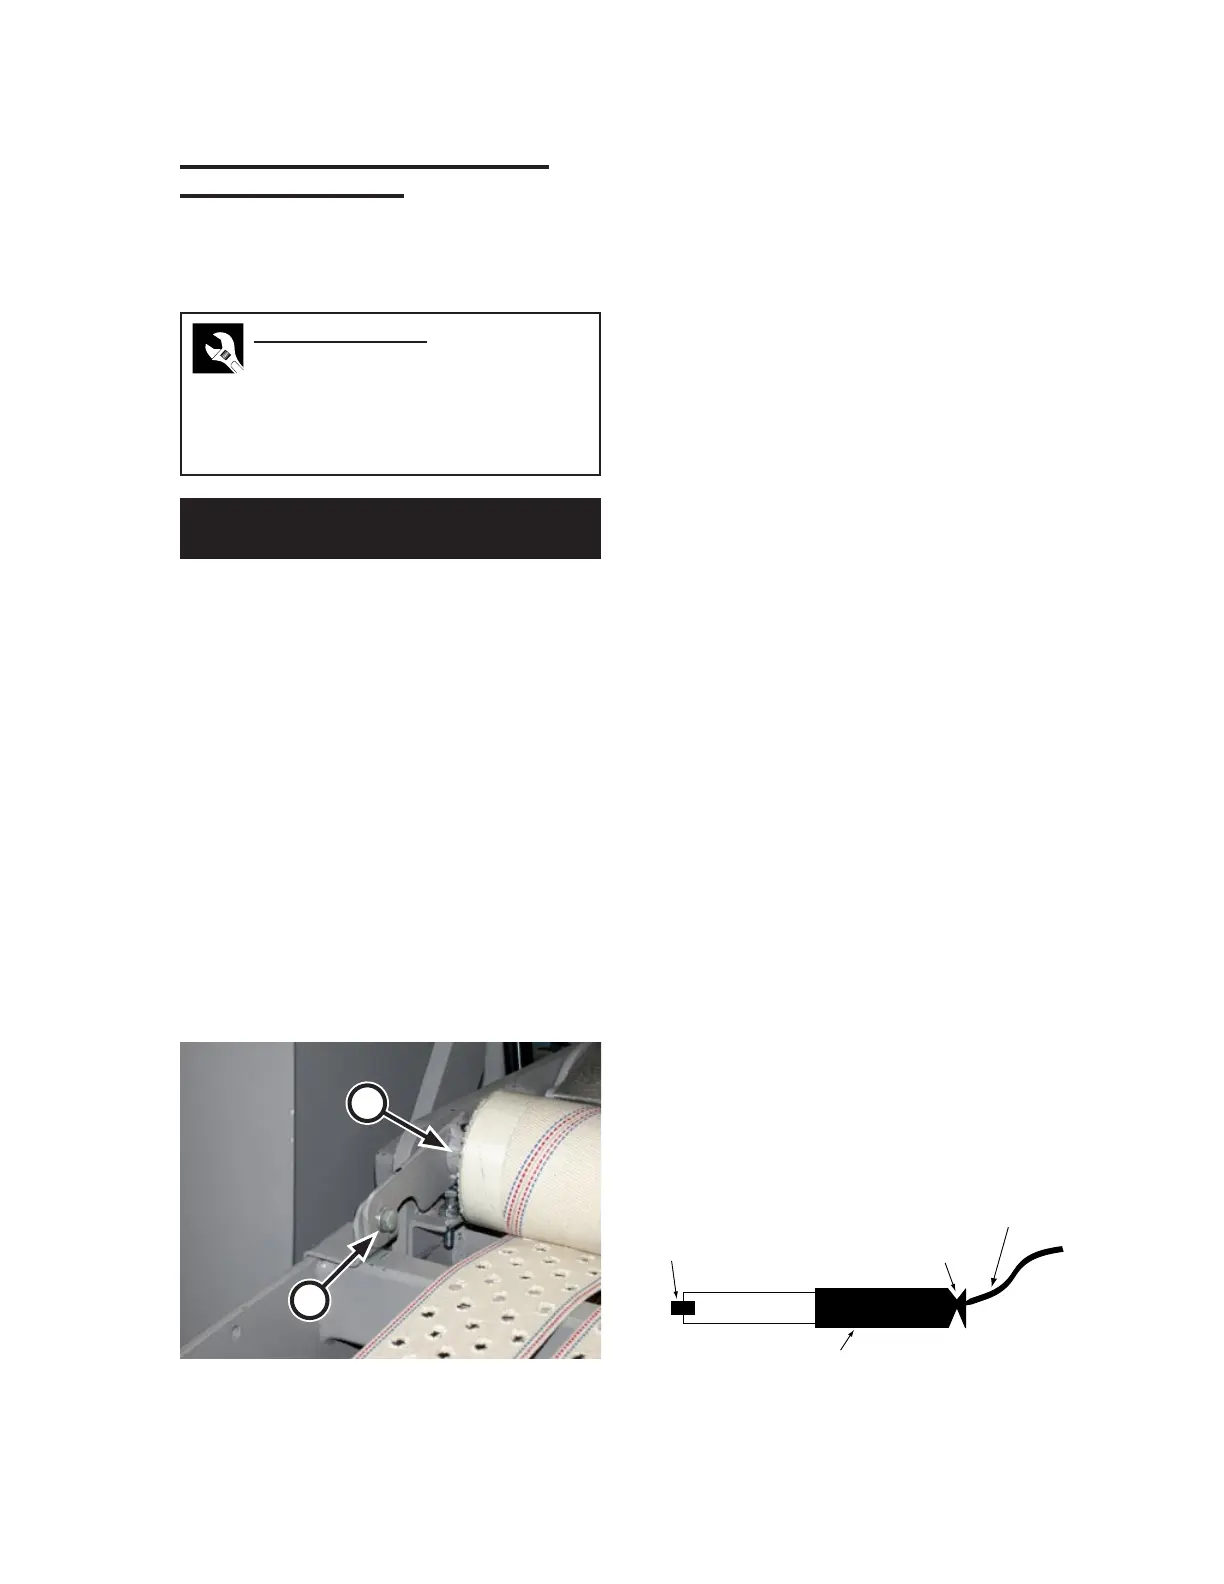
At the left end of the machine, remove the
bolt (Figure 7-39, A) which secures the
doffer roll bracket.
Lift the doffer roll slightly and pull its
bracket (Figure 7-39, B) out from the end
of the roll.
Pull the doffer roll off the machine and
place in a suitable work area.
1.
2.
3.
4.
5.
Cut and remove the glass filament tape
located at each end of the doffer roll.
Pull or cut off the old canvas cover and
the foam tubing.
Remove old adhesive from the ends of
each doffer roll with a scraper, coarse
sandpaper, or a steel brush. Wipe off any
remaining residue with a clean cloth.
Using a fresh cloth or brush, apply paint
thinner on the entire surface of the doffer
roll and wipe it down.
Plug the opening at one end of the doffer
roll to make it air tight (Figure 7-40, A).
Trim 1’ (305 mm) from one end of each
foam tube.
Pull the leading edge of a new foam tube
onto the first few inches of the doffer roll
opposite from the plugged end.
Place the end of a compressed air hose in
the far end of the foam tube and pinch the
end of the tube tightly around the air hose
(Figure 7-40, B).
Turn on the compressed air. This will
slightly inflate the tube and make it easier
to slide the rest of the tube onto the doffer
roll.
Pull the tube all the way to the end.
Repeat Steps 12 to 14 for the second tube
so that the roll is completely covered with
the foam tubing.
6.
7.
8.
9.
10.
11.
12.
13.
14.
15.
16.
Figure 7-40: Use compressed air to make it easier
to slide the foam tube onto the roll.
Doffer Roll
Foam
Compressed Air
Plug (A)
Pinch (B)
Figure 7-39: The doffer roll must be completely
removed from the unit in order to
replace its cover.
A
B
 Loading...