Edge/Edge Blanket Operating Guidelines
3-7
Start-Up
The following steps are suggested for start-up
of the spreader/feeder each day.
Perform all daily preventive maintenance
and cleaning procedures. For more in
-
formation, refer to the PREVENTIVE
MAINTENANCE chapter, Daily PM
section.
Have flatwork fully washed and extracted,
sorted, and ready to process.
Turn ON the compressed air supply to
the unit.
Turn power ON at the main disconnect
switch.
Press the green Start button. The indica
-
tor lamp in the switch lights and the CHI
Panel begins its start-up diagnostics. Then,
all rotating and conveying elements begin
to operate.
NOTE: If the unit is part of a
line with the Interconnected Stop
Circuit option, turn power ON at
the main disconnect switch to
each of the other machines in the
line.
1.
2.
3.
4.
5.
Perform a safety check:
Press a red safety STOP button. All
moving parts should stop and an error
message should display in the CHI
Panel.
Reset the red safety STOP button by
twisting it clockwise.
Restart the unit.
Test each of the 5 remaining red safety
STOP buttons in the same manner.
To test the Interconnected Stop Cir
-
cuit, start another machine in the line
and press a red safety STOP button on
that machine. Make sure the spreader/
feeder shuts down, an error message
displays in the CHI Panel and the red
SYSTEM E-STOP lamp glows.
Reset the stopped unit so that the green
SYSTEM READY lamp glows.
Restart the unit.
Test the crossbeam sensor by momen
-
tarily blocking the beam. All moving
parts should stop and an error message
should display in the CHI Panel.
Restart the unit
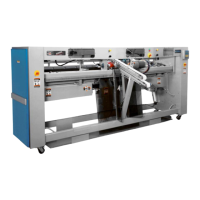
Test the two mass sensors one at a time.
Press down on the lower inlet belt just
above a mass sensor (Figure 3-9, A).
The upper arm should raise, all moving
parts should stop and an error message
should display in the CHI Panel.
Restart the unit and repeat the test with
the second mass sensor (B).
6.
•
•
•
•
•
•
•
•
•
•
•
•
Figure 3-9: Two mass sensors are located under
the lower inlet belt.
B
A