Repair Edge/Edge Blanket
7-28
Scrape off any old cement which remains
on the roll using a scraper, coarse sand-
paper or a wire brush. Wipe away any
remaining residue with a clean cloth.
To apply the tape:
Cut a 9-7/16” (238 mm) for each
placement.
Remove the backing from the tape
Line the tape up with the center
mark.
Wrap the tape around the roll and butt
the ends together.
Repeat Step 10 for each tracking tape
location.
Bring the ribbons back into position and
replace the connecting pins. Make sure
the 1/2 right twist is maintained on the
underside of the discharge conveyor
(Figure 7-35).
Move the unit back into position.
9.
10.
a)
b)
c)
d)
11.
12.
13.
Discharge Conveyor Doffer Roll
Pressure Adjustment
The doffer roll is designed to help make
flatwork lays down smooth and flows easily into
the ironer.
If the doffer roll is not applying sufficient
pressure against the discharge ribbons, it will
stop rolling or only roll sporadically.
If the doffer roll is applying too much pressure
against the discharge ribbons, flatwork may
“recoil” or otherwise become disturbed when
the first roll of the ironer begins pulling on the
material.
Additional Tools
wrenches
Perform only when the unit is OFF
with power disconnected.
Turn power OFF at the main disconnect
switch.
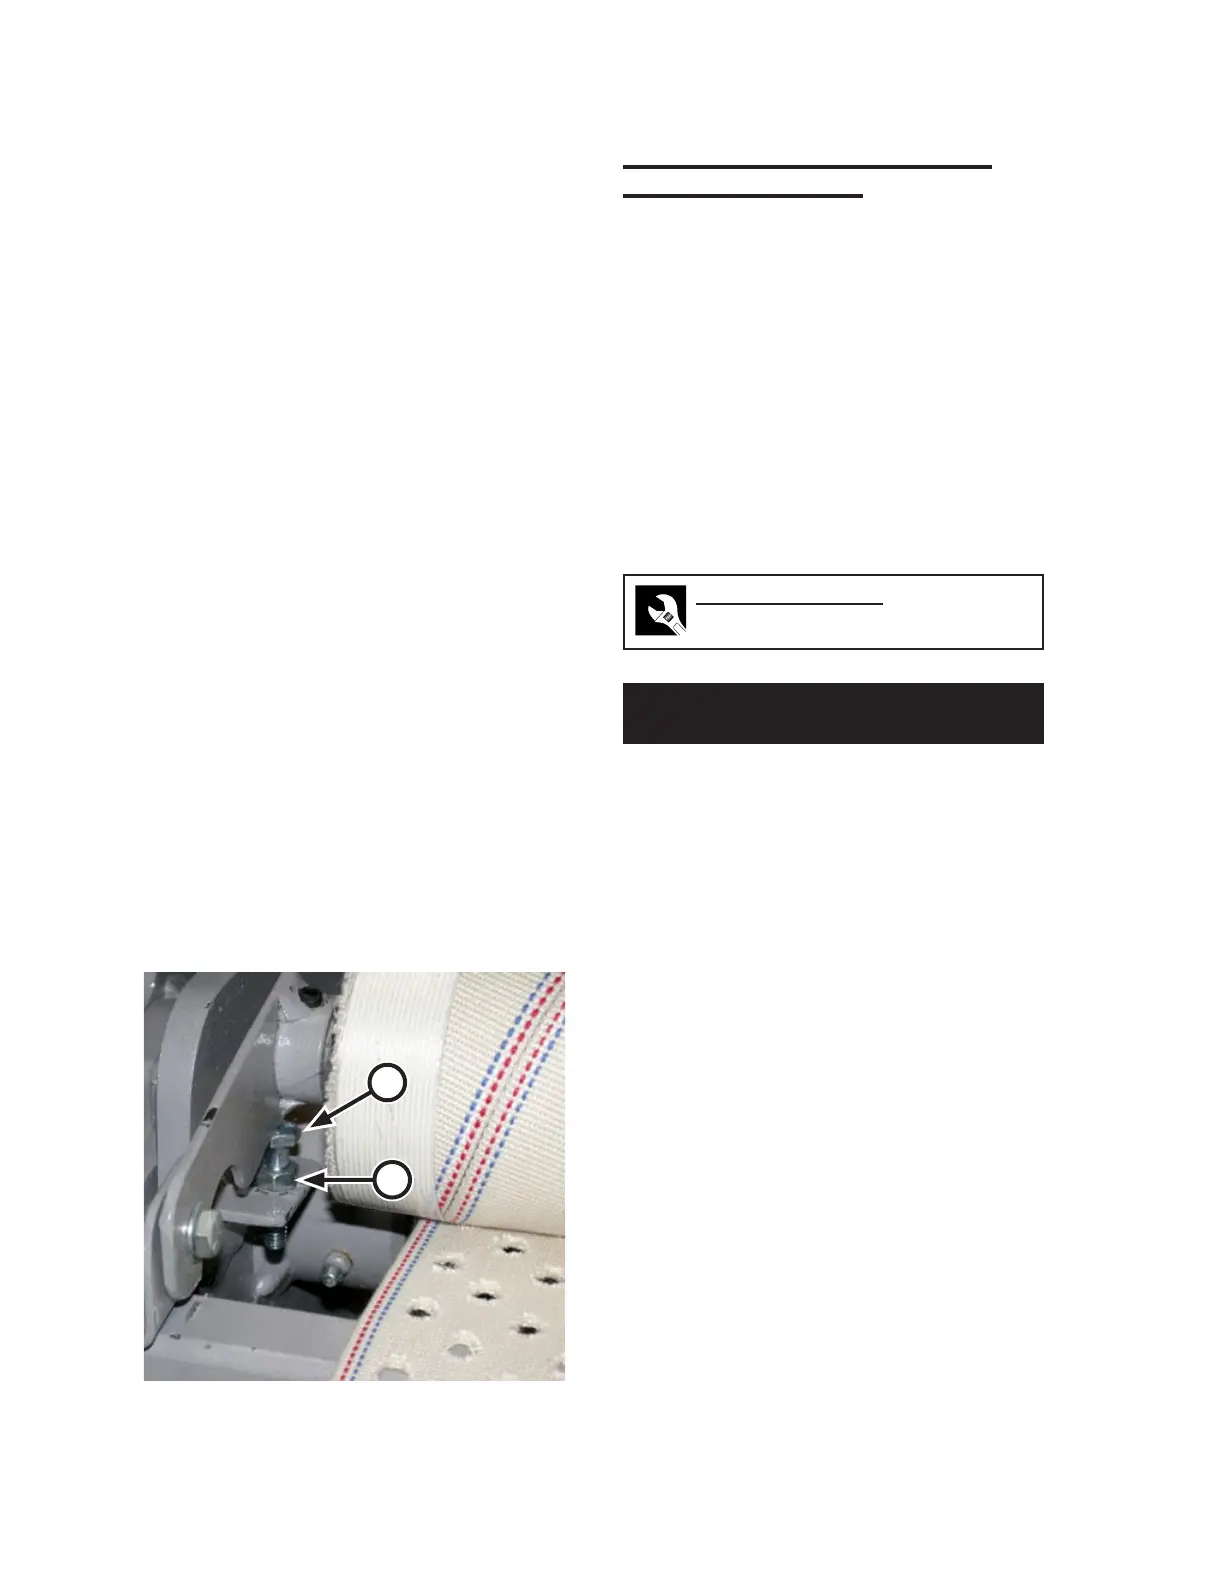
Locate the doffer roll pressure adjustment
bolt at the left rear of the machine (Figure
7-38). There is one on each side.
Loosen the locknut (Figure 7-38, A) and
then the adjustment bolt (B) clockwise to
increase pressure or counterclockwise to
decrease pressure.
Tighten the locknut.
Turn the machine on and process several
pieces to verify correct operation of the
doffer roll.
1.
2.
3.
4.
5.
Figure 7-38: A pressure adjustment bolt is located
at each end of the doffer roll.
A
B