Edge/Edge Blanket Preventive Maintenance
4-15
CAUTION
Remove the cap slowly.
There is a compressed
spring just behind the cap
(Figure 4-21). Do not lose this
spring. You will need it for
reassembly.
Slowly pull the cap with the bearing
screws still attached away from the carrier
bracket, being very careful to keep track of
the compressed spring (Figure 4-21).
The bearings will come out as the end cap
is pulled away from the carrier bracket.
Remove the old bearings from the cap
by removing the bearing screws (Figure
4-22).
Mount the new bearings to the cap with
the screws just removed.
Slide the bearings into the carrier brack
-
et.
Use a small slotted screwdriver to care
-
fully compress the spring under the edge
of the carrier bracket as you slide the end
cap closed (Figure 4-21).
Re-install the end cap mounting screw.
Re-install the bearing screws on the op
-
posite end of the carrier bracket.
12.
13.
14.
15.
16.
17.
18.
19.
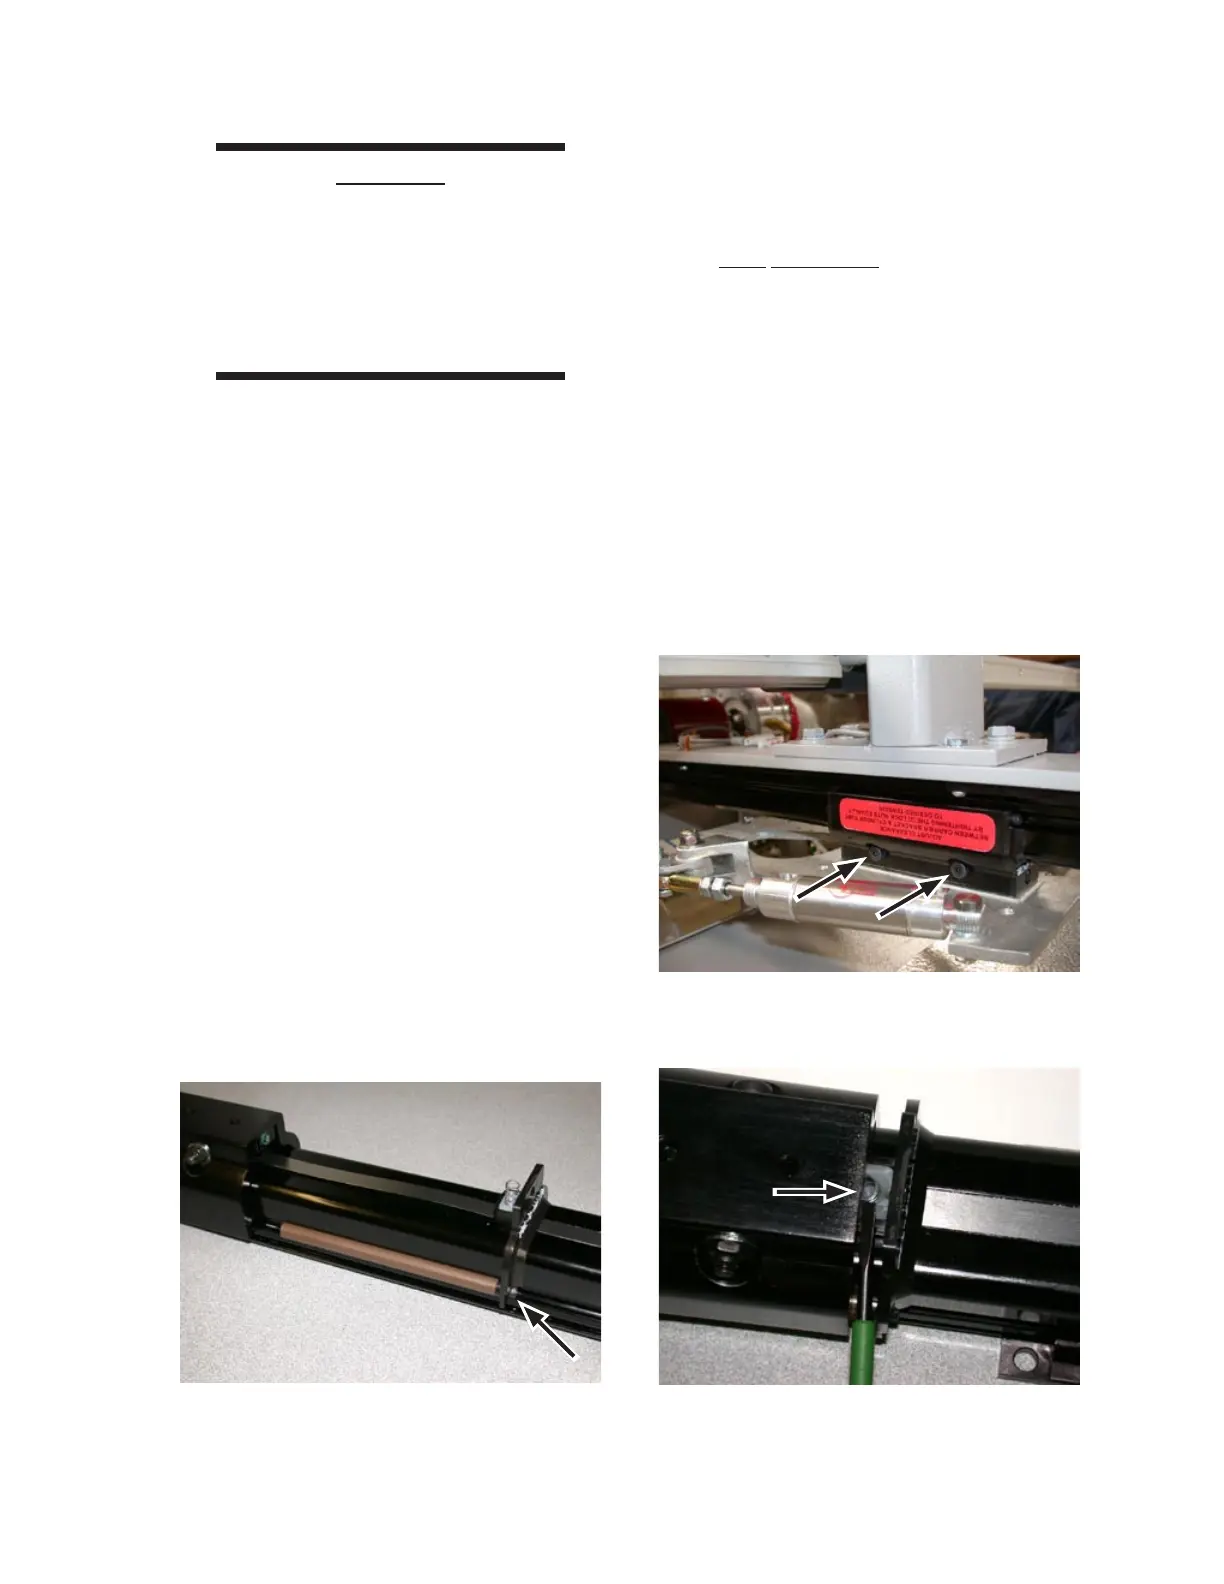
Figure 4-22: Remove the screws which secure the
bearings to the removed end cap.
Figure 4-21: Control the spring when sliding the
end cap into or out of position.
Figure 4-23: These screws adjust the tension of the
carrier bracket.
With the new bearings in place, adjust the
tension of the carrier bracket using the two
hex nuts shown in Figure 4-23. Adjust the
carrier so that it moves smoothly and is
snug, but not tight.
Re-install the rodless air cylinder onto its
bracket using the screws, nuts and washers
removed in Step 8. Before securing the
bracket, be sure to precisely align using
the measurements from Step 4.
Reconnect the air hoses to the rodless air
cylinder.
Reinstall the upper transfer clamp bracket
using the bolts removed in Step 5.
Start the unit to test and verify the opera
-
tion of the rodless air cylinder.
20.
21.
22.
23.
24.