EasyManuals Logo

Cisco ASR 903 Installation Instructions

Cisco ASR 903
66 pages
To Next Page IconTo Next Page
To Previous Page IconTo Previous Page
Page #44 background imageLoading...
Page #44 background image
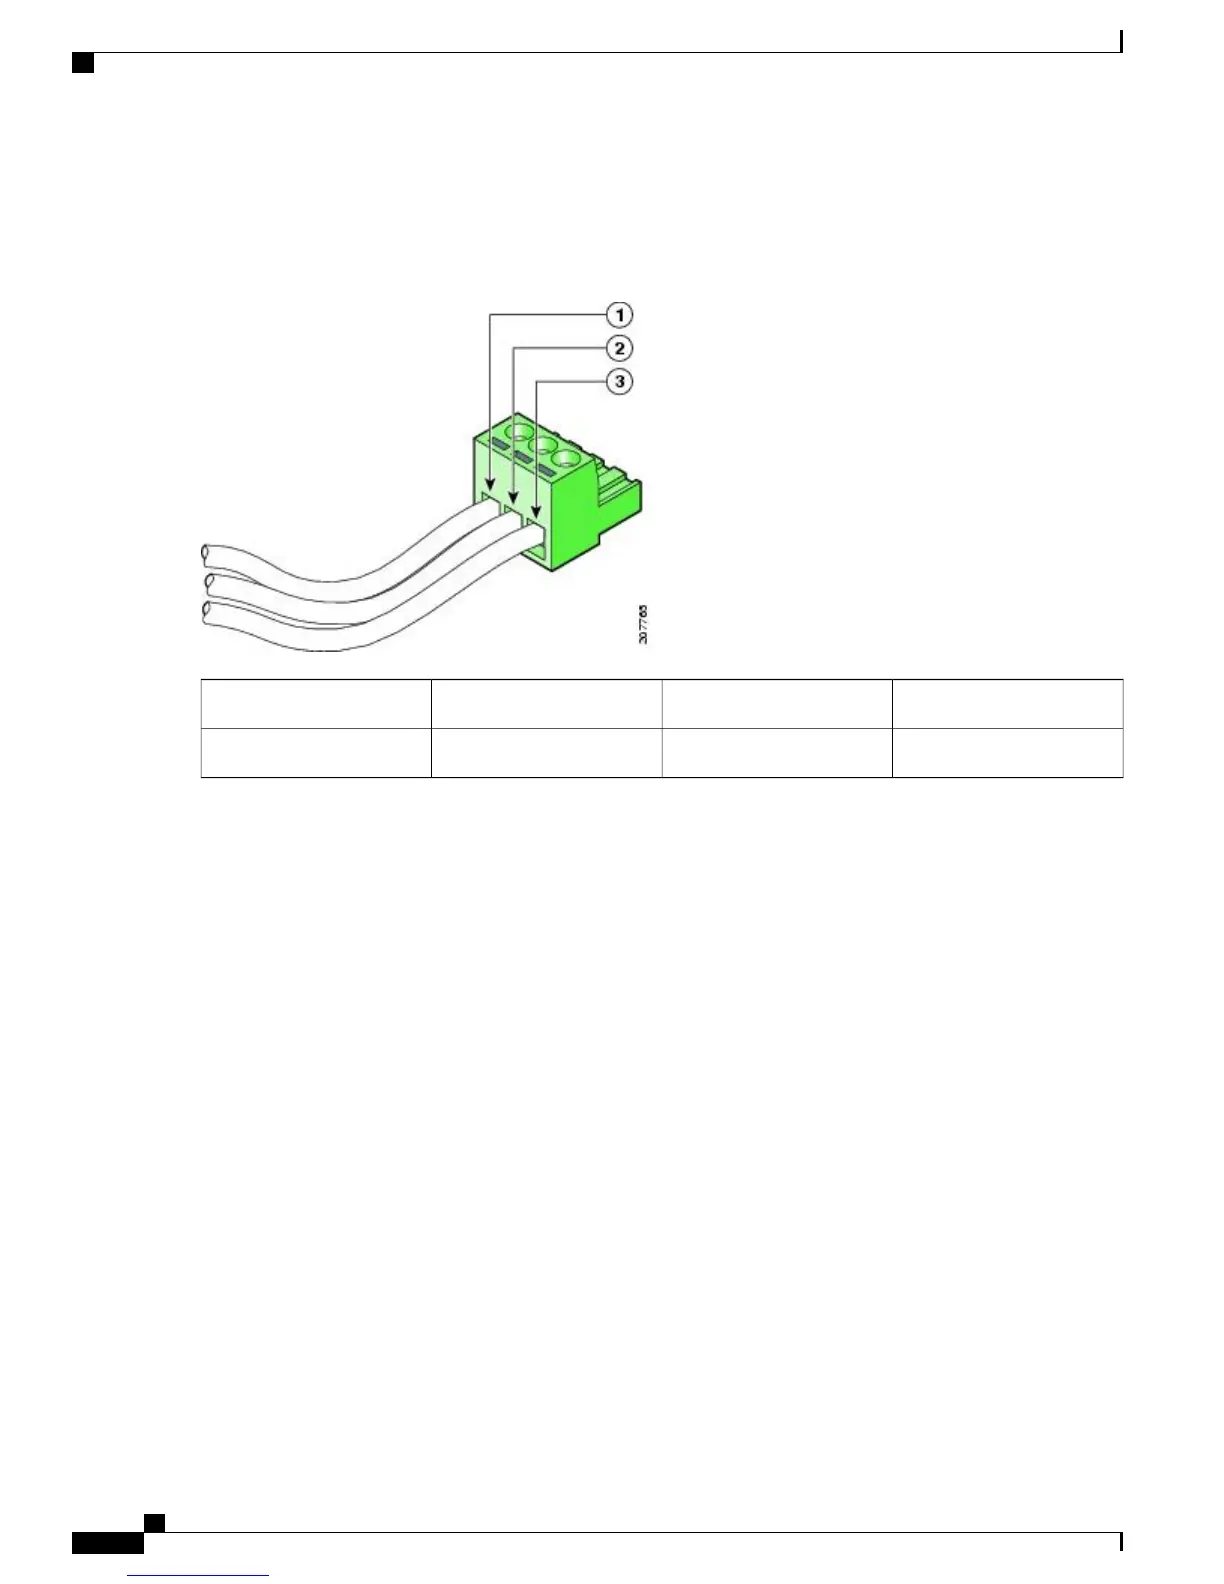
c) Positive (+) lead wire (middle)
Figure 19: DC Power Supply with Lead Wires
Positive (+) lead wire3Ground lead wire1
Negative () lead wire
2
Step 4
Insert the exposed wire of one of the three DC input power source wires into the terminal block plug. Make sure that
you cannot see any wire lead. Only wire with insulation should extend from the terminal block.
Do not overtorque the plug captive screws of the terminal block. The recommended maximum torque is from
0.5 Nm (4.425 lbf/sq in) to 0.6 Nm (5.310 lbf/sq in).
Caution
Cisco ASR 9000 Series Aggregation Services Router Satellite Systems Installation Guide
44
Installing the Cisco ASR 903 Router as a Satellite Shelf
Installing the DC Power Supply

Table of Contents

Other manuals for Cisco ASR 903

Questions and Answers:

Question and Answer IconNeed help?

Do you have a question about the Cisco ASR 903 and is the answer not in the manual?

Cisco ASR 903 Specifications

General IconGeneral
Form FactorModular
Storage Temperature-40°C to 70°C (-40°F to 158°F)
Humidity5% to 95% non-condensing
RedundancyYes, redundant power supplies and route processors
Operating SystemCisco IOS XE
Power SupplyAC or DC
Switching Capacity240 Gbps
Operating Temperature-40°C to 65°C (-40°F to 149°F)
MTBF200, 000 hours
Supported ProtocolsIPv4, IPv6, MPLS, L2VPN, L3VPN
InterfacesGigabit Ethernet, 10 Gigabit Ethernet, T1/E1

Related product manuals