1 2 3 4
56
Operating Manual
3
2
1
2
nd
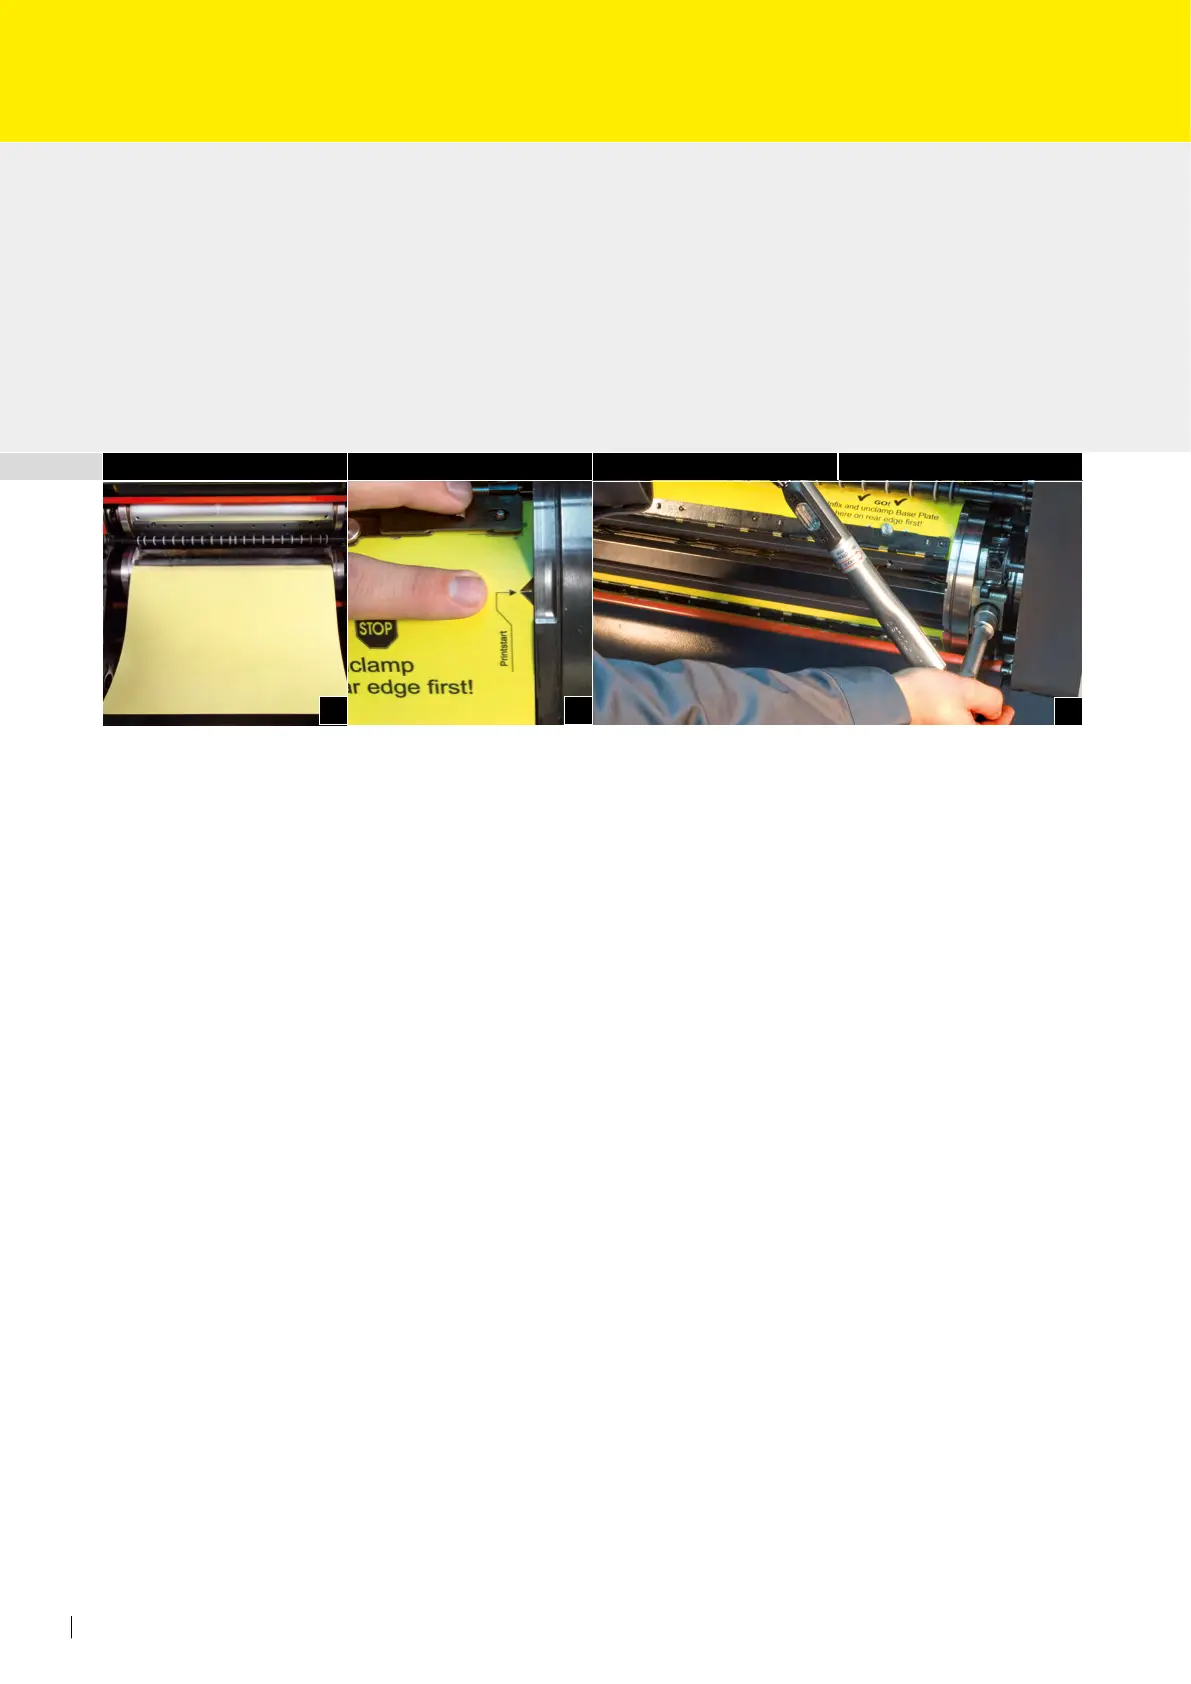
Step: Clamping the RSP base plate
• Remove blanket.
• If necessary, hang on calibrated packing sheets at the beginning
of the blanket cylinder. For determining the packing height, see page 80 (Fig. 1).
• Hang the base plate with the print start side into the front blanket lock-up shaft of the
blanket cylinder.
• Now turn the blanket lock-up shaft so that the position mark of the base plate (Print-
start) conforms with the print start line of the blanket cylinder (Fig. 2)!
• Draw in the base plate together with the calibrated packing sheets by inching forward.
Hang the base plate into the rear blanket lock-up shaft and clamp by 25 Nm at the
rear edge using a torque screwdriver. The front position marking should be checked
once more (Fig. 3).
Important note:
The position marking (Printstart) on the base plate must conform with the printstart line
of the blanket cylinder!
Incorrect operation may cause damages to the impression cylinder and/or blanket cylinder!
When unclamping the RSP base plate likewise pay attention to Printstart.
The base plate should rst be removed at the back blanket lock-up shaft.
The printstart position must be held until full removal of the base plate.
No positioning corrections must be made by pulling the base plate backwards or forwards!