1 2 3 4
57
Operating Manual
QV3.3
4321
3
rd
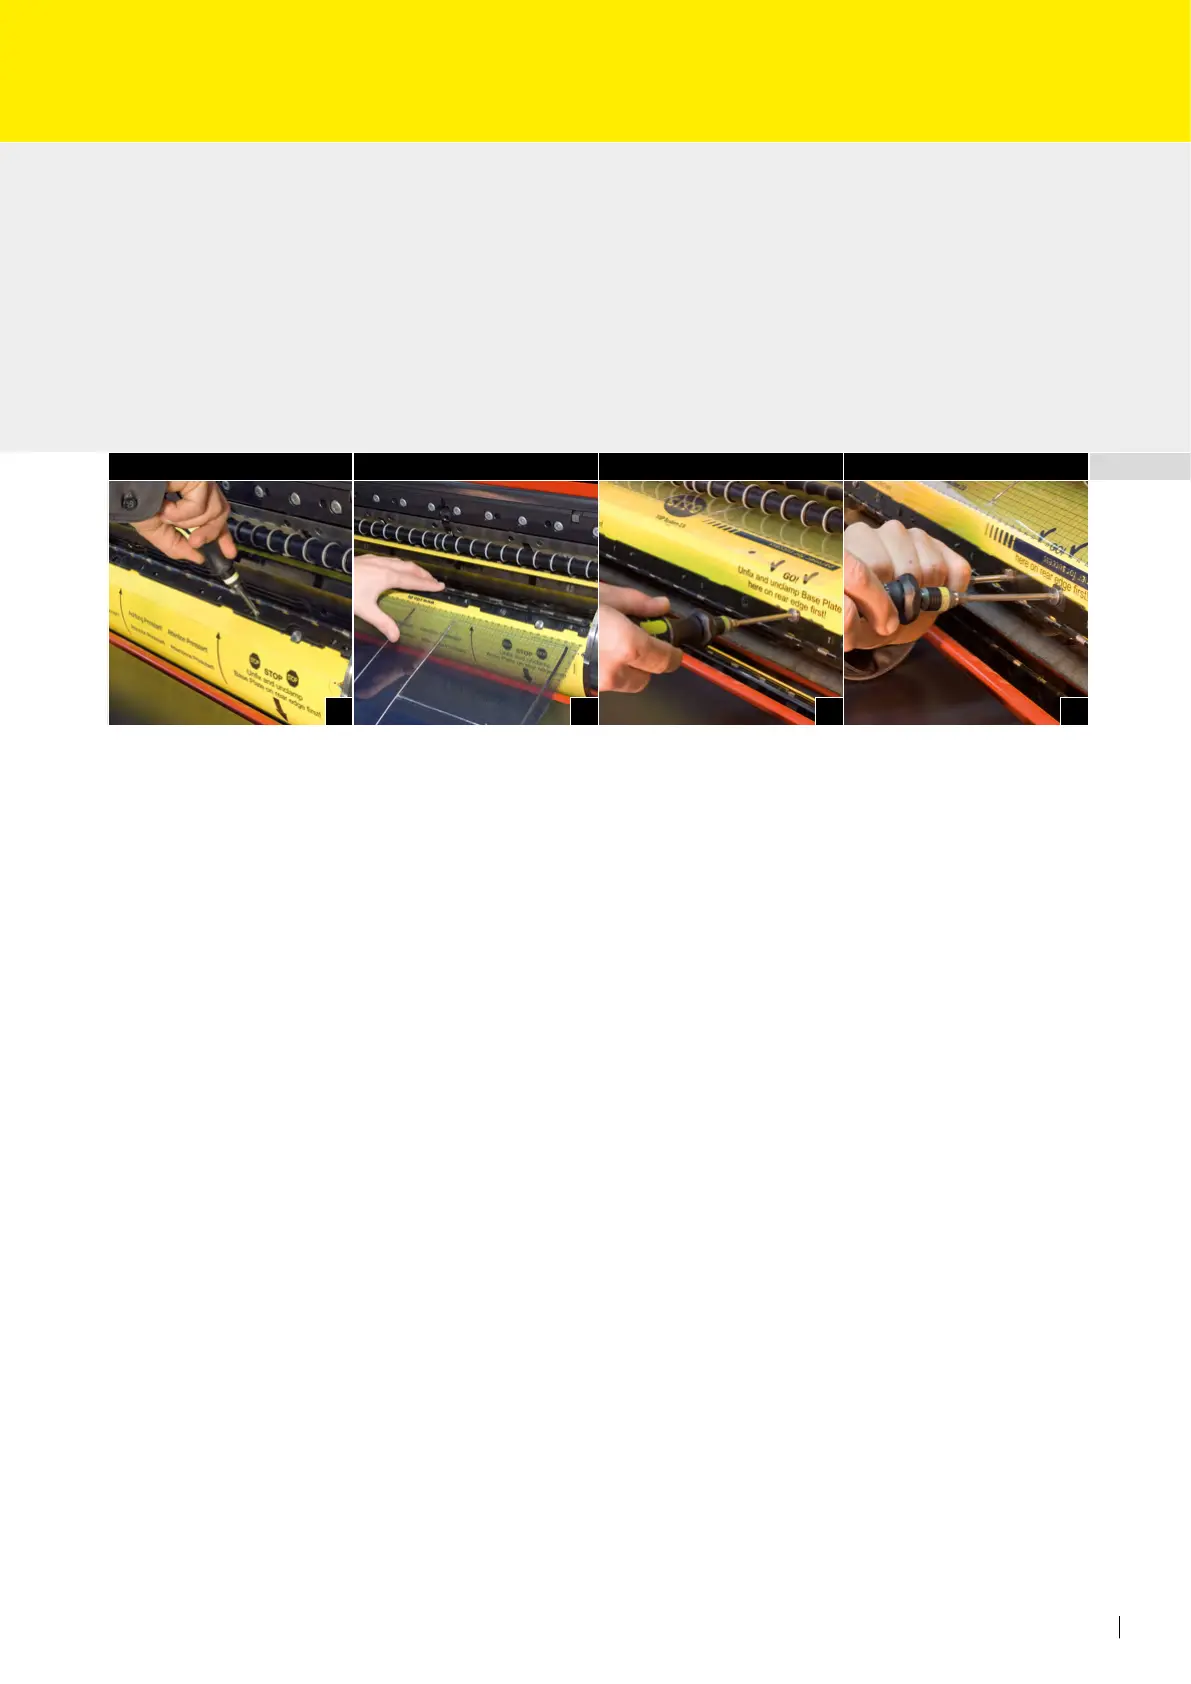
Step: Fitting the RSP grid sheet or RSP direct t exible die
Important note:
Please check before installation of the base plate that the closure hinge at the front edge
has been set to the central position with the register adjustment.
The RSP direct t exible die is 0.30 mm lower (no compensation required) than an RSP
grid sheet with attached tool. Therefore always set the cylinder spacing to a sufcient
distance (0.35 mm) whenever changing an RSP grid sheet / RSP direct t exible die.
The RSP system 2.0 must only be operated – even during inching of the press – with
the locking hinge closed!
Always tighten the locking screws to a torque of 1.2 Nm. Use only the TX 20 torque
screwdriver supplied to loosen and tighten the screws.
When installing and removing the RSP direct t exible dies, we recommend wearing
safety gloves (RSP accessories).
• Open the front closure hinge using the unlocking tool (Fig. 1)
• Hang the assembled RSP grid sheet or RSP direct t exible die with the print start
side in the dome of the front hinge lower section; close the front closure hinge by
pressing together (Fig. 2/2a)
 Loading...