75
Operating Manual
Please note:
• The position of the base plate (Print Start marking) must line up with the Print Start
line of the blanket cylinder.
• Incorrect handling can lead to damage to the impression cylinder or blanket cylinder!
• When unclamping the RSP base plate, also pay attention to the Print Start line.
• Release RSP base plate at the rear blanket cylinder expansion shaft rst, then remove.
• The Print Start position must be maintained until the RSP base plate has been fully
removed.
• Positioning corrections should not be carried out by pulling the RSP base plate back-
wards or forwards.
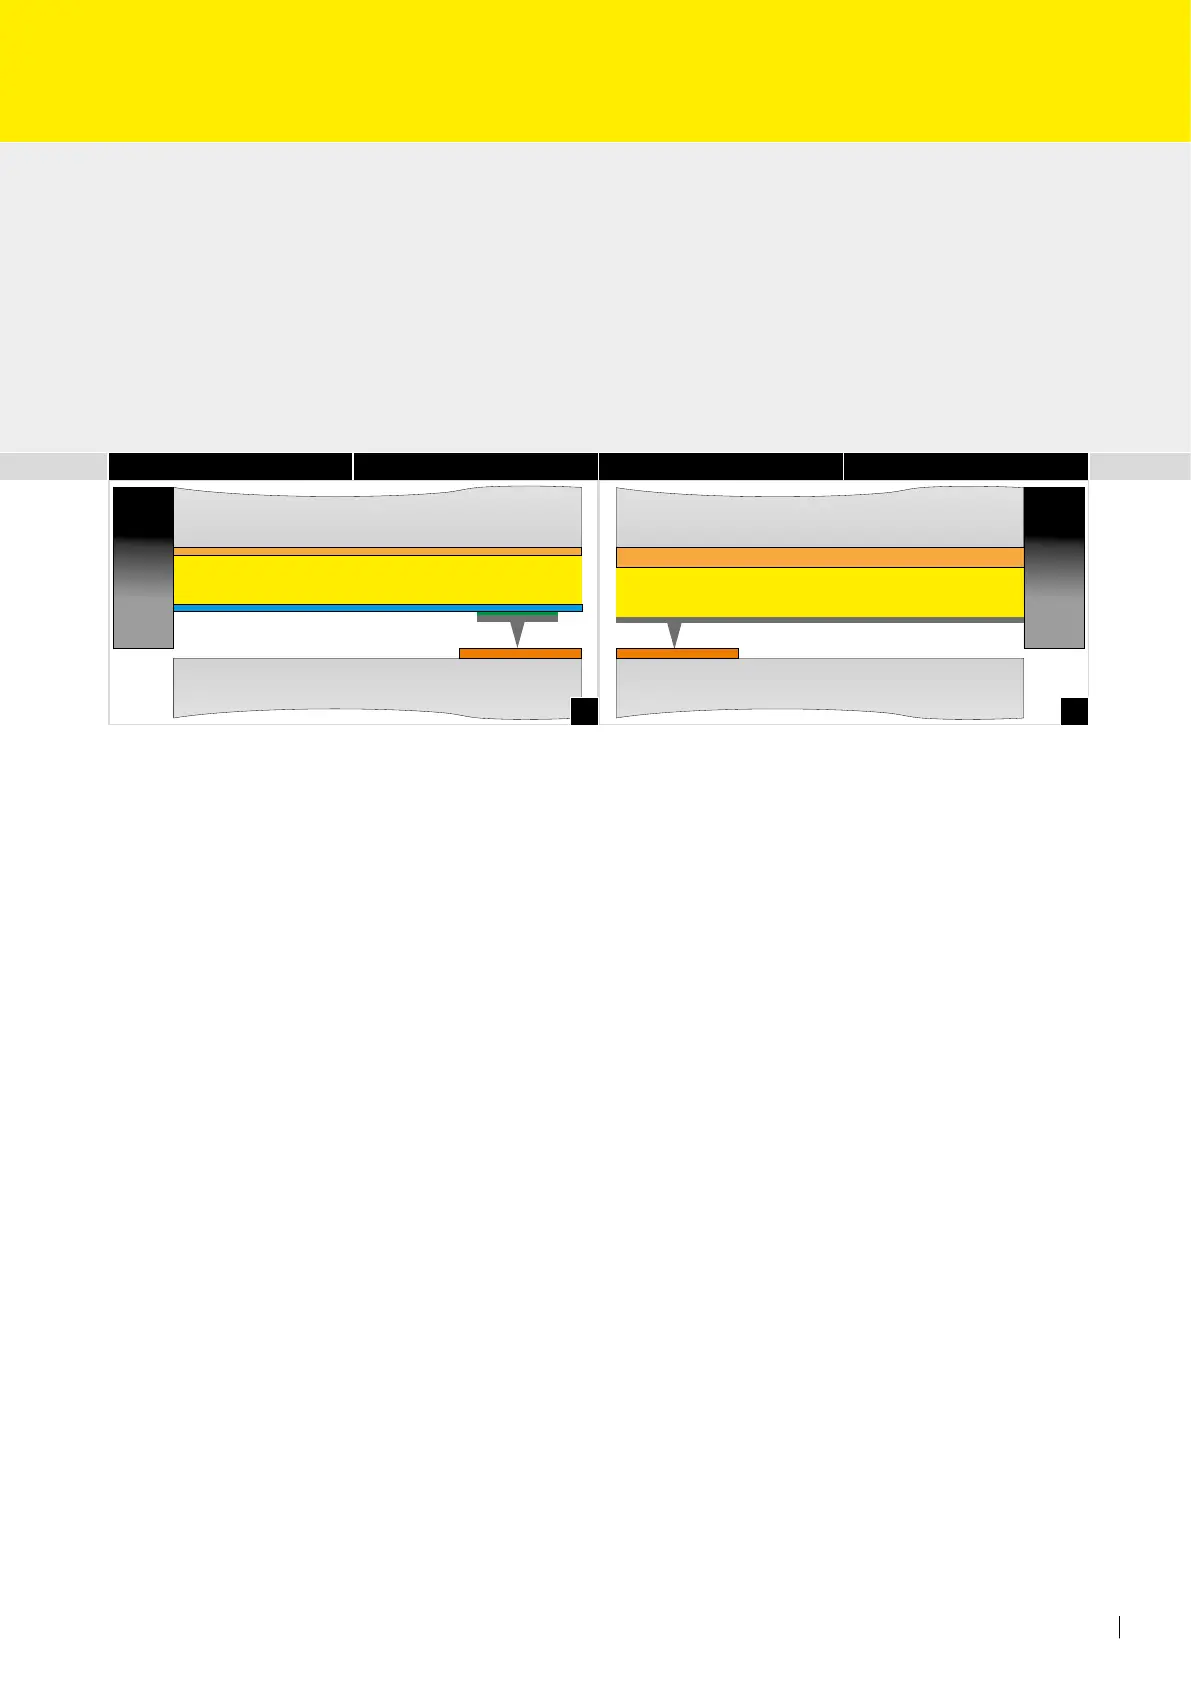
Instructions for using grid sheets or direct t exible dies:
When using grid sheets, please use 0.30 mm packing under the base plate. If a substrate of
0.15 mm or thinner is being nished, always work with a packing of 0.20 mm (Fig. 4) when
using a grid sheet because of the excessive pressure caused by the substrate thickness set-
ting and the limited printing pressure. A packing of 0.5 mm is only for use with an RSP
direct t exible die and in this case it replaces the packing of 0.3 mm or 0.2 mm (Fig. 4)!
Instructions and data apply to standard machines with a groove of 2.6 mm without foils
afxed to the blanket cylinder. Please check all values in advance, as well as the printing
pressure, as printing presses can always be individually adjusted.
Instructions for tting direct t exible dies
Push the direct t exible die into the channel of the cylinder as shown in gure 1 to
ensure secure closure of the locking hinge at the front edge.
Impression cylinder
Blanket cylinder
RSP base plate
RSP grid sheet
RSP flexible die
with RSP adhesive tape
Packing sheet
Bearer
Impression cylinder
Blanket cylinder
RSP base plate
RSP direct fit flexible die
Packing sheet
Bearer
Impression cylinder
Blanket cylinder
RSP base plate
RSP grid sheet
RSP flexible die
with RSP adhesive tape
Packing sheet
Bearer
Impression cylinder
Blanket cylinder
RSP base plate
RSP direct fit flexible die
Packing sheet
Bearer
65
 Loading...