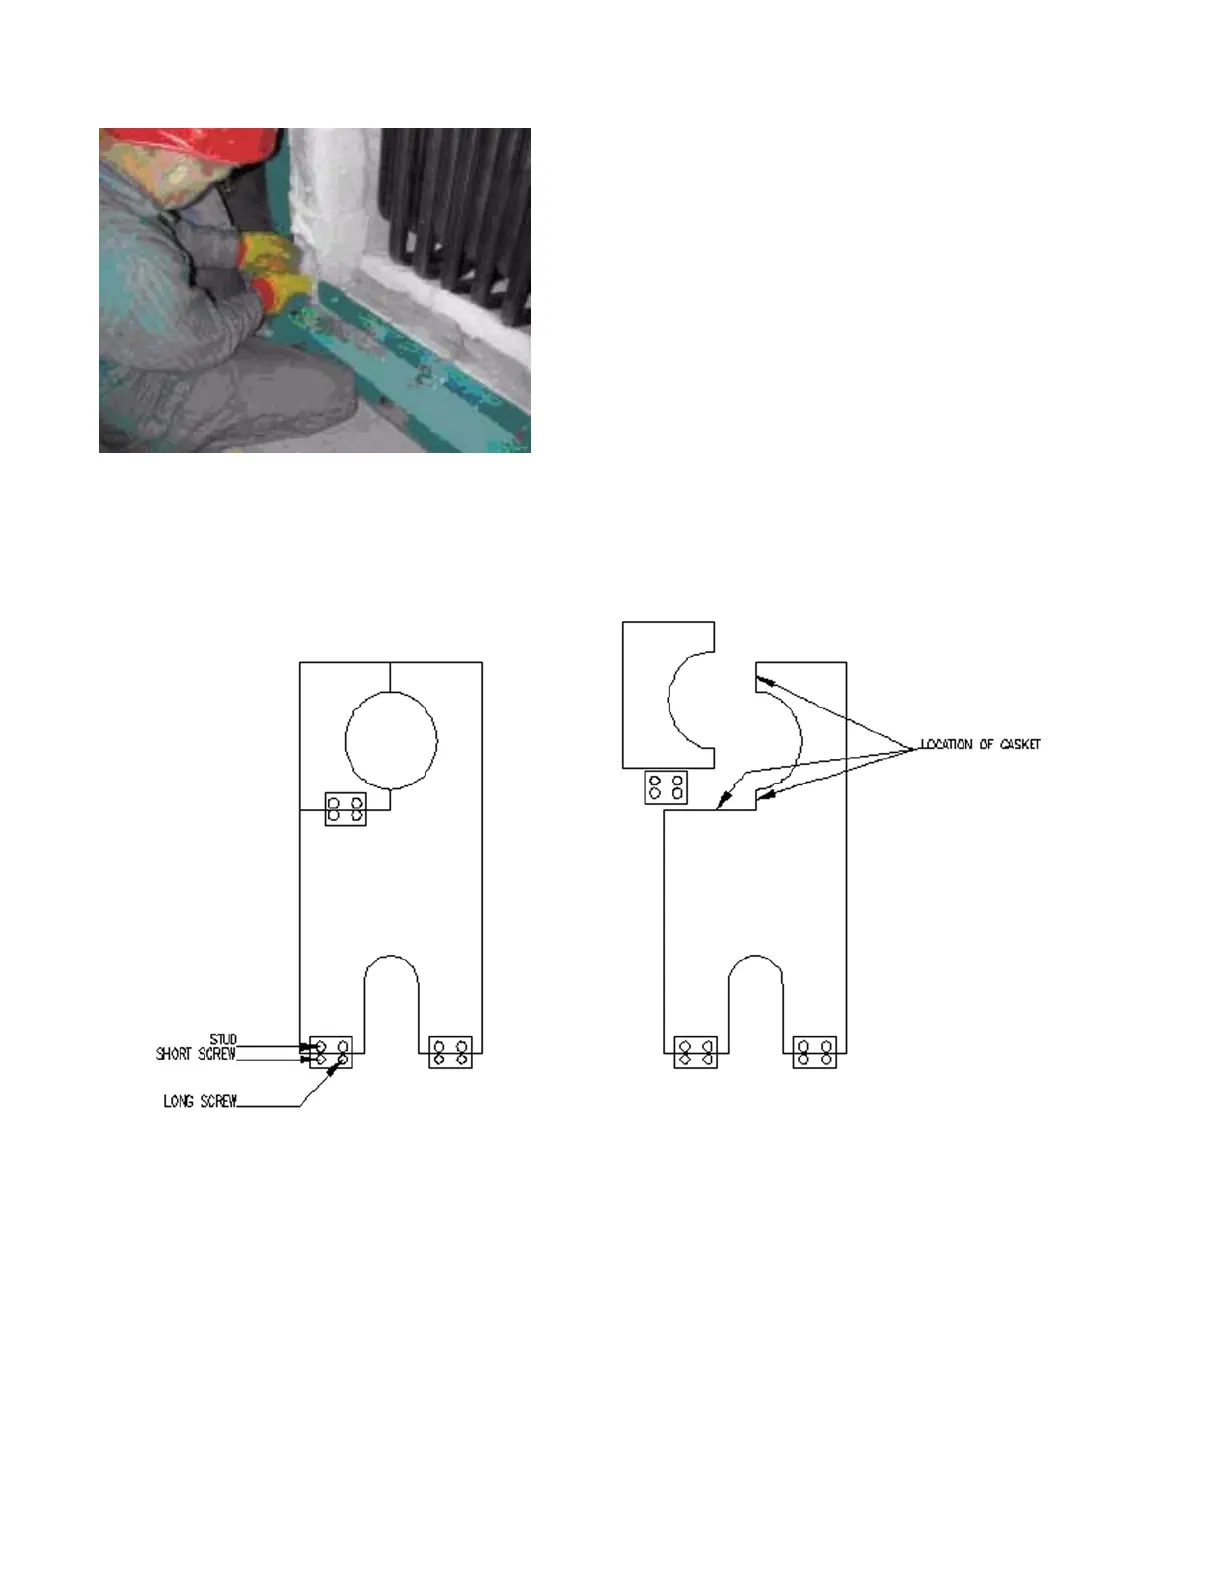
Casing Assembly Model FLE Assembly
3-10 750-192
Figure 3-13. Align wall with base angle
1. Install and snug up the long center bolts on both
sides of the drum. Insert the pry bar on top of the
drum to lift the wall fractionally while tightening the
bolts, as this will prevent the gasket from tearing.
2. Use a spray adhesive to fasten a strip of insulation to
both of the inside edges of the wall where the smaller
portion of the rear wall will be attached (Figure 3-
14).
3. Move the corner section of the rear wall into position
taking care not to let the insulation get caught in the
joint. Install the end plates connecting the pieces of
wall together and remove the wedge. After ensuring
that the wall is flush with the other section of the
wall, lightly tighten the endplate.
Figure 3- 14
Figure 3-14. Silicone and gasket, rear wall