17
SHEAVE/GUIDE YOKE INSTALLATION
1) The sheave/guide yoke (YOKE) must be installed after the Jack Unit and Upstand Post
are assembled and while the scaffolding is still in the shaft. This is a fairly heavy piece.
Make sure you have sufficient help to assist in placing the YOKE in position. Use a safety
line.
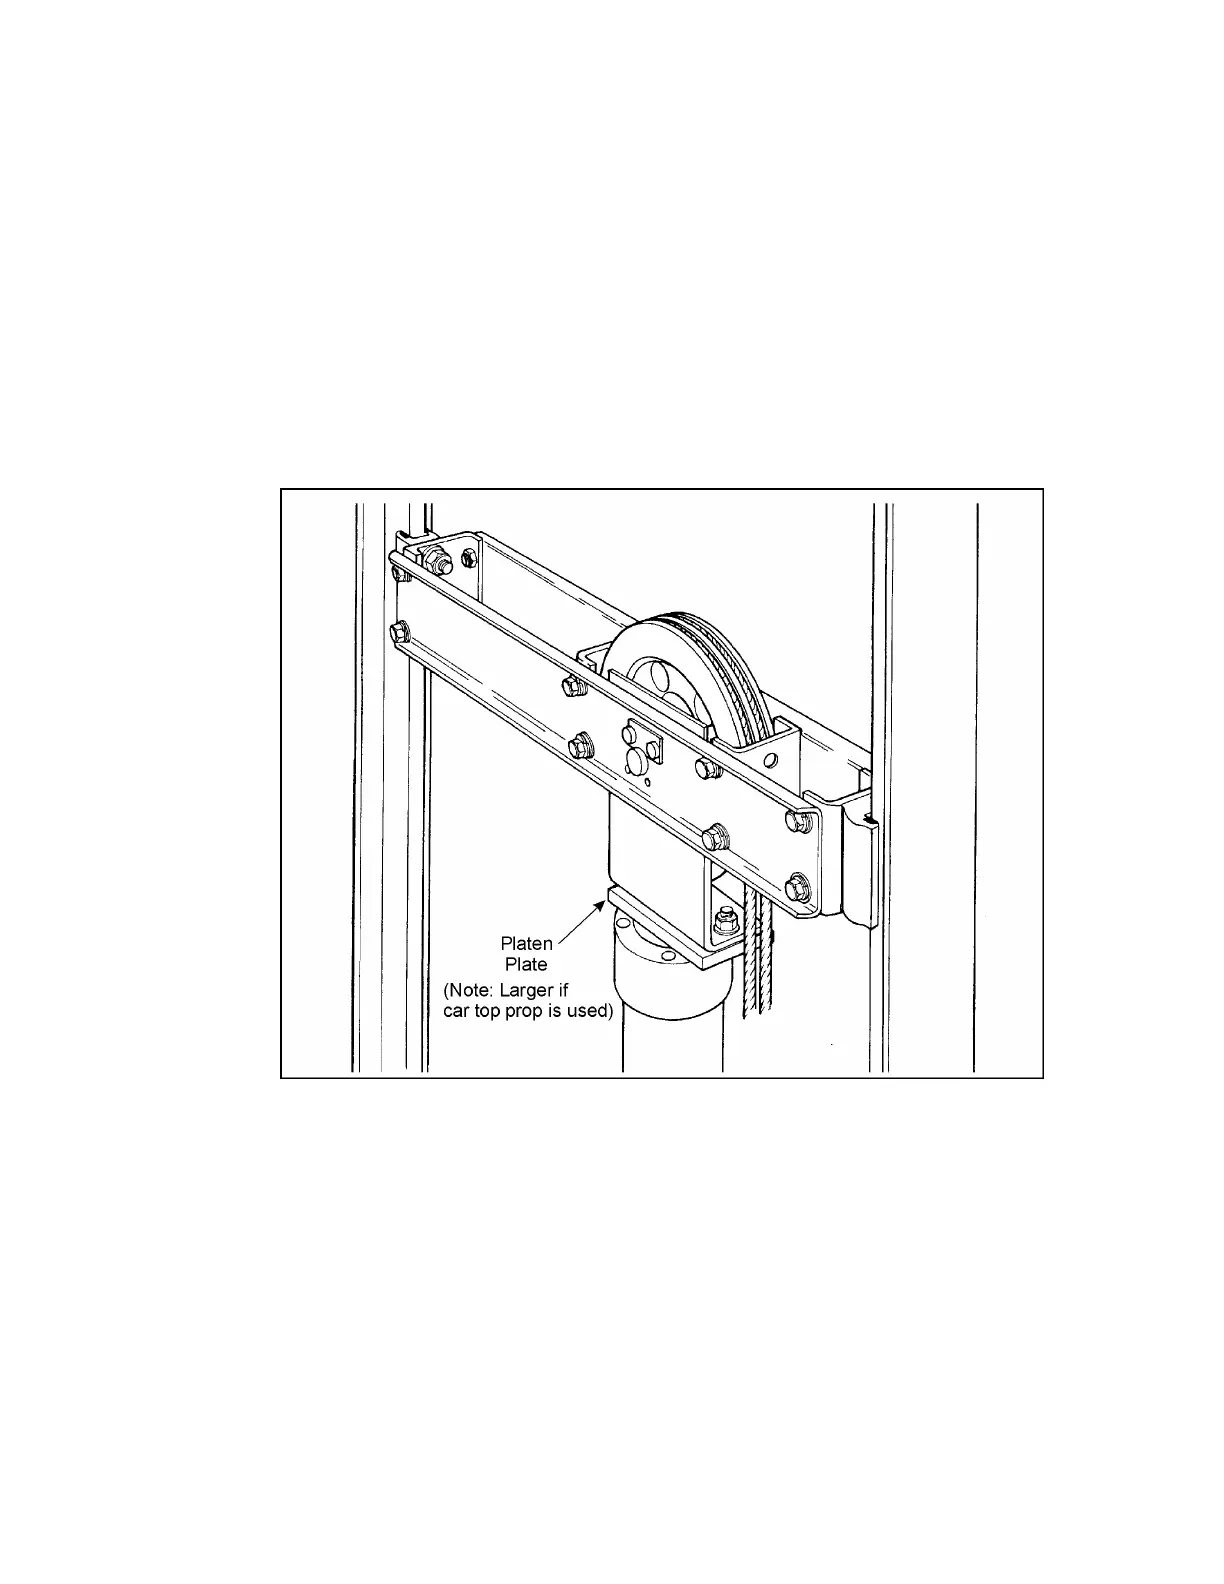
2) First, install the JACK PLATEN PLATE to the top of the jack and tighten. Rest the YOKE
on the JACK PLATEN PLATE and line up the two bolt holes. Insert the bolts into the two
bolt holes and install the nuts but do not tighten. Now place a guide shoe on the rail
above the YOKE and slide it down into place to fit over the 7/16" carriage bolts left in
place, do the same on the other side. “Line up” the YOKE with the centreline of the rails
before tightening the shoe bolts and ensure that the clearance between the shoe and rail
is approximately 1/16" on each side. Adjustment is provided on each end of the channel.
3) The D.B.G. is 30" and; therefore, the distance inside to inside of the guide shoes should
be 29 7/8". It can be a little greater, but it should NEVER BE LESS.
4) Tighten the JACK PLATEN PLATE bolts to the YOKE. The inside edge of the sheave
should now be “lined up” with the centreline of the rails and the center of the sheave
should be “in line” with the centerline of the jack unit. THIS IS IMPORTANT!
5) Loosen the four (4) bolts holding each of the two small channels inside the YOKE located
on either side of the sheave. These channels are designed to prevent the cables from
leaving (jumping) the sheave, in the event of the cables slackening. Once the cables are
in place, these small channels will be re-positioned as close to the sheave as possible,
usually within 1/8", and then tightened.
Fi
ure # 11 Yoke