page-28 EVOLUTION COVER
ASSEMBLY PREPARATION
This section shows you how to assemble the cover
panels.
FOAM SPACER INSTALLATION
NOTE
The following figures represent the assembly of an
8’ model. Panel size may vary.
1.
Install foam spacers on the top of the spa
near each corner. Use the masking tape
provided in the seal bag to keep the spacers
in place. Install at least 3 foam spacers on
each longest side. Do not stack foam spacers
see Figure 31.
FIGURE 31: FOAM SPACER INSTALLATION
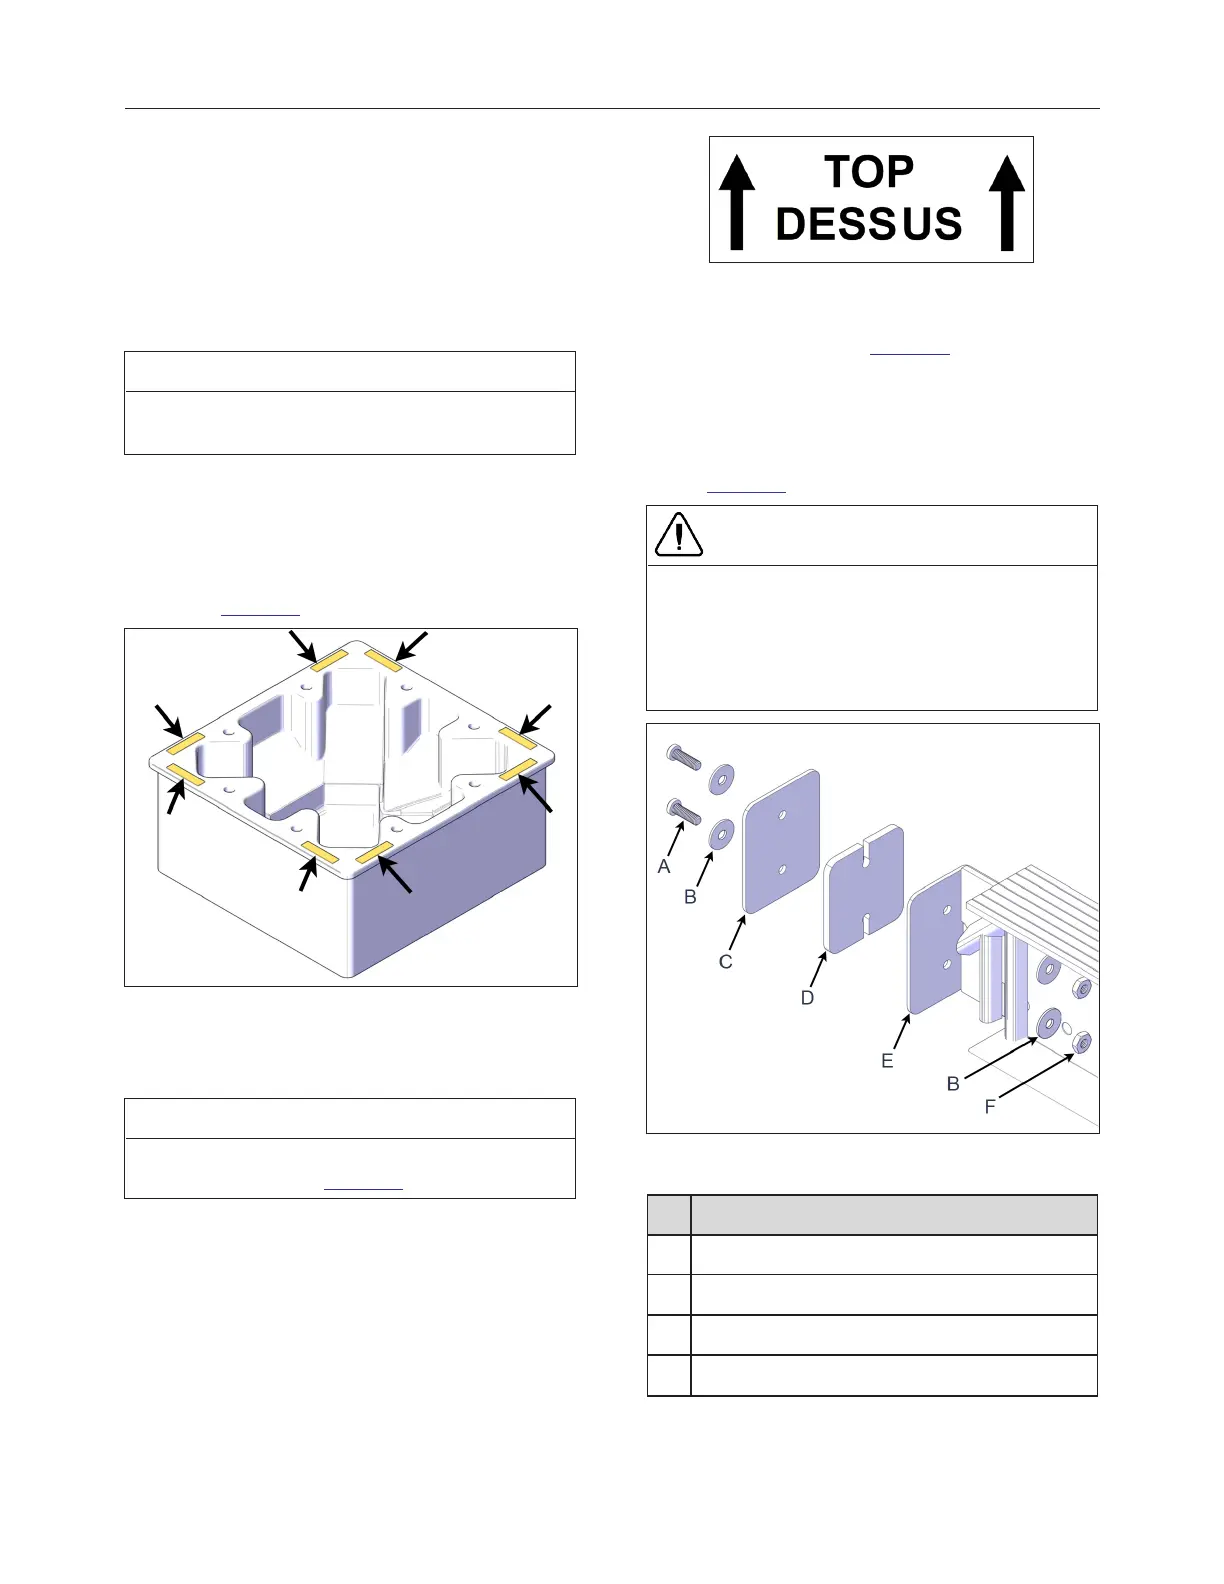
I-BEAM CONNECTION PLATE INSTALLATION
NOTE
Make sure the label TOP/DESSUS in the I-beam
is facing upwards see Figure 32.
FIGURE 32: TOP ORIENTATION OF I-BEAM
1.
Assemble the two I-beam short connection
plates as shown in Figure 33.
2.
Use #10-32 x 5/8” screws and #10-32 nuts.
Insert the I to C spacer in between the I to C
connection plate and the bracket. The screws
and nuts can now be properly tightened see
Figure 33.
CAUTION
Two I to C connection plates must be installed per
I-beam.
Ensure these bolts and nuts are not overly tight so
they don’t bend the I to C-bracket and the I to C-
short connection plate.
FIGURE 33: I-BEAM WITH THE SHORT I TO C
CONNECTION PLATE INSTALLATION
ID DESCRIPTION
A SCREW #10-32 X 5/8''
B FLAT WASHER #10
C I TO C SHORT CONNECTION PLATE
D I TO C SPACER
240799 OWNER'S MANUAL REVISION 4