EVOLUTION COVER page-29
ID DESCRIPTION
E BENT PART OF I TO C BRACKET
F NUT #10-32
COVER PANEL ASSEMBLY
NOTE
The cover is rectangular. The standard model will
need the motor frame assembly to be on the short
side of the cover, whereas the long side will need
the motor frame assembly on the long side of the
cover. Only the 8-foot model is available in the long
side version see Figure 34.
FIGURE 34: RECTANGULAR COVER
NOTE
It is recommended to use a mounting table as a
base to build the top section of the cover, and later
transfer it to the spa once it is assembled.
If you use a table, use the foam to support the
cover assembly to prevent any damage to the
cover.
CAUTION
If there is limited space, please follow the next
steps while assembling directly onto the spa..
1.
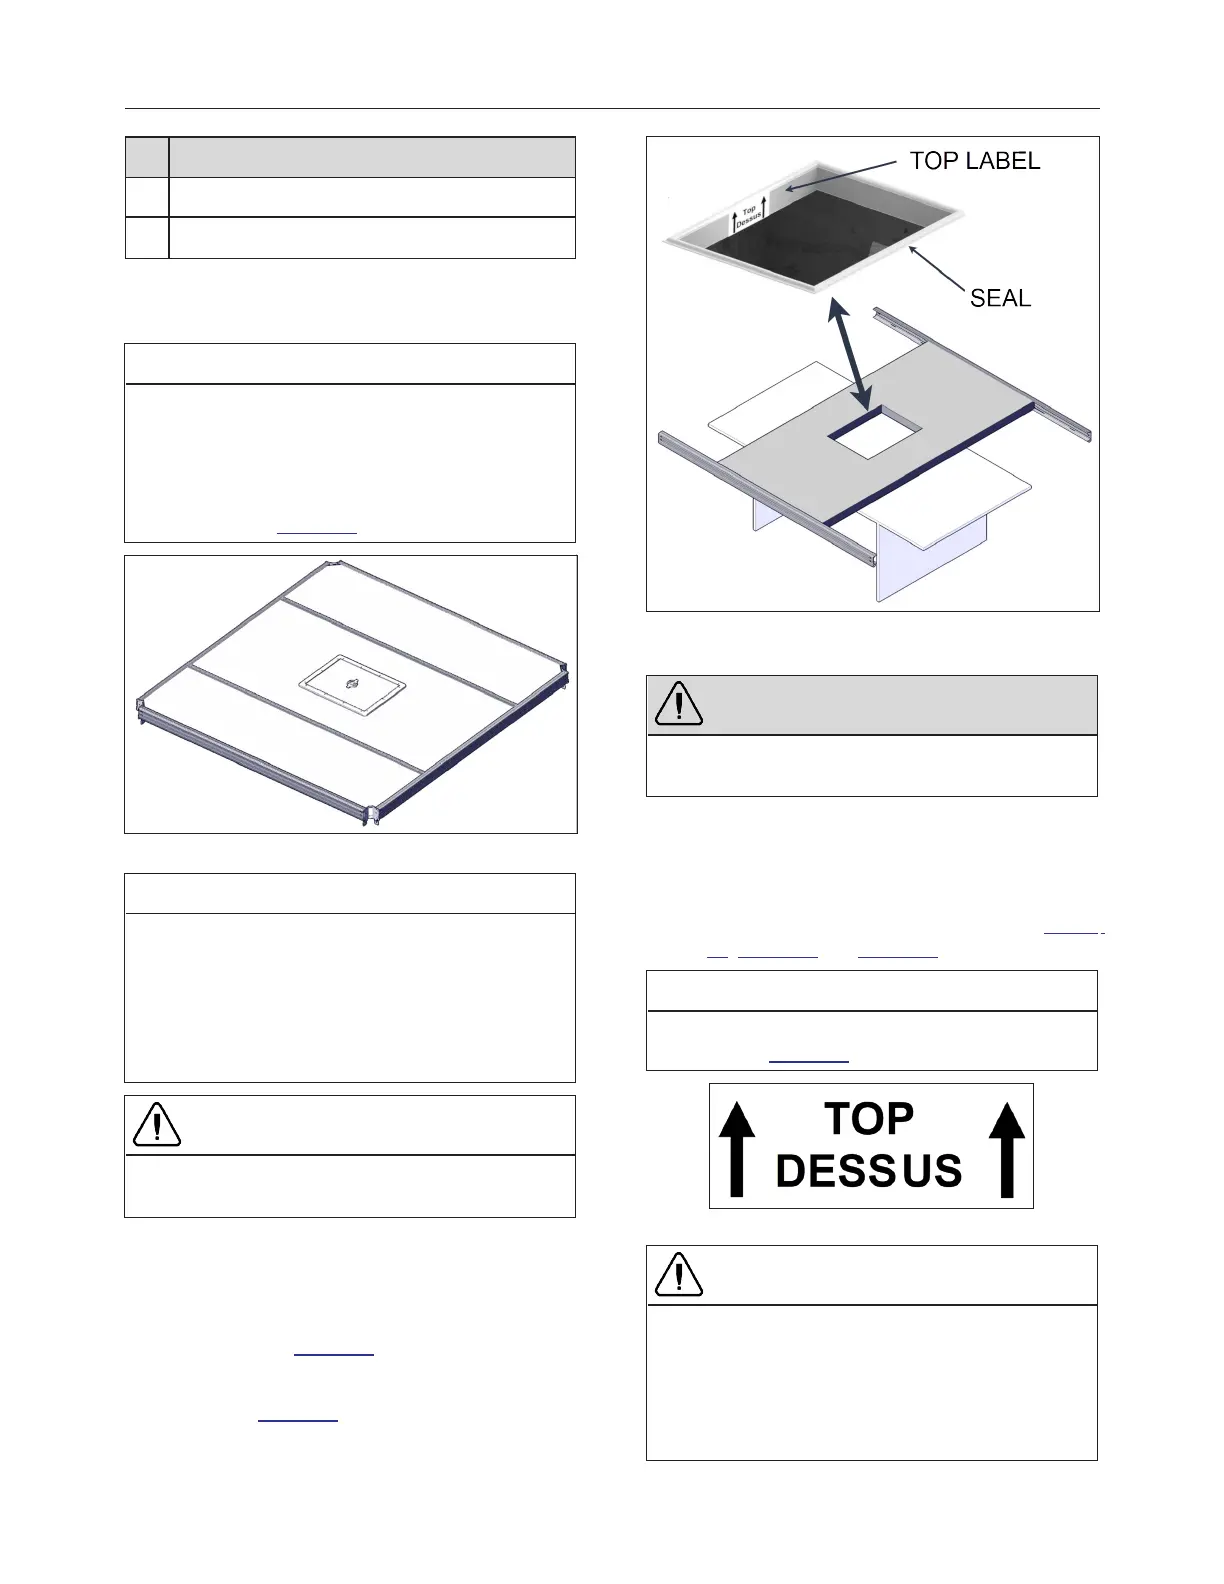
Install the center cover panel, with an opening
in the center, on the mounting table. Make
sure the seal around the escape hatch
opening is on top and the top label is properly
oriented see Figure 35
2.
Install the long C-Channels, 94 9/16''. (240
cm) see Figure 35.
FIGURE 35: ESCAPE HATCH AND C-CHANNEL
INSTALLATION
WARNING
When mounting the C-channel onto foam panel, be
careful not to delaminate the fiberglass.
3.
Slide one I-beam with short I to C connection
plates in the C-channels on both sides of the
middle panel. Install the I- beams in such
manner where the bent portion of I to C
connection is pointing outwards see Figure
37, Figure 38 and Figure 39.
NOTE
Make sure the label in the I-beam is facing
upwards see Figure 36.
FIGURE 36: TOP ORIENTATION OF I-BEAM
CAUTION
Make sure the I-beam has cleared bottom and top
section.
While inserting the I-beam in the C-channel, make
sure it is always square with the C-channel.
Make sure parts fit snugly with foam panels.
240799 OWNER'S MANUAL REVISION 4