page-44 EVOLUTION COVER
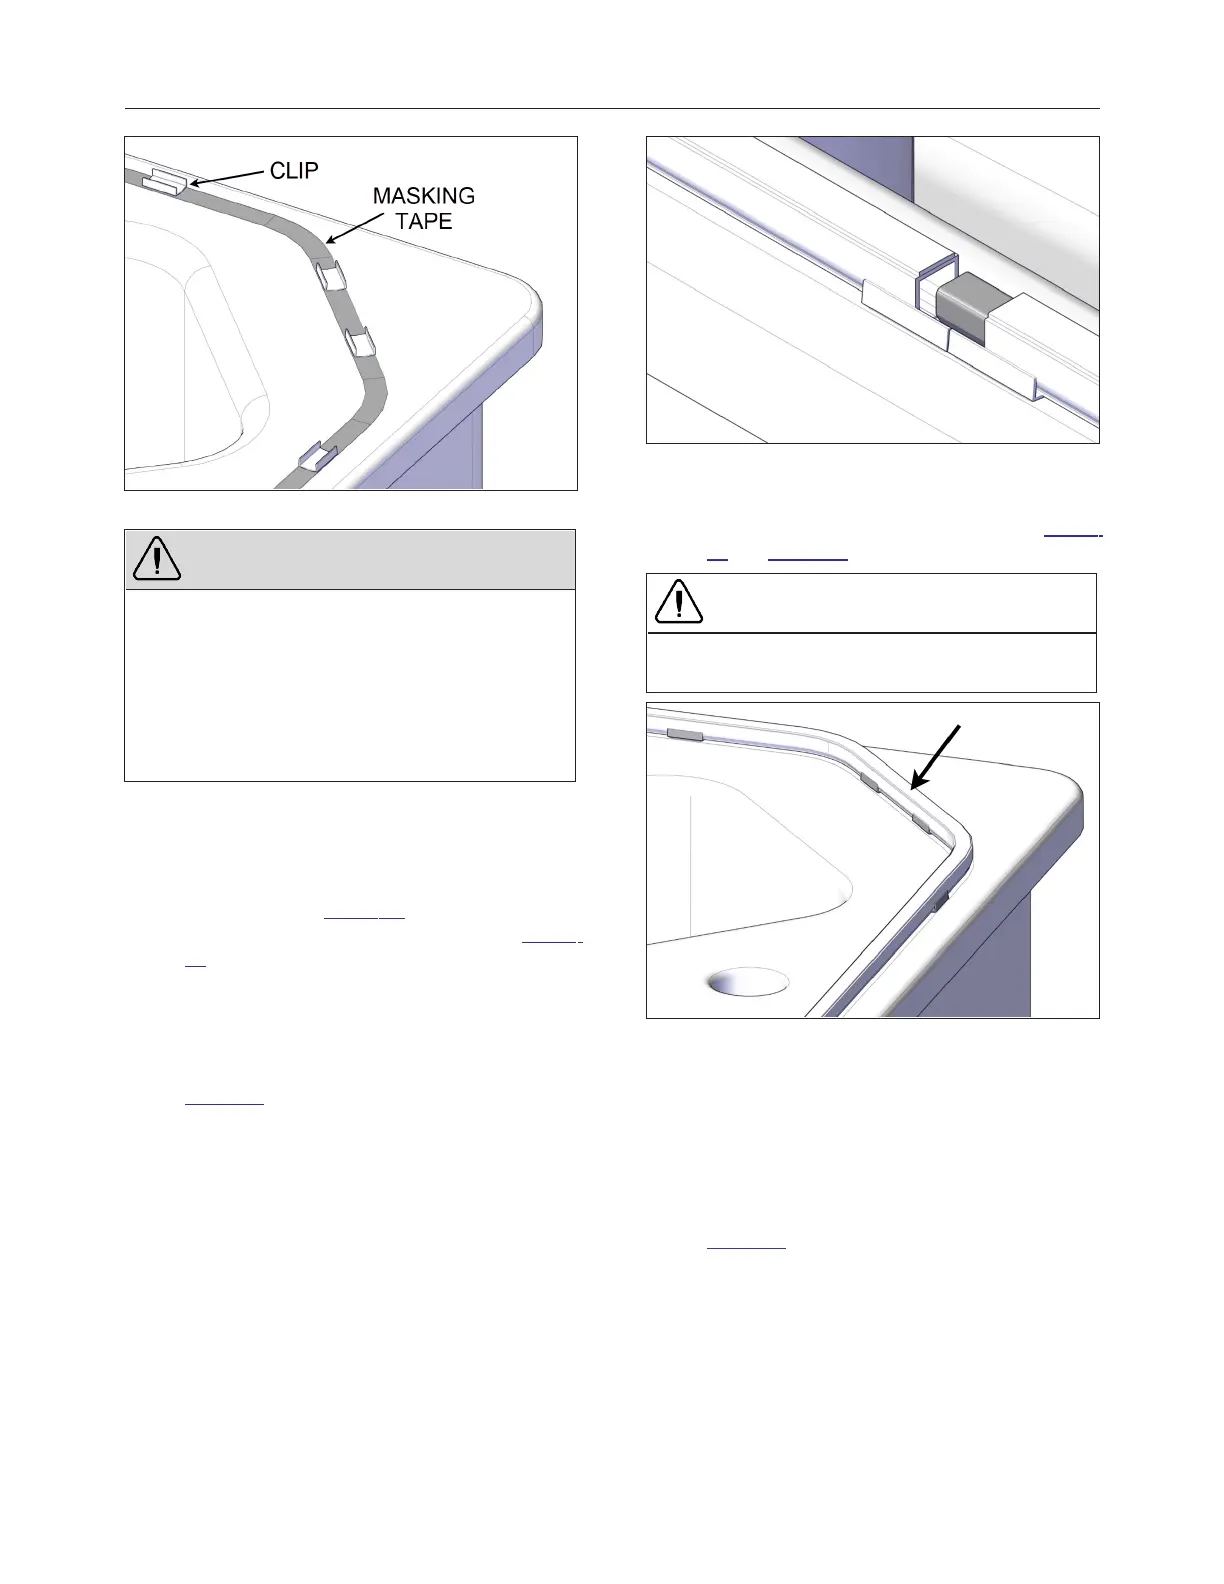
FIGURE 74: MASKING TAPE AND CLIPS
WARNING
The use of masking tape is recommended since it
will protect the spa acrylic from the clip glue.
Furthermore, pulling the masking tape from one
corner to the next will ensure straightness.
Install the masking tape at the best location as
possible according to the contact surface between
the cover and the top edge of the spa.
4.
The number of seal clips is limited.
Temporarily install the clips all around the spa
to ensure the best distribution (do not stick
yet). The minimum turn radius for the seal is
4" (10 cm), see Figure 74. Keep two clips for
the seal joint connector as shown in Figure
75. Once the distribution is done, stick the
clips in place (on the tape if applied).
5.
The seal joint starts on the opposite side from
the spa entrance. Install two clips where the
seal joint connector will be located, see
Figure 75.
FIGURE 75: SEAL JOINT CONNECTOR
6.
Start installing the seal joint with the adhesive
layer facing up towards the cover, see Figure
75 and Figure 76.
CAUTION
Do not install the seal joint near a control system
or the critical components of the spa.
FIGURE 76: SEAL INSTALLATION
7.
Once the seal is installed in the clips around
the entire spa, cut the extra length as straight
as possible for the best joint finishing results.
8.
Insert the supplied seal connector in both
ends of the seal. The use of masking tape to
hold the two ends is recommended, see
Figure 75.
240799 OWNER'S MANUAL REVISION 4