CABRIOLE’
CRAMARO TS S.r.l. – 37044 COLOGNA V.TA (VR) - VIA QUARI DESTRA, 71/G TEL. +39 0442/411688 / FAX + 39 0442/411690
E-MAIL info@cramaro.com WEBSITE: http://www.cramaro.com - Manual n° MCA016-EN-ED00 – date 15/01/15
page 33
3
2
1
4
5
4
3
2
1
5
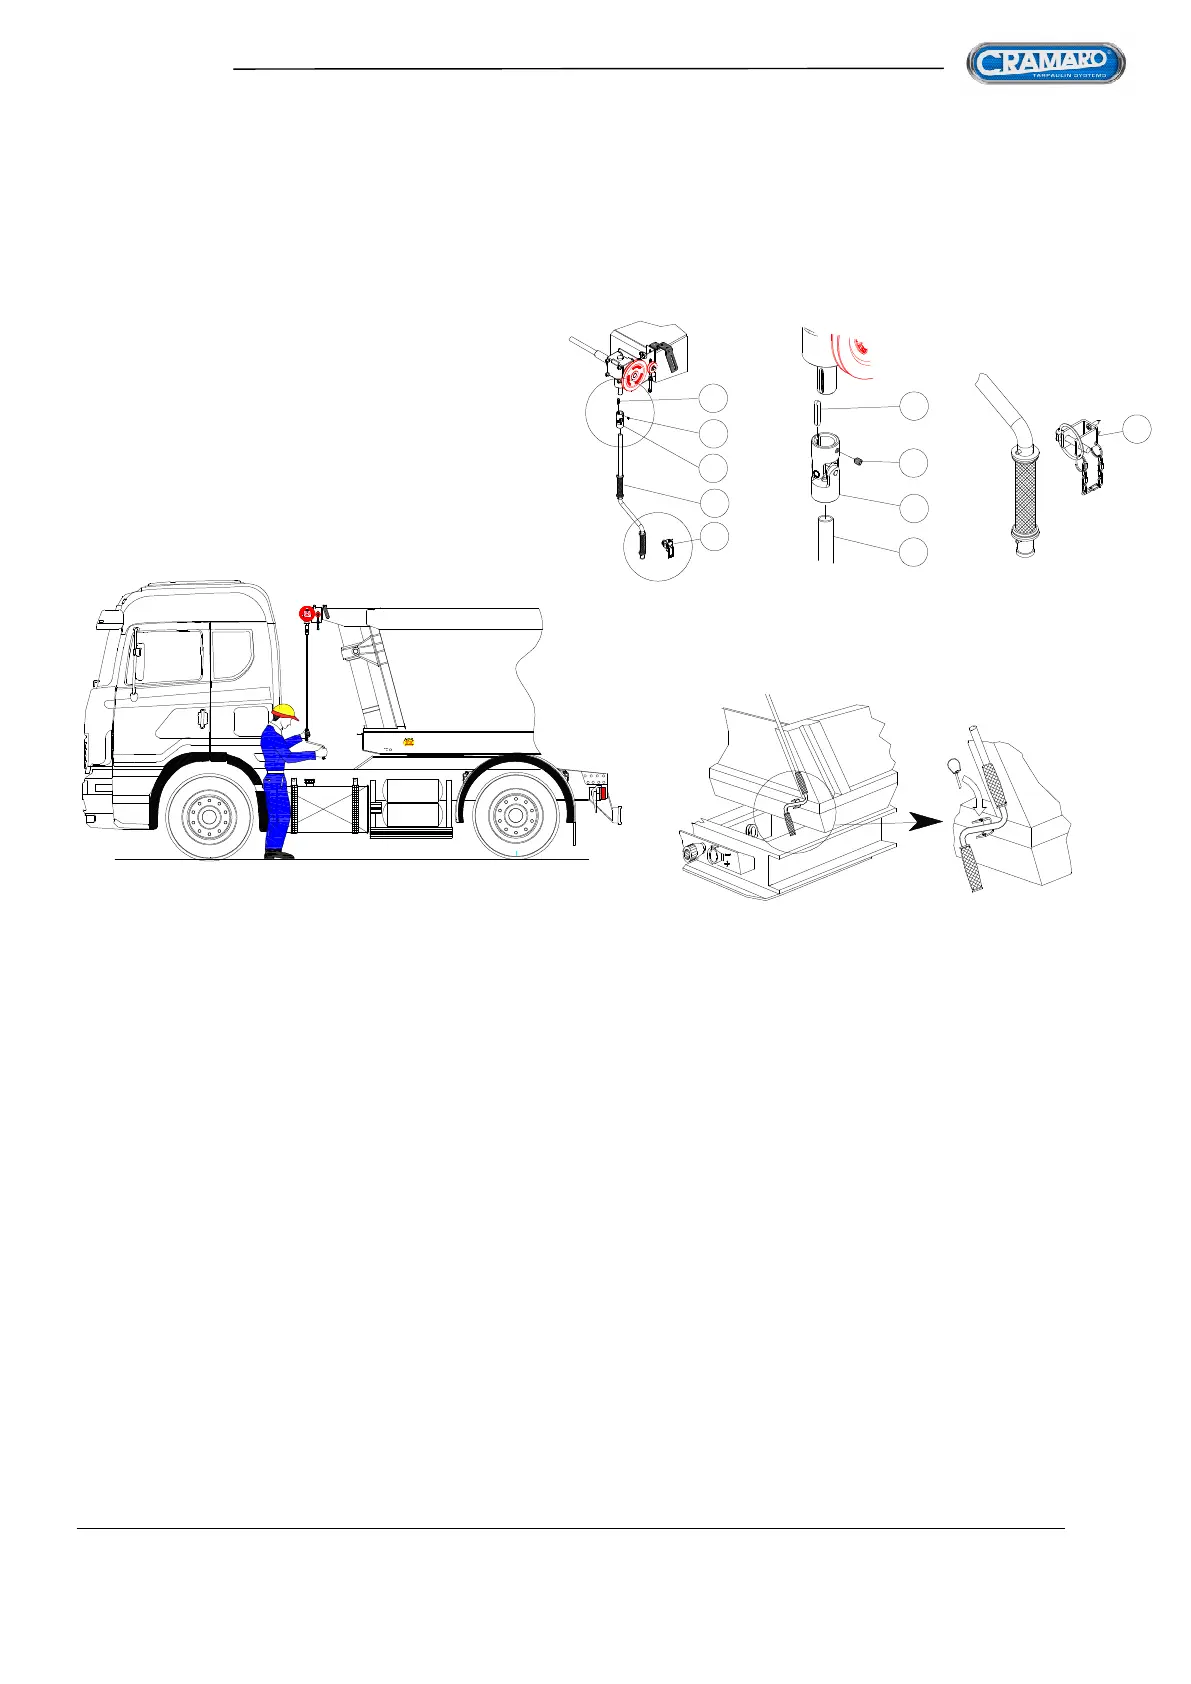
FIG 52
IMPORTANT NOTE : The two rear pulleys can also be at different distances from the end of the container; in this
case, two final parallel bow-stop plates must be secured so that the last bow cannot slant when the tarpaulin is fully
extended.
- ASSEMBLING THE ROTATING ROD (Manual versions) -
First of all, before welding
the shaft to the gimbal, you must cut
the rod so that the ROTATING HEIGHT
of the handles, WHEN THE ROD IS ASSEMBLED
ON THE VEHICLE, is approximately
AT THE HEIGHT OF THE OPERATOR'S SHOULDER
and, at the same time, does not interfere with other parts
of the vehicle
(basically, it must not be too long)
ROD STOP ASSEMBLY DIAGRAM
The rotating rod is essentially made up by five parts:
1. A rod with plastic handles.
2. A gimbal to weld to the rod.
3. An M8 grub screw to lock the gimbal onto the shaft exiting the reducer..
4. A key to insert on the reducer shaft
5. A rod stop in (FE) or (AL) to apply to the front part of the container, including a pin and chain to lock the end of
the rod (to weld or bolt)
Once you have carefully evaluated the length that the activation handle on the vehicle must have, you must proceed
as follows:
Cut the rod pipe to the pre-defined length (1)
Insert the rod (1) into the gimbal (2) from the side opposite where there is the slot for the key and weld the two
components.
Connect the prepared rod to the reducer, inserting the supplied key (4) and lock the elements with the specific M8
grub screw (screw without head) (3)
Assemble and secure the crank handle, position the rod stop (5) in the front part of the container, making sure,
before welding or bolting it, that it houses the crank handle rod well in the rest position, both with the tarpaulin
extended and with it retracted
Insert the snap pin that locks the rod in place (5)