Page 10 of 57
PRIOR TO INITIAL POWER UP
Open the Service Door on the right side using the Key provided in the coin return cup, or if shipped with a locking
clip, remove the clip and install the lock. Ensure there is no power to the AC Distribution Box. On Venders with a
main power switch on the AC Distribution Box the switch needs to be in the OFF position. On Venders with a main
power quick disconnect plug on the AC Distribution Box the quick disconnect plug needs to be unplugged. Check
that all connectors are firmly seated on the Media Atlas H Board and at the various Peripheral Boards:
Environmental Board
o Refrigeration control
o Lighting control
Port Board
o Port Motor
o Port Product Sensor
Cup Motor Board
o Cup Motor
o Cup Product Sensor
X Motor Board
o X Motor
Y Motor Board
o Y Motor
Retrieve the main power plug from the hole in the rear of the Vender and plug the cord in a properly grounded
120VAC, 15 Amp receptacle (U.S. and Canada). Open the Service Door and apply power to the AC Distribution
Box (if equipped with a Bill Acceptor, the Acceptor should cycle twice). The LED Light Assemblies should illuminate
and the cooling unit should start. If the Display shows “OUT OF SERVICE”, or the cooling unit fails to start, refer
to the TROUBLESHOOTING SECTION of this guide.
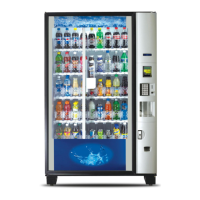
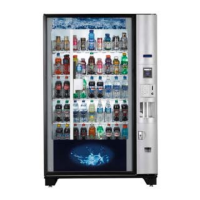
PLACING THE VENDER ON LOCATION
!! CAUTION !!
The Vender is intended for INDOOR USE ONLY. It should be kept out of direct sunlight and away from any heat
source. This Machine is not suitable for installation in an area where a water jet or hose and nozzle may be used.
The Vender must be on a solid, flat and level surface. Ensure the flooring can bear the weight load of a fully loaded
Vender (approximately 1109 lbs. or 503 kg). The Vender must be positioned close enough to an electrical outlet
so that an extension cord is not required. If the Machine will be subject to user misuse or vandalism, it is
recommended that the Vender be secured to the floor or wall as described in Crane Merchandising Systems
Technical Bulletin 344. Due to the large size and weight of the Vender, never attempt to move the Vender with a
Hand Truck or Stair Climber. Use a pallet jack or Vender/Cooler Dollies at all times when moving the Vender. The
Vender should never be slid or pushed in place. Never side load the leveling legs; doing so will cause damage to
the legs. Do not transport the Vender to or from customer locations loaded with product, as damage may result
due to excessive weight. Be sure to test Vender for proper operation before putting in to service on location. Call
the Crane Merchandising Systems Technical Service Department or your Crane Merchandising Systems
Representative for assistance.
ACCEPTABLE AMBIENT OPERATING TEMPERATURE RANGE
BevMAX Refresh 6 Media Models 5800-6/3800-6 equipment manufactured by Crane Merchandising Systems is
designed to work properly in a temperature range of 75°F to 90°F (23°C to 32°C) 65% R.H.
LEVEL THE VENDER
Adjust the front leveling legs, ensuring that an even gap exists between the glass door and the top security angle
and receiver box, and then level the Machine front to rear. A carpenter’s level will help verify that the Vender is

 Loading...