Page 11 of 57
level. Leveling legs are adjusted using a wrench or socket 1 ½” or 38 mm in size. If the Vender is to be used in a
bank of equipment, check the top and sides for proper alignment. If you are unable to properly level the Vender,
select an alternate location. NEVER PLACE OBJECTS UNDER THE LEVELING LEGS OF THE VENDER.
DANGER
THE VENDER MUST BE PROPERLY LOCATED AND LEVELED. IF THE MACHINE WILL BE
SUBJECT TO USER MISUSE OR VANDALISM IT IS RECOMMENDED THAT THE VENDER
BE SECURED TO THE FLOOR OR WALL AS DESCRIBED IN CRANE MERCHANDISING
SYSTEMS TECHNICAL BULLETIN 344 TO MINIMIZE THE RISK OF INJURY OR DEATH
FROM TIPPING. CALL THE CRANE MERCHANDISING SYSTEMS TECHNICAL SERVICE
DEPARTMENT OR YOUR CRANE MERCHANDISING SYSTEMS REPRESENTATIVE FOR
ASSISTANCE.
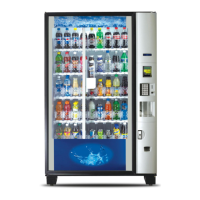
LOCATE THE VENDER
Do not block the rear of the Vender. Maintain a minimum of 4 inches (10 cm) from the wall to ensure adequate
airflow through the condenser and compressor. At the rear of the Vender, make sure nothing obstructs the air
exhaust at the back of the Machine.
WARNING
TO AVOID THE POSSIBILITY OF A FIRE HAZARD, DO NOT STORE ANYTHING OR ALLOW
DEBRIS OF ANY KIND TO ACCUMULATE IN THE BOTTOM OF THE MACHINE, IN THE
BOTTOM OF THE SERVICE AREA, IN AND AROUND THE REFRIGERATION COMPARTMENT
OF THE CABINET, OR IN FRONT OF THE EVAPORATOR AND CONDENSER COILS.
INSTALLING PRICE LABELS
Pricing labels when ordered will be included with additional parts, labels, and information placed in Tray “200s”
during shipment. Remove the pricing label sheets from the Tray and gently remove the label corresponding to
the vend price of each selection by tearing at the perforation. The label is installed at the top of the front knuckle.
Once installed, push the label firmly against the front of the knuckle. This will ensure the label is locked in place.
INSTALLING PRODUCT ID CARDS
To assist with consistent loading, product ID cards can be installed in the product pusher to designate to the route
driver which product the column is set for. To install the flavor card, simply detach it from the sheet at the
perforation and slide it into the slots in the product pusher. Contact your graphics supplier to purchase as needed.
COIN CHANGERS & OTHER ACCESSORIES
The Vender can have an MDB Coin Changer installed and can have an MDB Bill Acceptor installed as well. Note:
BevMAX Refresh 6 Media Models 5800-6/3800-6 will work with an MDB Bill Acceptor only. If the MDB Coin
Changer and other MDB accessories are not factory installed, refer to the instructions received from the
manufacturer of the MDB Coin Changer and other MDB accessories for proper set-up and installation.
The Vender will support the following Domestic MDB Coin Changers:
All available CPI/MEI MDB
All available Conlux MDB
All available NRI MDB
All available Coinco MDB

 Loading...