Snack - Based Troubleshooting and Repair Guide
September, 2002 Page 43 of 54 1670065
A. Selection Keypad
Removal
1. Remove the display PCB.
(see “Display PCB” on page 41)
2. Remove the bill validator.
(see “Bill Validator” on page 51)
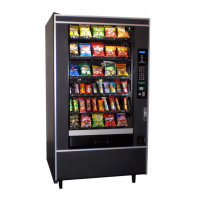
3. Remove 4 screws and cup spacers See
(figure 14). Save them for later use.
NOTE:
The top two screws securing
the faceplate were removed
with the display PCB.
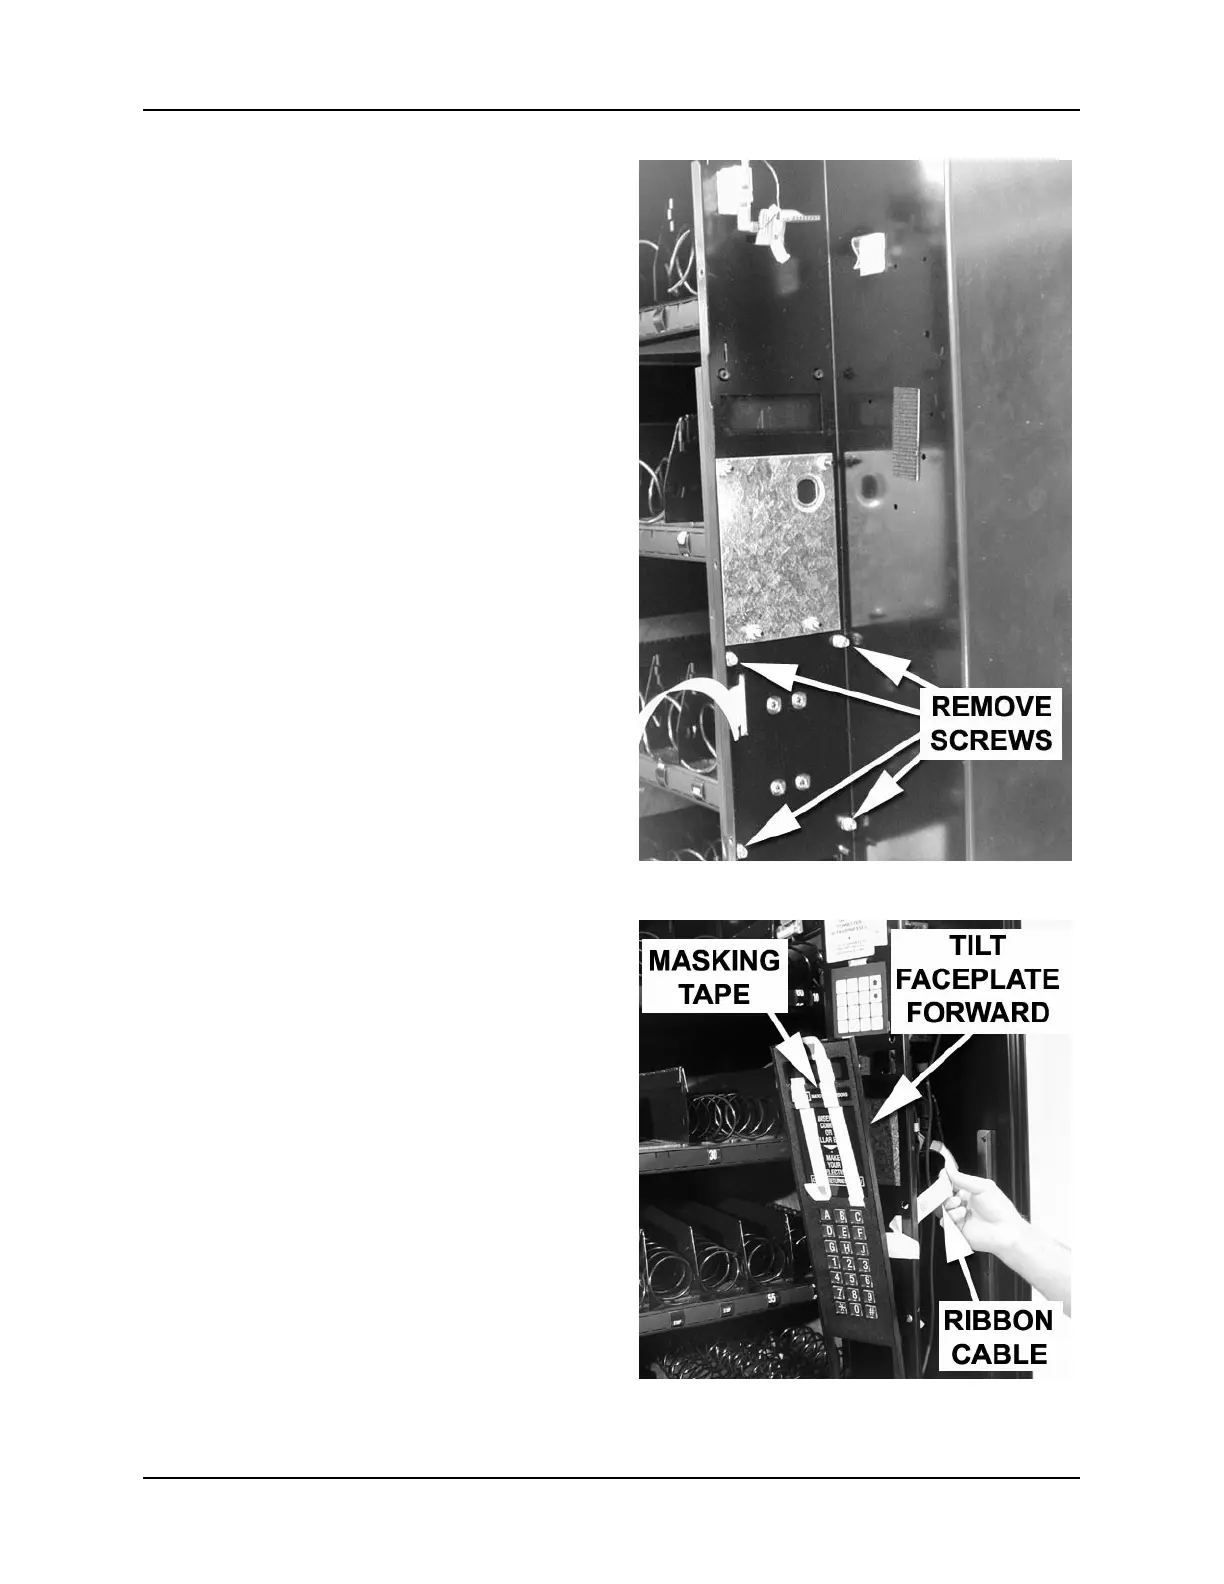
4. Before you remove the faceplate from
the front of the monetary door, put one
or two pieces of masking tape across
the display window and the instruction
insert to keep them from falling out
(figure 15).
5. Slowly remove the faceplate from the
top as shown (figure 15).
6. Work the keypad ribbon cable through
its slot to completely remove the
assembly (figure 15).
7. Lay the assembly face down on a flat
surface to avoid losing parts.
Figure 14
Figure 15