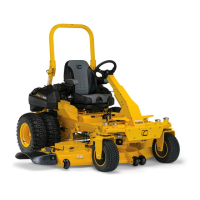
CVT Drive and brake system
85
11. Slip the seals, bearings, and washers off of the
differential and axle assembly. See Figure 6.94.
NOTE: When correctly installed, the seals fit on
the axle shaft with the lips facing out. Their pri-
mary purpose is to exclude dirt and moisture.
Grease does not tend to migrate past the axle
seals.
NOTE: If the transaxle is to be re-built, replace
the bearings and seals with new ones.
12. Inspect the differential and axle assembly.
12a. Look for damaged ring gear teeth.
12b. With the ring gear held still, turning one
axle should cause the other axle to rotate
smoothly in the opposite direction.
12c. Look for rust or excessive wear on the
bearing contact surfaces.
12d. Problems in any of these areas mean the
differential assembly should be replaced.
12e. If this is a warranty-related autopsy, iden-
tify the root cause of the problem. If it is not
something that was done wrong at the fac-
tory, the problem is not warrantable.
NOTE: Cub Cadet does not have a part number
for water, and it is not installed at the factory.
Figure 6.94
Differential and axle assembly
13. Lift the bevel gears out of the transaxle for disas-
sembly and (mostly) visual inspection.
See Figure 6.95.
13a. Note the placement of the shims on the
bevel gear shaft.
13b. Check the bevel gear teeth (that mesh with
the pinion gear) for wear or damage.
13c. Check the shift collar engagement teeth on
the bevel gears for wear or damage.
13d. Check the inside bearing surface of each
bevel gear for wear or damage.
13e. Check the bevel gear shaft for wear or
damage.
13f. Check the shift collar and fork for wear.
13g. Check shift collar teeth and splines for
wear or damage. See Figure 6.96.
Figure 6.95
Forward bevel gear Reverse bevel gear
Engagement teeth
Shift collar
Figure 6.96
splines
Shift fork
Teeth
 Loading...