CVT Drive and brake system
87
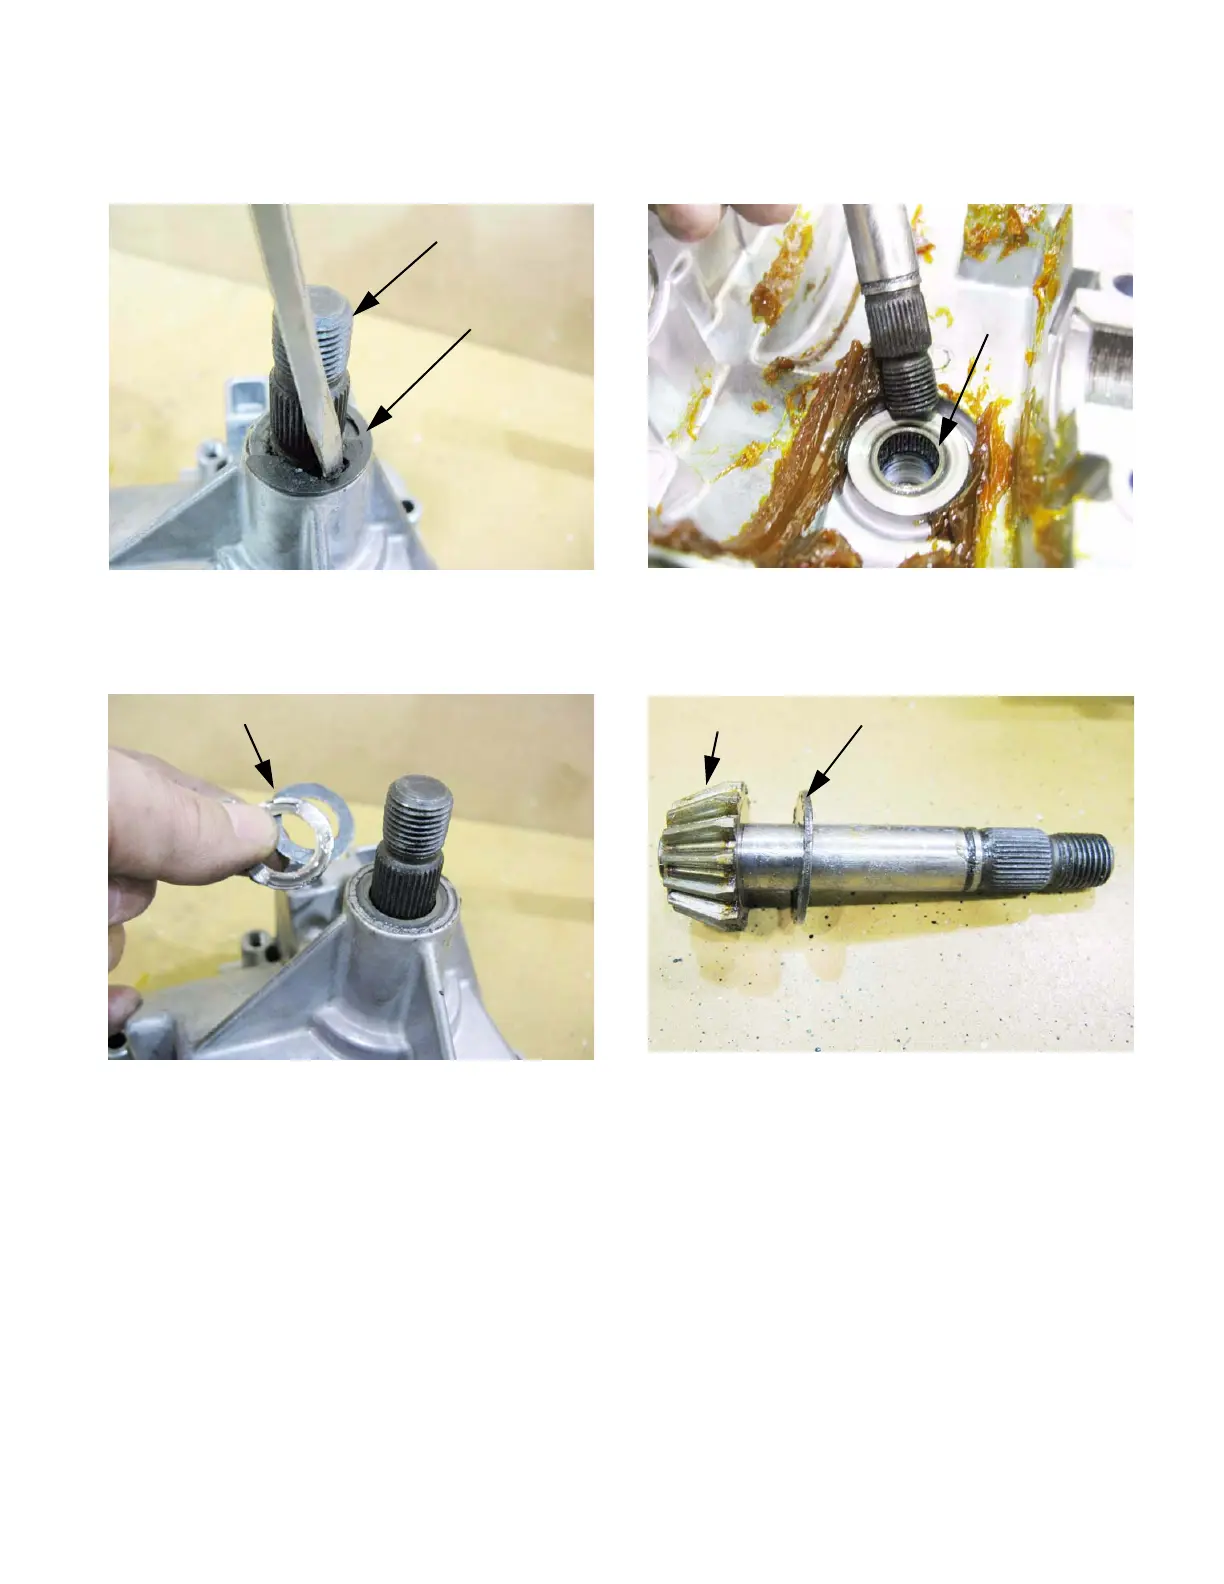
16b. Use a screwdriver to pry-off the E-ring.
See Figure 6.100.
16c. Remove the shim washers.
See Figure 6.101.
Figure 6.100
Input shaft
E-ring
Figure 6.101
Shims set end-play
16d. Pull the pinion shaft out of the housing.
See Figure 6.102.
16e. Inspect the shaft and bearings.
See Figure 6.103.
17. Final evaluation:
It may not be necessary to fully disassemble the tran-
saxle to identify the damage or find the root cause of a
warrantable failure.
At this point of disassembly, or some point earlier in the
process, the technician should be able to make an
assessment of whether it is feasible to repair the tran-
saxle. It should also be possible to positively identify
what went wrong in a warrantable transaxle replace-
ment.
If the transaxle is to be warranted, reassemble it for
shipping. It may be called back for inspection.
Figure 6.102
Needle
bearings
Figure 6.103
Pinion gear Thrust washer
 Loading...