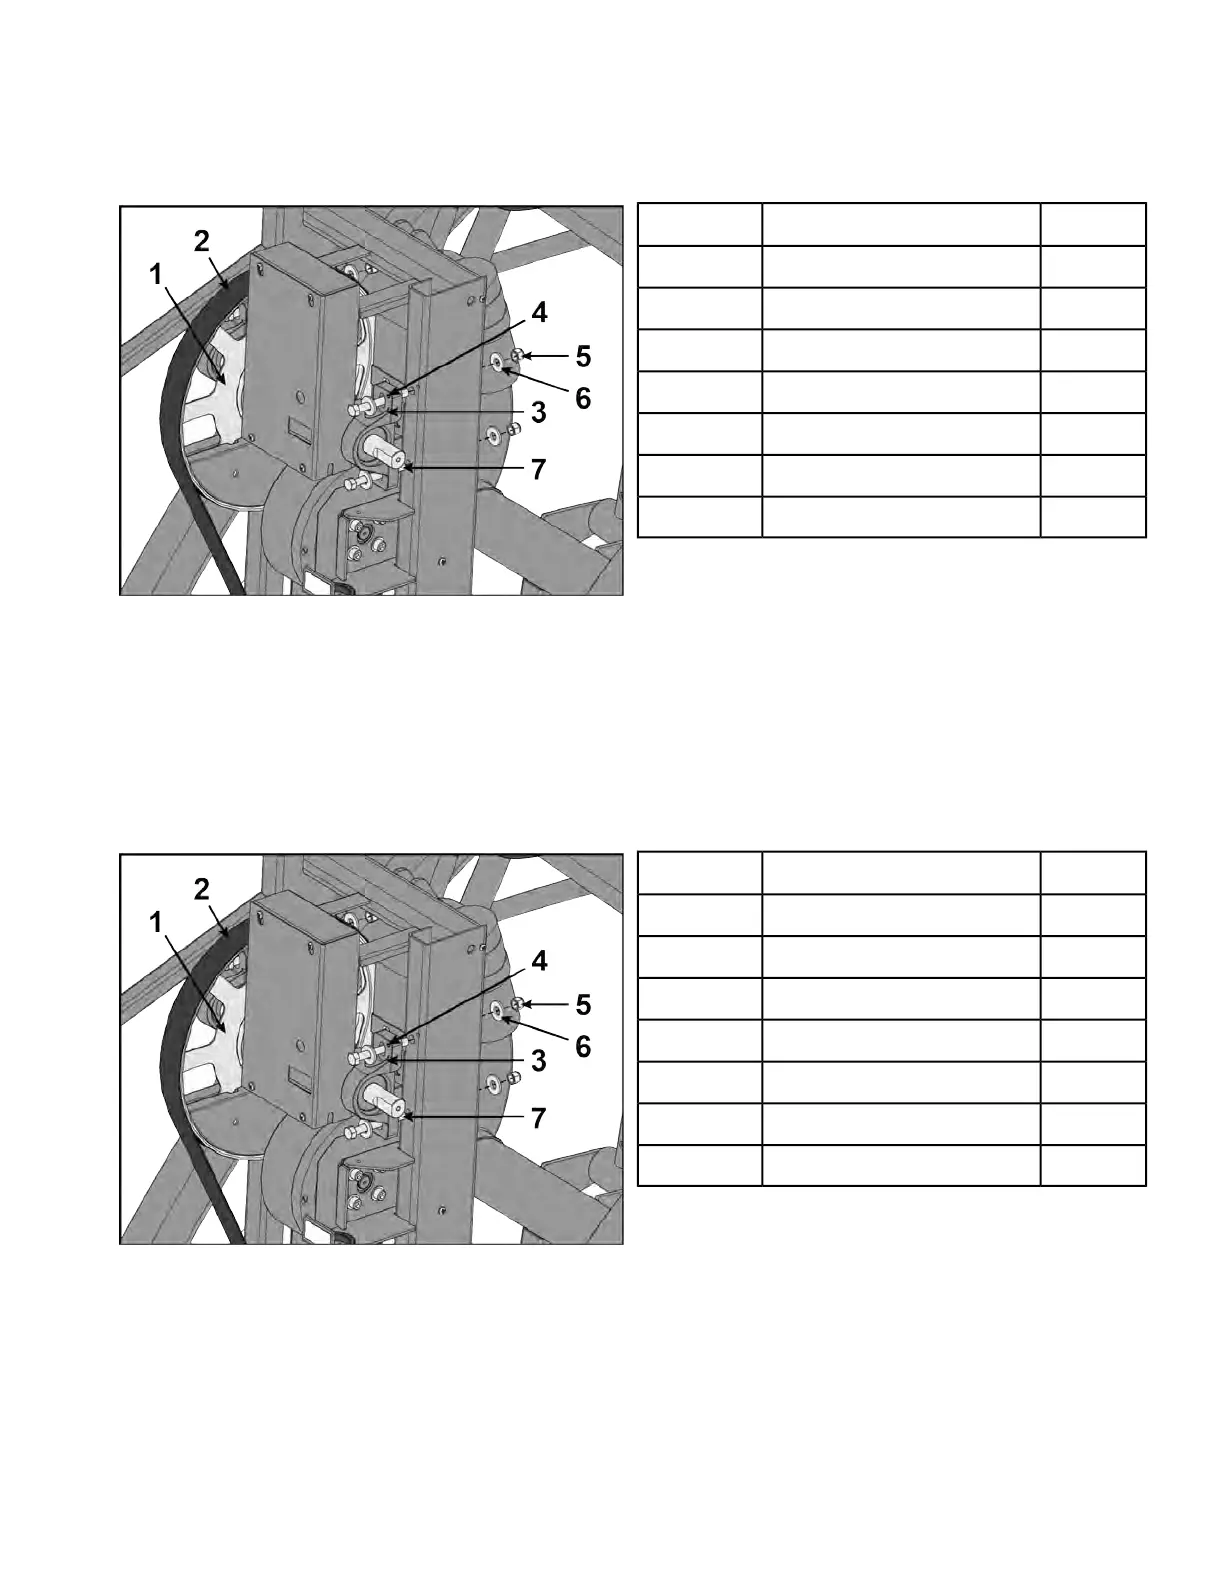
Remove crank shaft assembly
1. Remove the four bolts, eight flat washers and four nuts securing crank shaft assembly to frame
using a 9/16” socket wrench and a 9/16” open end wrench.
Qty.DescriptionItem
1Crank shaft assembly1
1Primary belt2
2Pillow block3
1Alignment pin4
4Nut5
8Flat washer6
4Bolt7
2. Remove primary belt from crank shaft assembly.
3. Remove crank shaft assembly.
Install crank shaft assembly
The new bearings have been pre-assembled on the new crank shaft assembly and are not adjustable.
1. Place assembly into primary belt and slide alignment pins into holes on the frame.
You may need to tap the pins in with a hammer so they are flush with the top of pillow blocks.
Qty.DescriptionItem
1Crank shaft assembly1
1Primary belt2
2Pillow block3
1Alignment pin4
4Nut5
8Flat washer6
4Bolt7
2. Secure two bolts, four flat washers, and two nuts to each pillow block using a 9/16” socket wrench
and a 9/16” open end wrench.
Tension drive belt
Tighten one HHCS a few turns then tighten the other HHCS a few turns using a 7/16” or 1/2” socket
wrench. Alternate until both HHCS are secure.
Page 131 of 202
Cybex 772A, 772AT Arc Trainer Part Number