B21O817A B21O818A
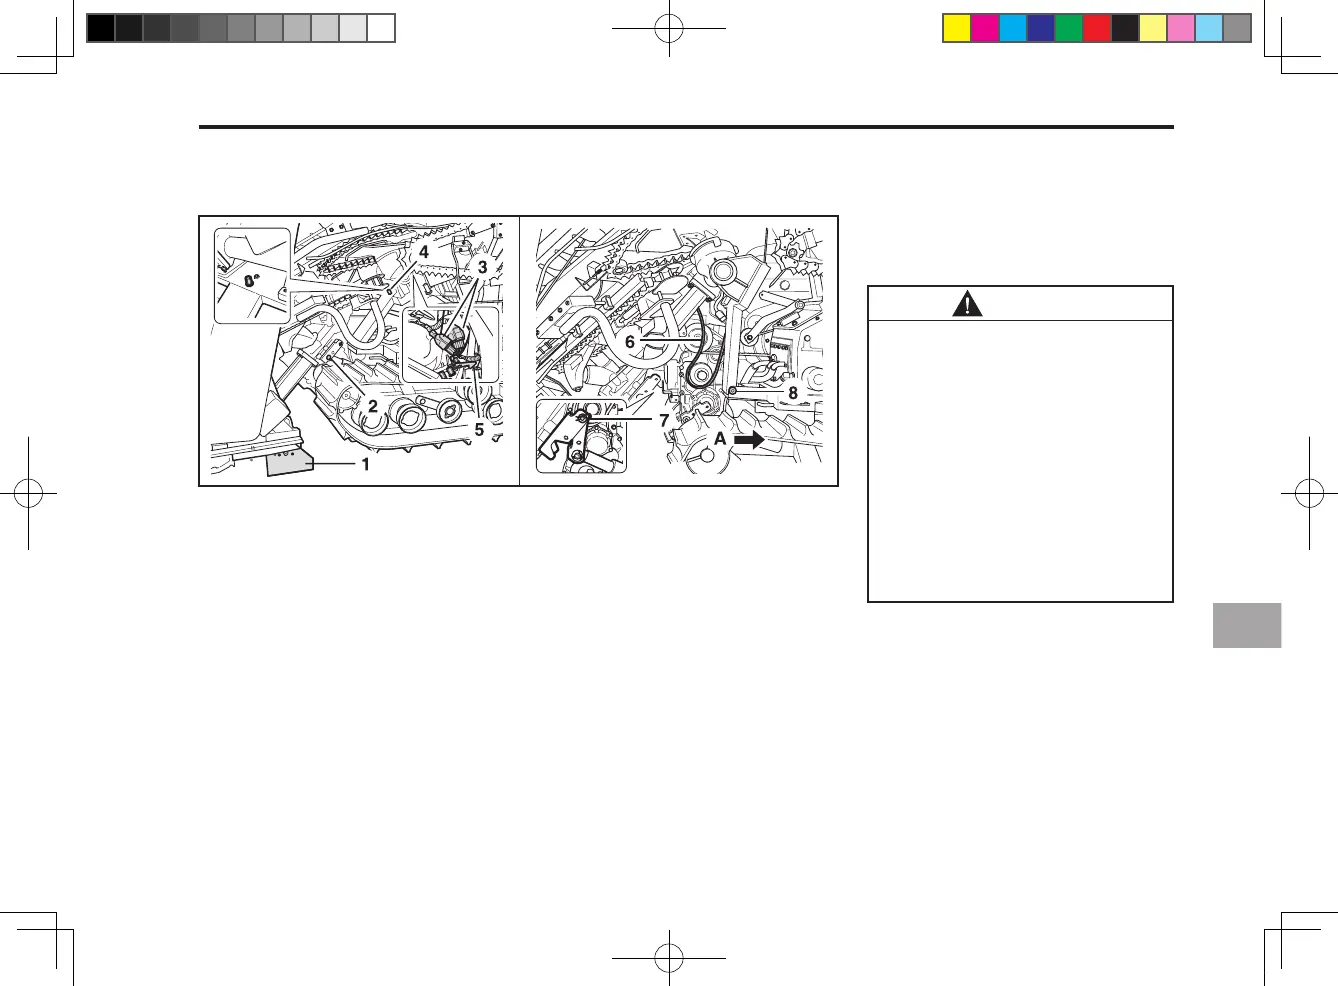
(1) Reaping Unit Stand
(2) Reaping Unit Holding Pin
(3) Reaping Unit Wire Connectors
(4) Reaping Unit Holding Bolts (4 pcs)
(A) Backward
(5) Holding Hook
(6) Reaping Unit Drive Belt
(7) Reaping Unit Locking Pin
(8) Connecting Head Pin
REMOUING AND INSTALLING EACH UNIT
REAPING UNIT
REMOVING THE REAPING UNIT
1.Stopthecombineonaatcon-
crete surface.
2. Start the engine and slightly
raise up the reaping unit and set
up the reaping unit stand (1).
3. Lower the unit and shut off the
engine.
4. Remove the two reaping unit
holding pins.
5. Disconnect the unit wire con-
nectors.
6. Remove the four reaping unit
holding bolts and disengage the
holding hook.
7. Start the engine and slowly back
up a little bit.
8. Remove the reaping unit drive
belt and locking pin.
9. Remove the connecting head
pin and back up.
1. When moving the combine,
maintain the engine’s speed
2,000 rpm or higher. The
auxiliary shift lever should
b e e n g a g e d i n t o L O W
SPEED while the main shift
lever should be pushed into
its slowest speed.
2. Perform these processes
as concrete) surface.
CAUTION
1. Install in the reverse order of re-
moval.
INSTALLING THE REAPING UNIT