6
-3
3-POINT HITCH IMPLEMENT OPERATION
6
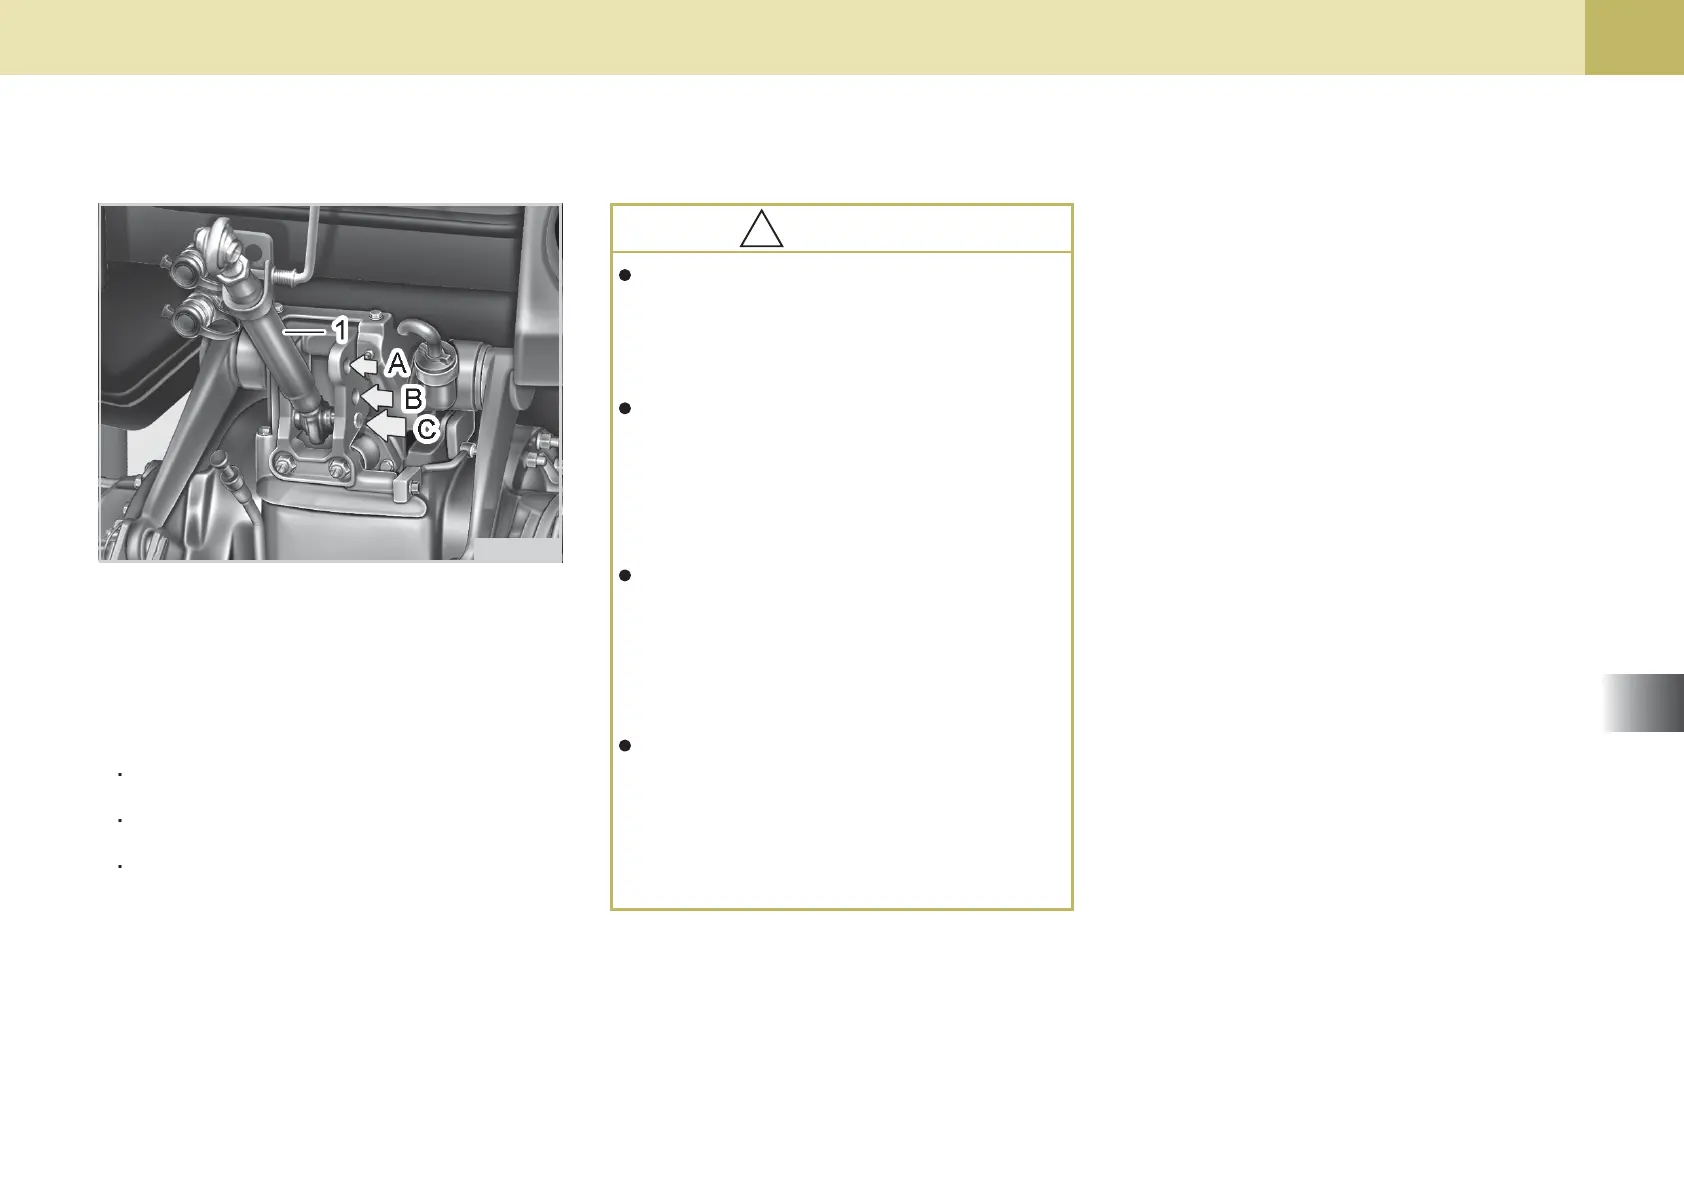
A plate describing how to attach
the implement is placed on the
standard implement of our
company.
When you are attaching an
implement (like rotary) not re-
quiring any traction, mount the
assembling spot of the top link
into the hole A.
When you are attaching an
implement (like plow) requiring
some traction, mount the as-
sembling spot of the top link
into the hole B,C.
When driving with an implement
attched, make sure to install the
top link to the hole A or B or put
the draft control to the “Deep”
position.
!!
!!
!
CAUTION
PRECAUTION FOR INSTALLING
3-POINT HITCH IMPLEMENT
H11O525A
When attaching an implement, con-
nect it according to its draft as follow:
A : Traction power is not required
B : Heavy load traction work
C : Normal load traction work
1. Adjust an angle of the implements
to the desired position by shorten-
ing or lengthening the top link.
2. Adjusting a proper length of imple-
ments varies as a type of imple-
ments used.
(1) Top Link