SR200 & SR300 Card Printers and LM200 & LM300 Laminators User’s Guide 93
Adjusting the Patch Position
Thepositionofthepatchonthecardcanvaryslightlyforeachlotoflaminatorsupplymaterial.
Youcanchangetheleft‐to‐rightpositionorthetop‐to‐bottomposition,ifneeded.
ThecurrentpatchpositioncanbeviewedontheLaminatortaboftheStatusMonitor.Referto
“LaminatorTab”onpage 47.
Changing the Front-to-Back Position
Turningthesupplysprocketofthelaminatefilmcartridgeenablesyoutoadjustthepatch
positiontothefrontorbackby1.0mm.
Usethefollowingstepstochangethefront‐to‐backpatchposition:
1. Poweroffthelaminatorandallowittocool.
2. Openthelaminatordoorandremove
thelaminatorcartridge.
3. Removethesupplyfilmfromthecartridge.
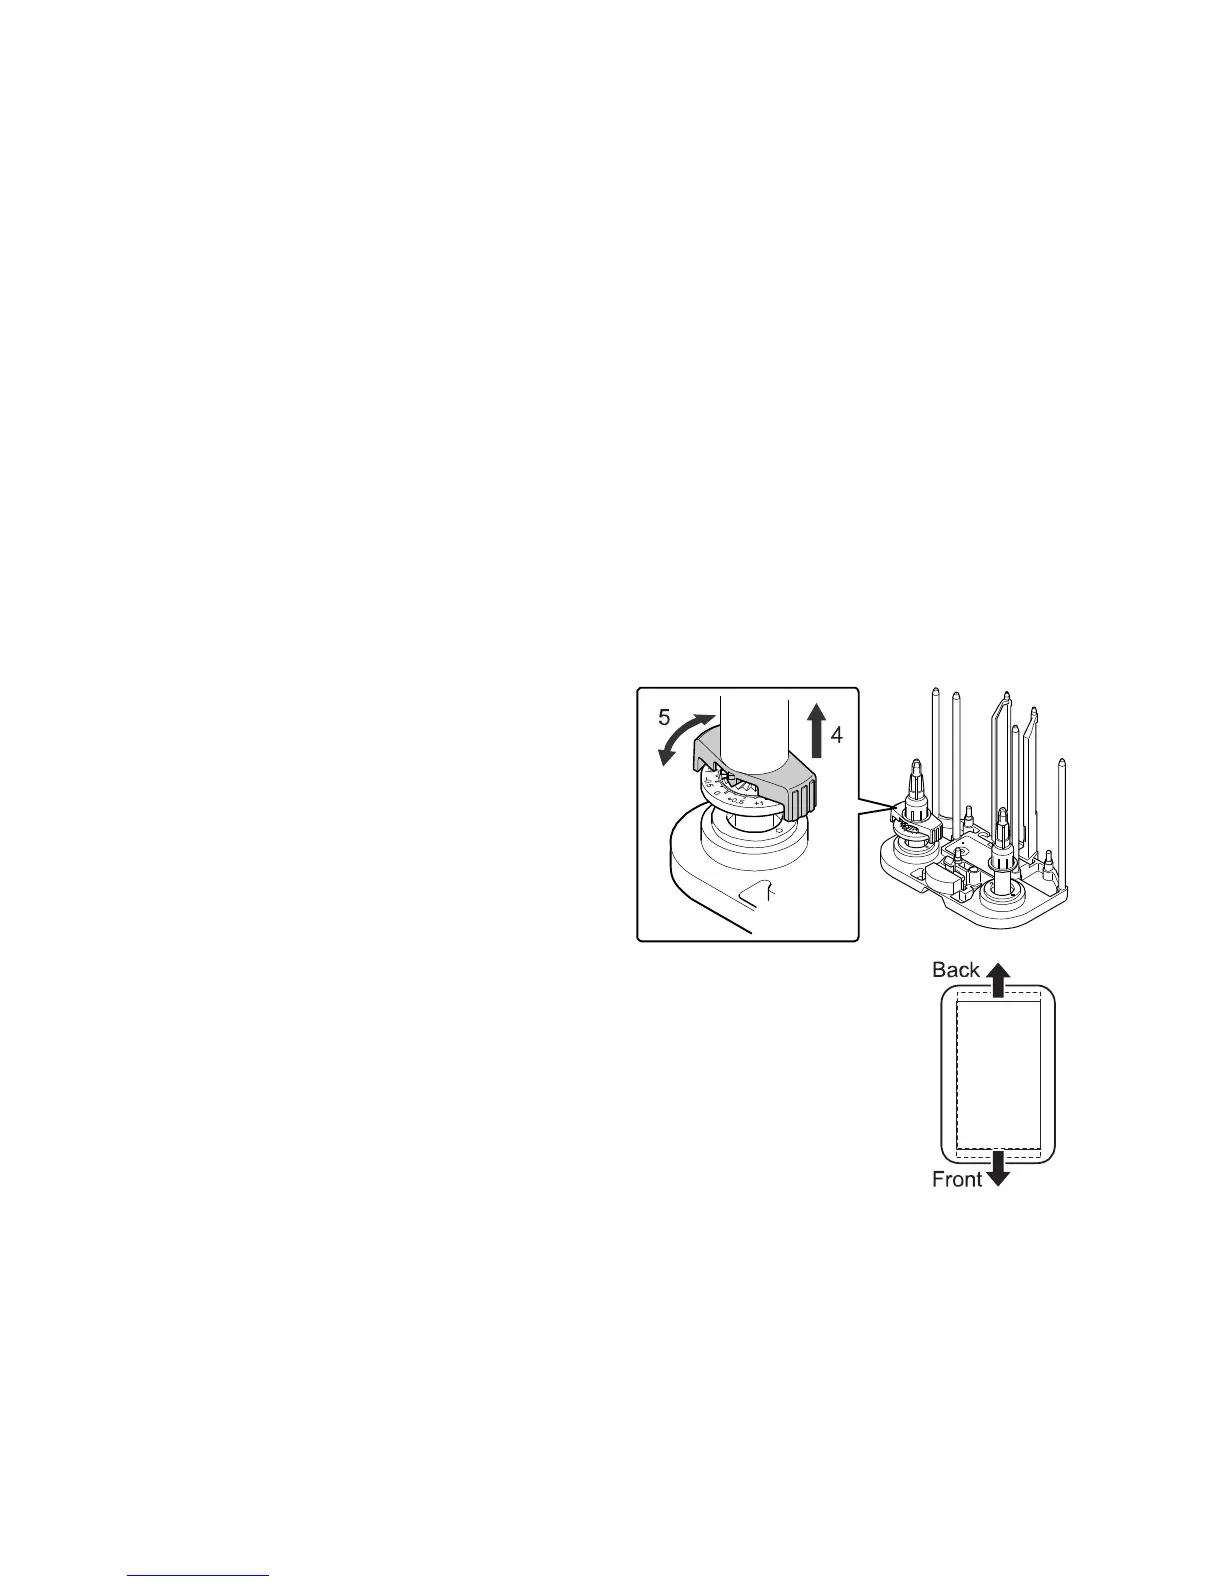
4. Pullthesprocketup(4).
5. Turnthesprocketknobtomovethe
patch(5):
Turntheknobcounterclockwise(+)
tomovethepatchpositiontotheback.
Turntheknobclockwise(‐)tomovethepatchpositiontothefront.
6. Releasethesprocket.
7. Loadthesupplyfilmontothecartridge.
8. Insertthecartridge,closethedoor,andpoweronthelaminator.The
laminatorinitializesthesupplymaterialautomatically.
9. Laminateacardtoverifythenewpatchposition.