System Installation and Configuration
96-30051-001 Rev. D3 DDN SFA12K (SFA OS 2.3.1) Hardware Installation & Configuration Guide | 29
❖ Verify that the Power On indicator stays ON, indicating a successful power
application. If the On Battery indicator is ON, check the power input to the BBU.
❖ If the Alarm indicator is ON, do not proceed until all alarms are clear. Refer to the
BBU documentation for troubleshooting information.
❖ Continue from step 7
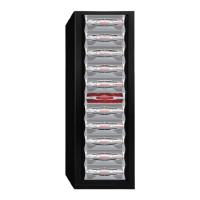
6. On both BBUs (Model 1550) (Figure 24):
❖ Press and hold the Power button on the front panel for 1 second to turn on the unit.
The buzzer beeps once and all the LEDs go ON momentarily.
❖ Verify that the Power LED and Load Protected LED stay ON, indicating a successful
power application. If the Degraded Operation LED is ON, check the power input to
the BBU.
❖ Verify that both Load Segment 1 and Load Segment 2 LEDs turn ON after 13 seconds
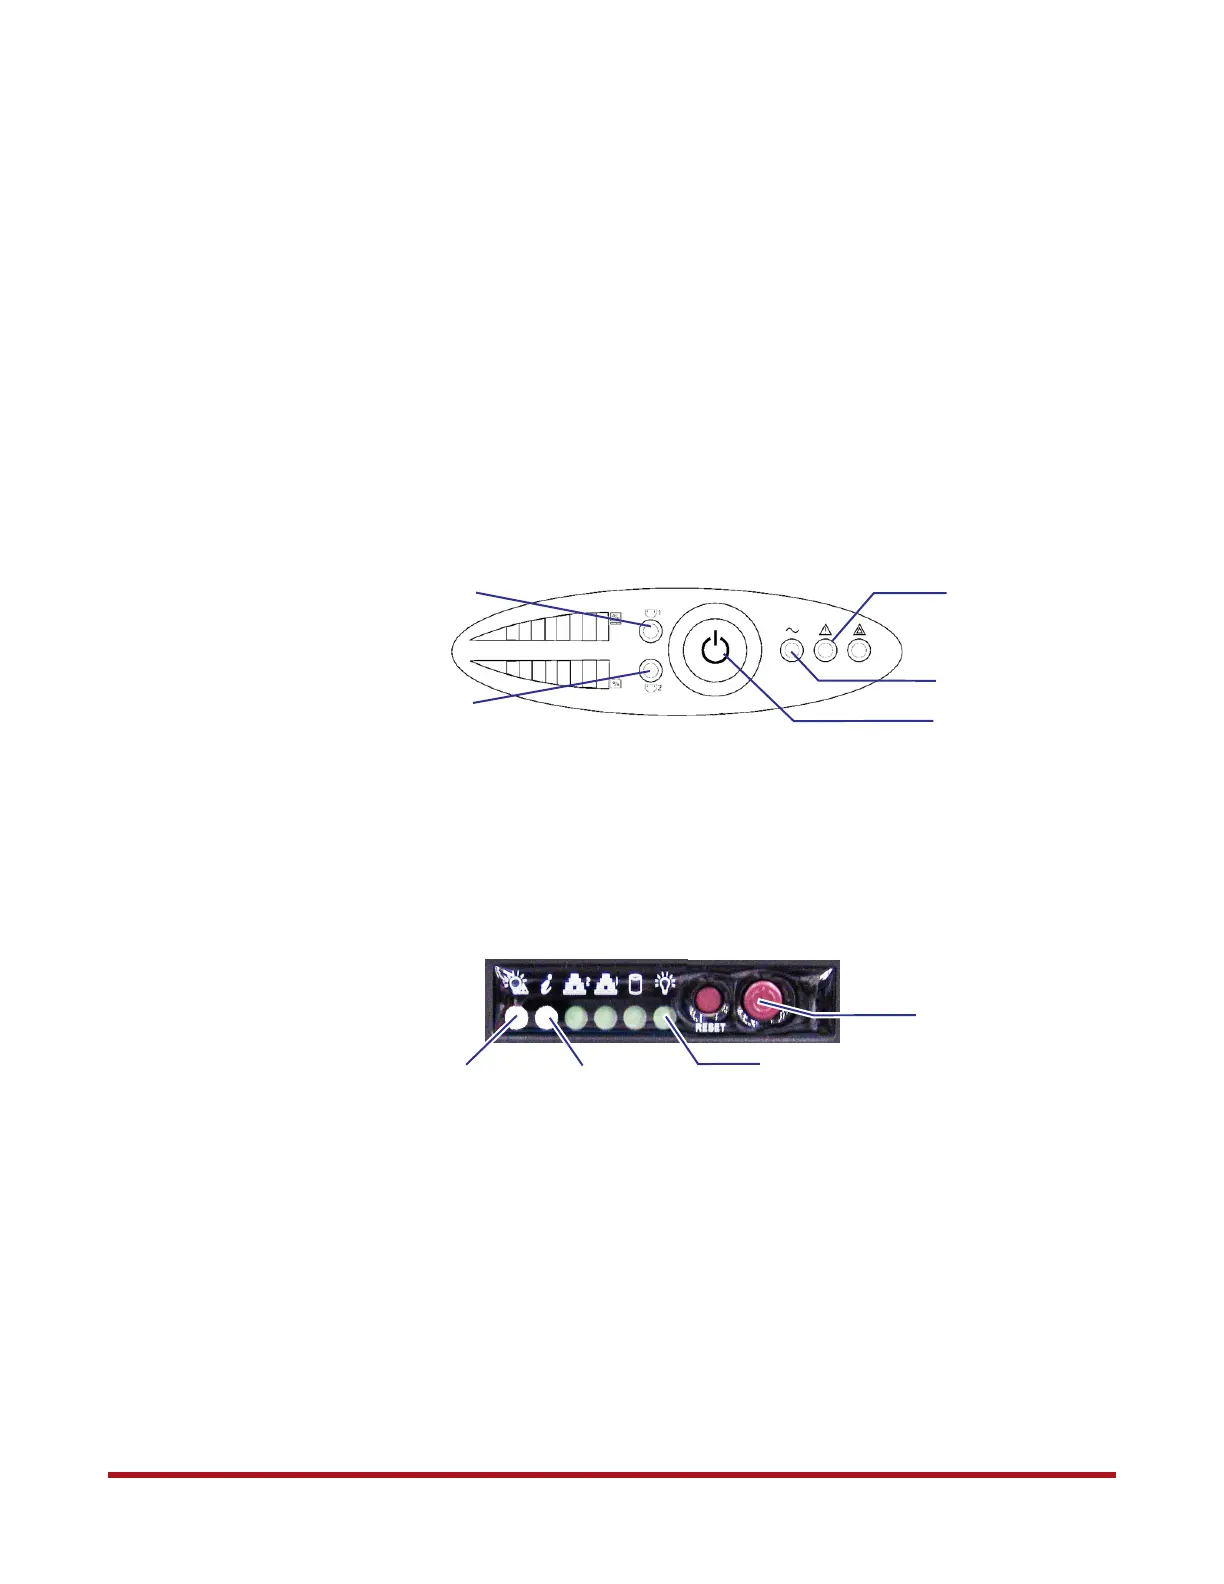
7. Turn on both controllers:
❖ Remove the controller front bezel
❖ Press the power button once (Figure 25)
❖ Reinstall the front bezel
8. On both controllers (Figure 25):
❖ Verify that the Power indicator is green
❖ The PSU Fault LED turns on during power up. Verify that it turns off after
13 seconds. If not, check the controller’s power supplies at the back.
❖ Verify that the Enclosure Info LED is off. If not, check the fan or power condition
according to the LED color:
• Solid amber: overheat
• Blink amber (1 Hz): fan fail
• Blink amber (0.25 Hz): power fail (PSU missing or AC missing)
• Blink blue: locate enclosure command received
Figure 24. BBU Front Panel
Power Button/LED
Load Protected LED
Degraded
Operation LED
Load Segment 1
Load Segment 2
Figure 25. Controller Power Button and LEDs
Power Button
Power Indicator (Green)
PSU Fault LED (Off)
Enclosure Info (Off)