Passport 2®/Passport 2 LT™ Service Manual 0070-10-0441 3 - 9
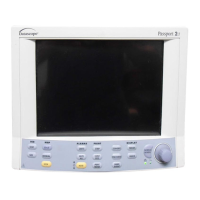
Repair Information Disassembly Instructions
2. Remove the 2 screws that secure the Inverter bracket assembly.
3. Remove the 2 screws that secure the right mounting rail.
4. Remove the screw that secures the choke mounting bracket.
5. Remove the screw that secures the left mounting rail.
6. Remove the screw that secures the lower mounting bracket.
7. Lift the Passive display up and out and remove.
E. Removal of the Main CPU board (Main Frame).
1. Remove the front housing assembly as stated in Paragraph A.
2. Remove the NIBP Pump assembly and bracket as stated in Paragraph F.
3. Remove the 8 screws that secures the metal shield to the back housing.
4. Remove the Power Supply assembly from the rear of the unit as stated in Paragraph M.
Once the Power Supply is removed carefully lift the Main CPU assembly up (about one
inch).
5. Disconnect the Recorder cable from J8.
6. Disconnect the connector J13 (power switch).
7. Disconnect the CO
2
connector from J 23 (CO
2
module)
8. Disconnect the SpO
2
connector from the SpO
2
board assembly (Masimo
®
or
Nellcor
®
).
9. Disconnect the connector J203. (Panel board).
10.Carefully lift the CPU board assembly from the back housing.
11.Carefully angle and lift the CPU board assembly from the back housing.
12.Disconnect the connector from J202 and remove the SpO
2
assembly.
13.Remove the ten screws that secure the CPU board to the metal frame.
F. Removal of the NIBP Pump.
1. Remove the Front housing assembly as stated in Paragraph A.
2. Disconnect the tubing from the inline pump filter.
3. Disconnect the connector from J8.
4. Remove Pump assembly from holding bracket.
G. Removal of the NIBP Module
1. Remove the Front housing assembly as stated in Paragraph A.
2. Remove the NIBP Pump as stated Paragraph F.
3. Disconnect the cable from J1.
4. Unfasten the NIBP fitting on the side of the back housing with a 1/4 inch nut driver
5. Slide the NIBP module from the rear of the unit carefully and remove.
H. Removal of the Masimo SpO
2
Module
1. Remove the Front Housing assembly as stated Paragraph A.
2. Remove the Main frame assembly as stated Paragraph E.
3. Remove the three screws that secure the Masimo SpO
2
module to the standoffs.
4. Remove the Cable assembly from J3 of the SpO
2
Module.
5. Lift the Masimo SpO
2
Module up and remove.
I. Removal of the CO
2
Module
1. Remove the front housing assembly as stated Paragraph A.