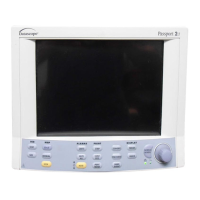
Disassembly Instructions Repair Information
3 - 10 0070-10-0441 Passport 2®/Passport 2 LT™ Service Manual
2. Remove the Main frame assembly as stated Paragraph E.
3. Remove the Patient Connector Panel as stated in Paragraph J.
4. Remove the two screws that secure the CO
2
module to the back housing assembly.
5. Slide the CO
2
Module to the left and lift the Module up and out of the back housing.
J. Removal of the Patient Connector Panel
1. Remove the two screws that secure the Patient Connector Panel housing the back
housing.
2. Slide the Patient Connector housing toward the back.
3. Swing the housing open and remove the CO
2
exhaust tubing, connector and input
connector retainer clip. (optional).
4. Disconnect the Ribbon cable assembly from the module.
5. Remove the two screws that secure the SpO
2
connector to the Panel assembly.
K. Removal of the Recorder Assembly
1. Open the recorder door and locate the captive screws in the rear of the recorder.
2. Slide the recorder from the opening and remove.
L. Removal of Recorder Interface Board
1. Remove the Front Housing as stated in Paragraph A
2. Remove the Main frame as stated in Paragraph E.
3. Remove the recorder assembly as stated in Paragraph K.
4. Remove the Cable assembly from J3.
5. Remove the three screws and pull the board from the unit.
M. Removal of the Power Supply
1. Insert a narrow flat blade into each of the four slots and release each tab.
2. Ensure not to damage each tab. Remove the plastic cover.
3. Remove the four screws from the corners of the metal housing.
4. For units with Li-ion batteries only, a control cable is connected to the power
supply as shown in Figure 5-5 on page 5 - 13. The power supply cannot be
completely removed without first disconnecting this cable. Slide the power supply out
of the rear of the monitor until the control cable connector is exposed. Disconnect the
control cable.
5. Slide the power supply out of the rear of the monitor and remove.
N. Removal of the Battery Holder Assembly
1. Be sure the batteries are removed from the battery holder assembly.
2. Remove front housing assembly as stated in Paragraph A
3. Remove the main frame assembly as stated in Paragraph E.
4. Remove the five screws that secure the housing to the back housing. Be sure not to
bend the ground plate.
5. Lift and remove the battery holder assembly.