4: Radio Programming
4-8 PRC1099A-MSOP
Standard Scan Menu
The SCAN menu allows you to enable the scan feature, select the desired scan
group, create or edit a scan group and enable the voice detect feature.
Accessing
the Menu
1. Toggle the DIGIT knob until the SCAN icon flashes.
2. Toggle the TUNE knob to access the scan menu. The first selection in the
menu is SCAN SEL.
3. Toggle and hold the TUNE knob to scroll through the other menu selec-
tions. With your selection displayed, press WHIP TUNE to access it.
4. Follow the Menu Structure and Menu Selections below to assist in
programming the radio.
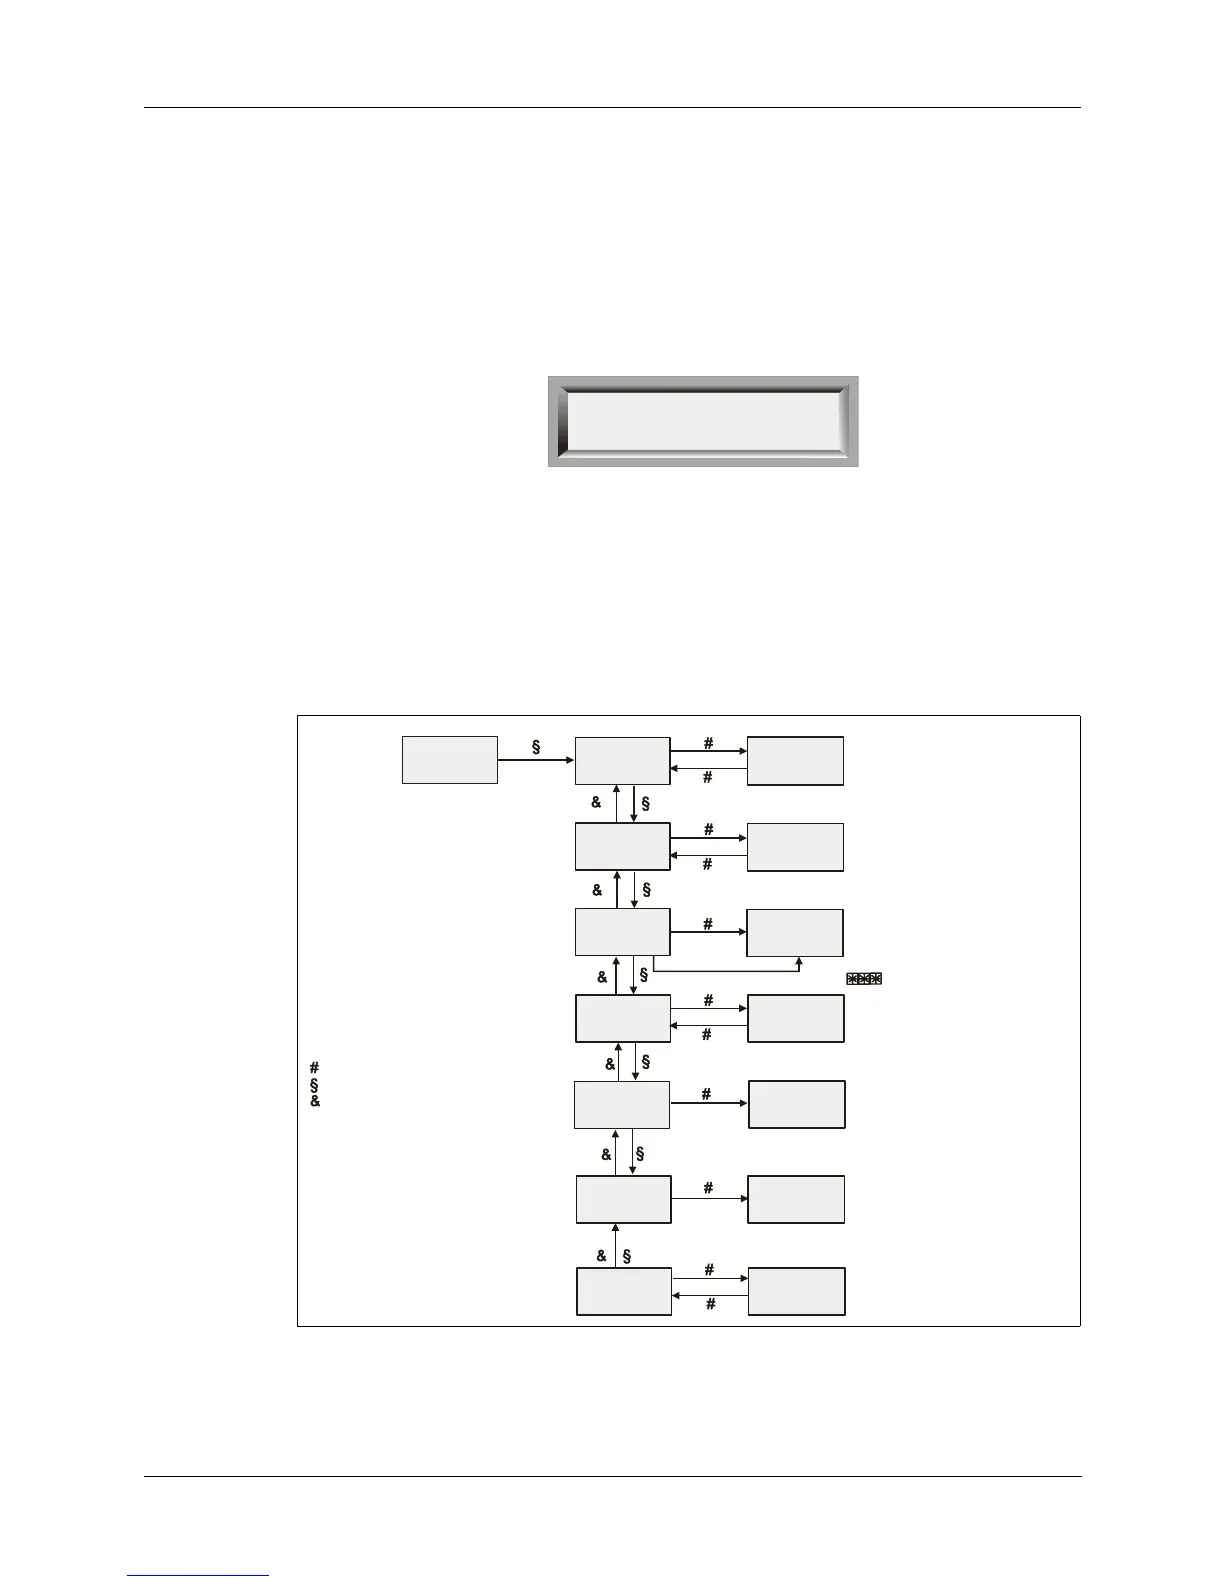
Menu
Structure
The diagram below shows the structure of the SCAN menu and the legend
indicates how to work within the selections and their settings.
SCAN
SEL
OPT
SCAN
CALL
DATA
MSG ALE
Select to end
XXX = On or off
Change with Tune knob
Save with Whip Tune button
SCAN
SCAN SEL
SCAN: XXX
SG: XX
SG: *XX
SR : XX.X SC
SH : XXX SC
VDET : XXX
VH : XXX SC
SG: NUM
MOD SG
SCAN RAT
SCAN HLD
VDET SEL
VDET HLD
XX = 0 to 29
Change with Tune knob
Save with Whip Tune button
XX.X = 00.5 to 64.9
Change with Tune knob
Save with Whip Tune button
XXX = 001 to 998
Change with Tune knob
Save with Whip Tune button
XXX = On or off
Change with Tune knob
Save with Whip Tune button
XXX = 001 to 998
Change with Tune knob
Save with Whi
Tune button
* Indicates selected
XX = channel number (00 to 99
Change with Tune knob
- Legend -
Indicates Whip tune button pressed
Indicates Tune knob moved up
Indicates Tune knob moved down
To exit any menu, use Digit knob